A store's settings
On this page
Every store has a cog on its tab. That opens its settings: where its games install, how they download, what they run with, and a good deal more.
This is the screen people get most lost in, so it’s worth understanding how it’s put together before changing anything. Most of it you will never need.
Start here: the visibility dropdown
At the top of the screen is a dropdown with four levels. It decides how much of the screen you can see, and it’s the single most useful thing on the page.
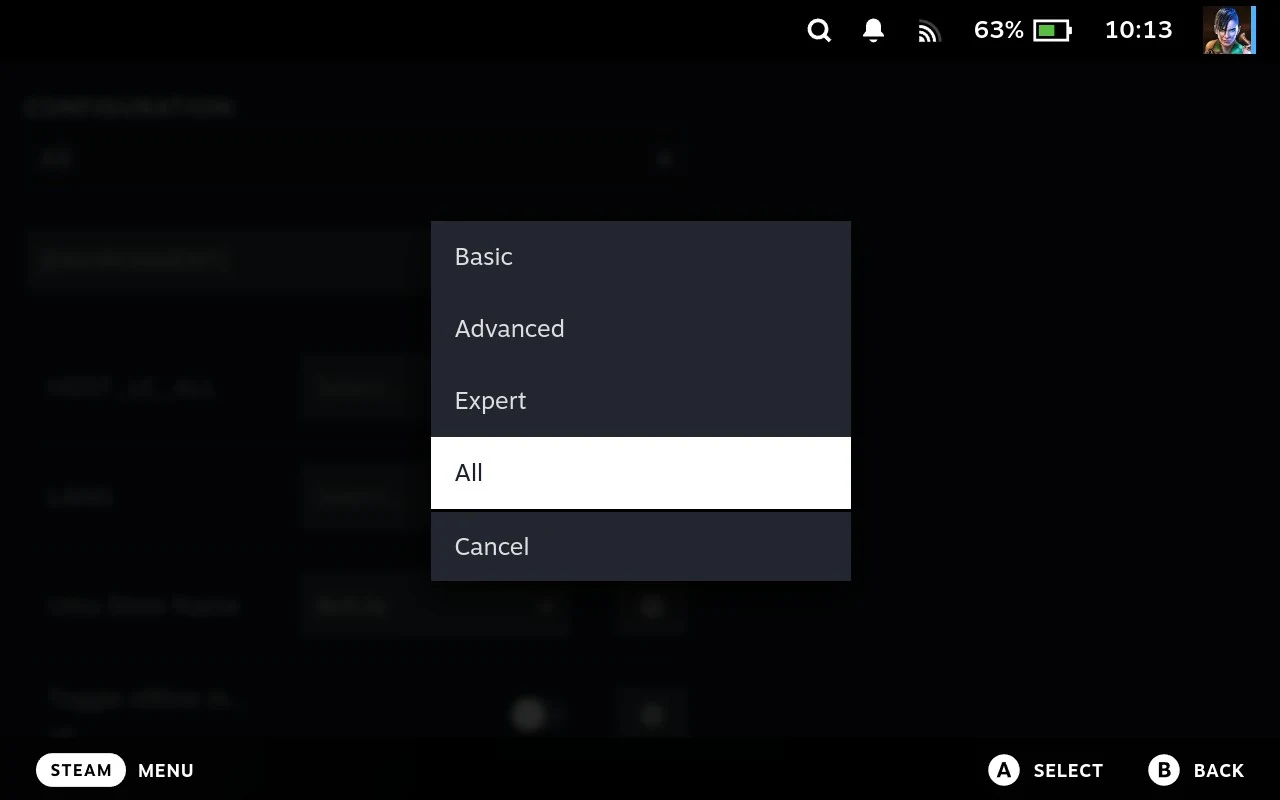
| Level | Shows |
|---|---|
| Basic | The handful of settings most people might change |
| Advanced | Adds things you’d change for a reason |
| Expert | Adds things that need you to know what they do |
| All | Everything, including settings that are rarely touched |
It starts on Basic, and that’s deliberate. The full list is long, much of it applies only to particular kinds of store, and showing all of it by default would bury the parts that matter.
If a setting described somewhere isn’t on your screen, raise the level. That’s almost always the reason, and it’s the first thing to check before assuming your store doesn’t support something.
Raising the level doesn’t change anything by itself. It only changes what you can see.
Why some of it looks odd
Two things surprise people, and neither is a fault.
Every store gets the same skeleton. Settings are generated from a shared template, so a store that downloads over the network and a store that reads a folder of ROMs both start with the same sections. That means you’ll see settings that don’t apply to the store you’re looking at, an rsync section on a store that never uses rsync, for instance. Ignore them. They’re inert.
Some settings are set by the extension and not meant for you. An extension fills in what it needs when it’s generated, and those values are usually right. Changing them without a reason is the most common way to break a working store.
The rule of thumb: if you don’t know what a setting does and nothing has told you to change it, leave it alone. Nothing here needs tuning to work.
Where games go
The two install settings work together, and this catches people out. Install Location picks the drive, and Install Directory is a folder inside it. The two are joined to make the final path:
Install Location   ~                (your home folder, on the SSD)
Install Directory  Games/Epic
Games end up in    ~/Games/Epic
Choosing Other for the location lets you name a different starting point, and the directory is still added on the end of it.
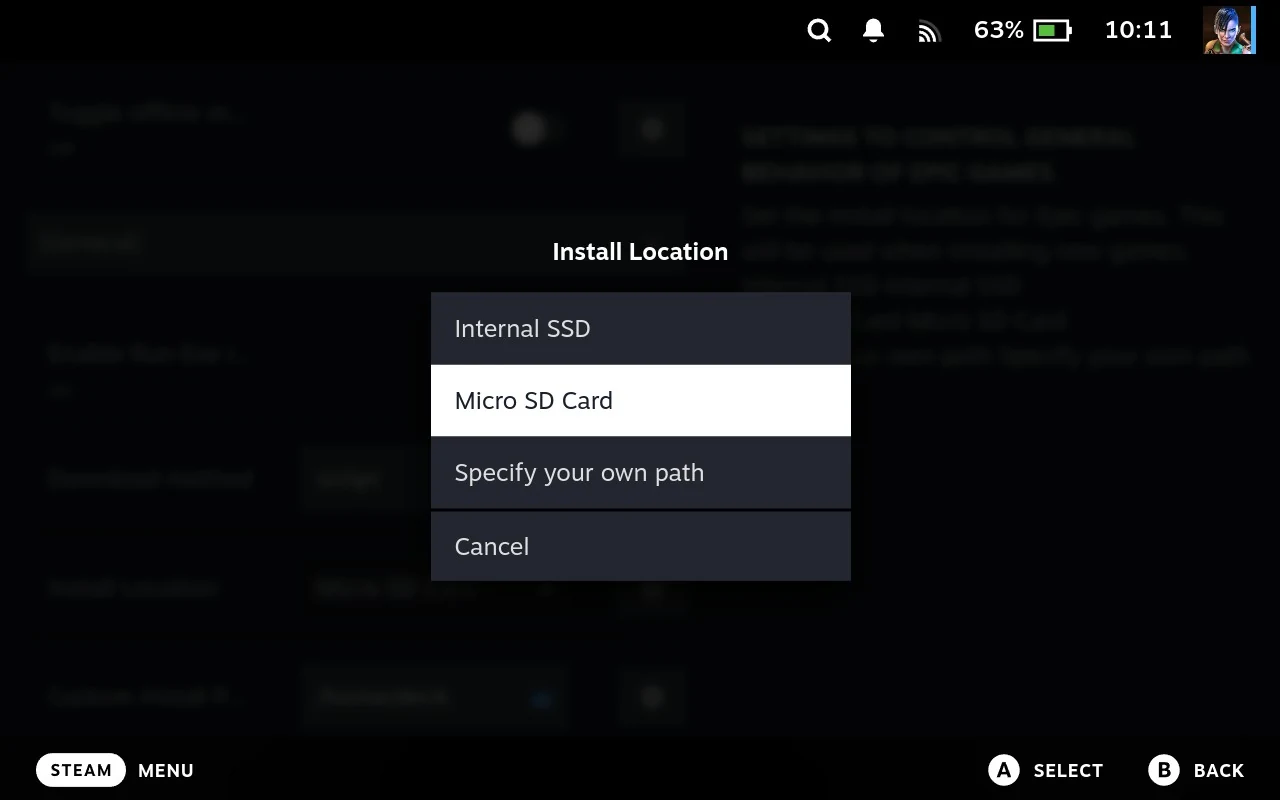
Install Directory is not a full path, so putting an absolute one there won’t send games where you expect, it just gets appended to the drive you picked anyway. If you want games somewhere unusual, set the location to Other and give the path there.
Choosing a folder for “Other”
Custom Location is where that path goes. The field is always on the screen, but it’s only used when Install Location is set to Other, otherwise it sits there being ignored, which is worth knowing before you wonder why setting it changed nothing.
You don’t have to type the path.
Press A on the field and the File Manager opens as a folder picker, titled Select Directory. It starts wherever the field currently points, so if you’ve set something before you carry on from there rather than from scratch.
Browse to the folder you want and press X to choose it. In picker mode X means Accept rather than View, and the hint at the bottom of the screen says so. B backs out and leaves the field as it was.
Only folders are listed. Files are hidden entirely while you’re picking a folder, so a directory you know contains games may look empty. That’s expected; you’re choosing where things go, not what to open.
A few things carry over from ordinary browsing and are worth knowing here:
- The sidebar works, so a mounted SD card or USB drive is one press away rather than a path to remember.
- Start makes the current folder the pane’s root, which helps when you’re several levels into a drive.
- You can create a folder from the left-trigger menu if the one you want doesn’t exist yet, then pick it.
Start on the field itself resets it, the same as any other setting.
If you’d rather type the path, press Y for a text editor. Useful for somewhere the picker can’t easily reach, though the picker is less error-prone.
Point it at a folder you can write to. Somewhere under your home folder, or a drive you’ve mounted. System locations will fail at install time rather than when you set them.
Every setting
The full field-by-field list lives in Every store setting, worth consulting rather than reading.
Related
- What the tabs are and where the cog lives: Store tabs and game grids
- Where these settings come from, and how to write your own: Extensions
- The same screen described for extension authors: Settings reference