Every store setting
On this page
The complete list of what’s on a store’s cog, with the level each appears at. You don’t need to read this. It’s here for when you meet a setting and want to know what it does before touching it.
For how the screen works and what’s worth changing, see A store’s settings.
Every setting
The complete list, with the level each appears at. You don’t need to read this. It’s here for when you meet a setting and want to know what it does before touching it.
Every store shows all of these, whether it uses them or not, because they come from the same shared template. So the question to ask about an unfamiliar setting isn’t whether your store has it, but whether your store uses it. A ROMs extension means nothing to a store that downloads from a website, and it’ll still be sitting there.
A few do nothing at all. They’re carried over from earlier versions or from the Generator’s own workings, and they’re noted below where that’s the case.
The sections start collapsed, so the whole list fits on one screen. Open the one you want and the rest stay out of the way.
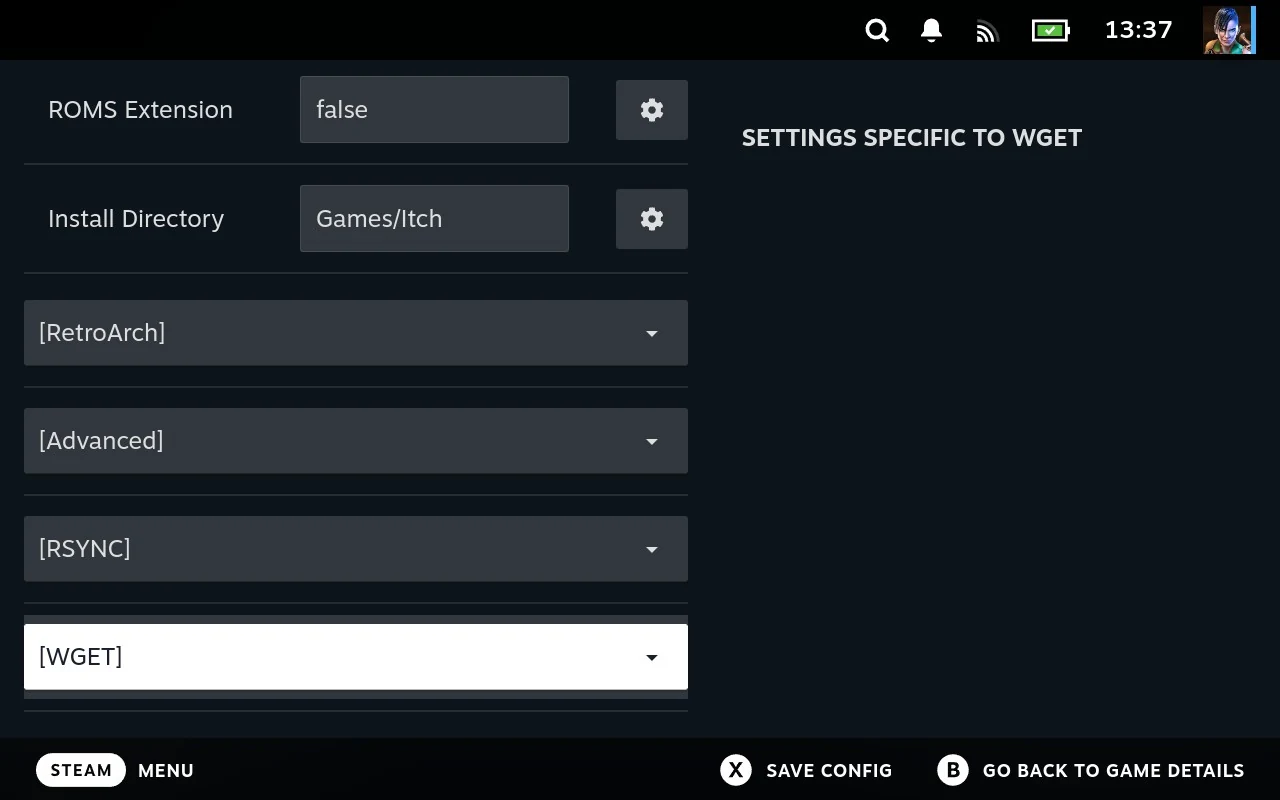
General
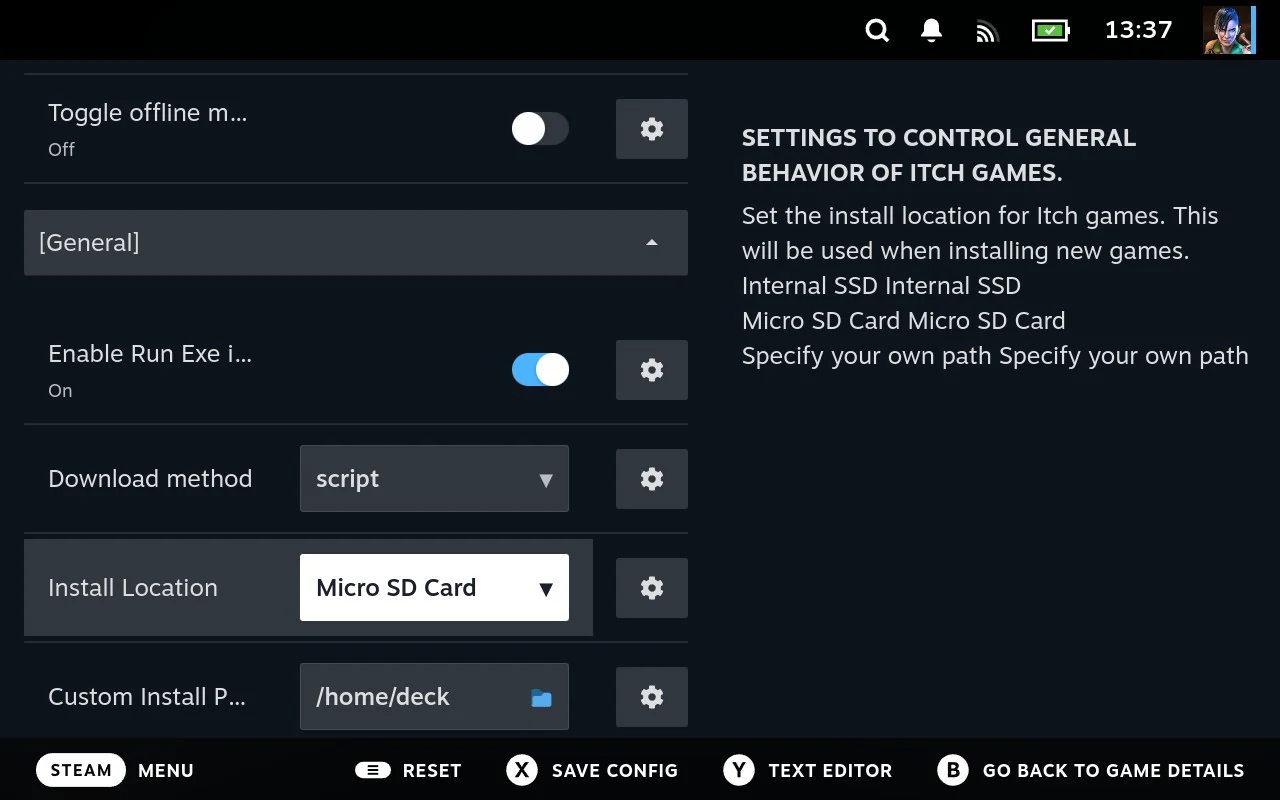
| Setting | Level | What it does |
|---|---|---|
| Install Location | Basic | Which drive games go on: the internal SSD, the MicroSD card, or Other |
| Custom Location | All | The folder to use when Location is Other. Ignored otherwise |
| Install Directory | All | The folder inside the chosen drive, such as Games/Epic. Appended to the drive, never a full path on its own |
| Download method | All | How games are fetched: script (the extension’s own), rsync (from another machine), or none |
| Enable Run Exe in Game Dir | All | Whether Run Exe appears on a game’s page, for launching other executables in its folder |
| Toggle offline mode | Basic | Asks this store’s client to work offline. See Offline mode |
| Group Name / Section name | All | Nothing, currently. Left over from how the Generator organises its own data |
Advanced
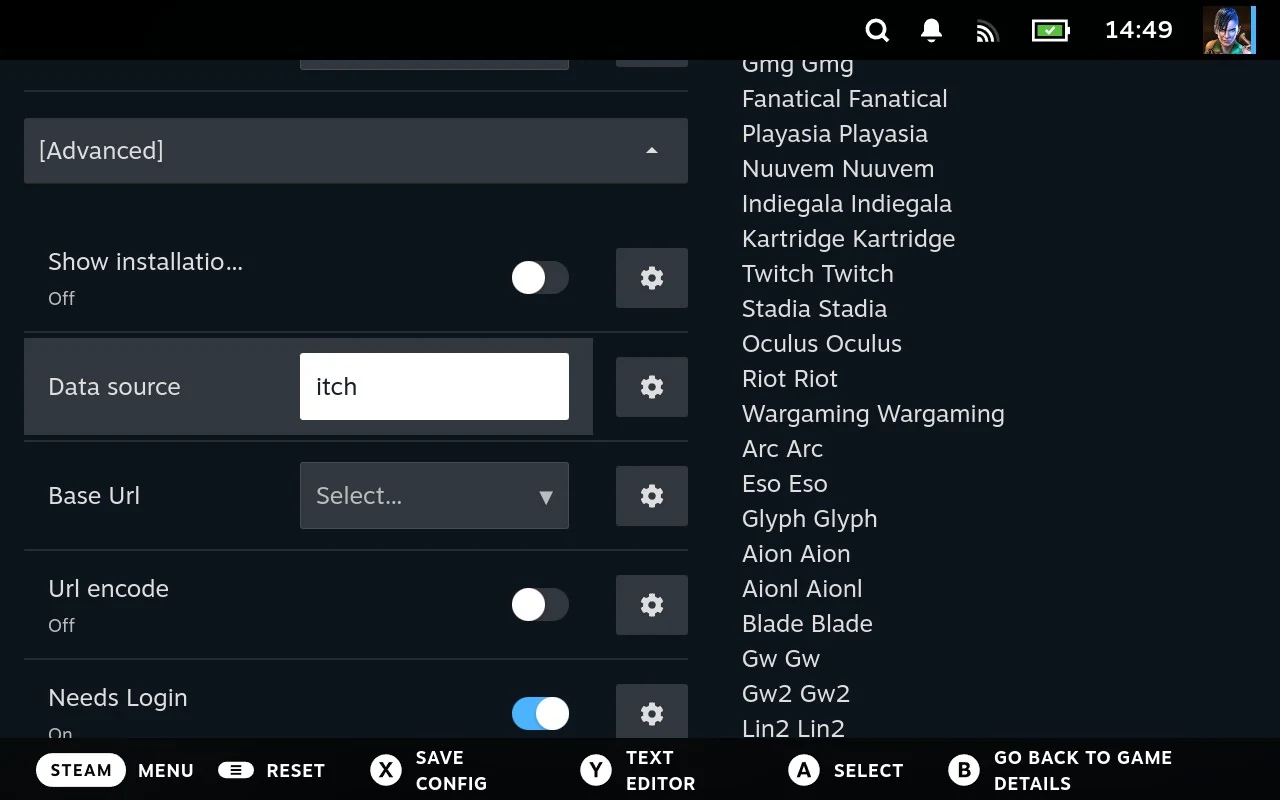
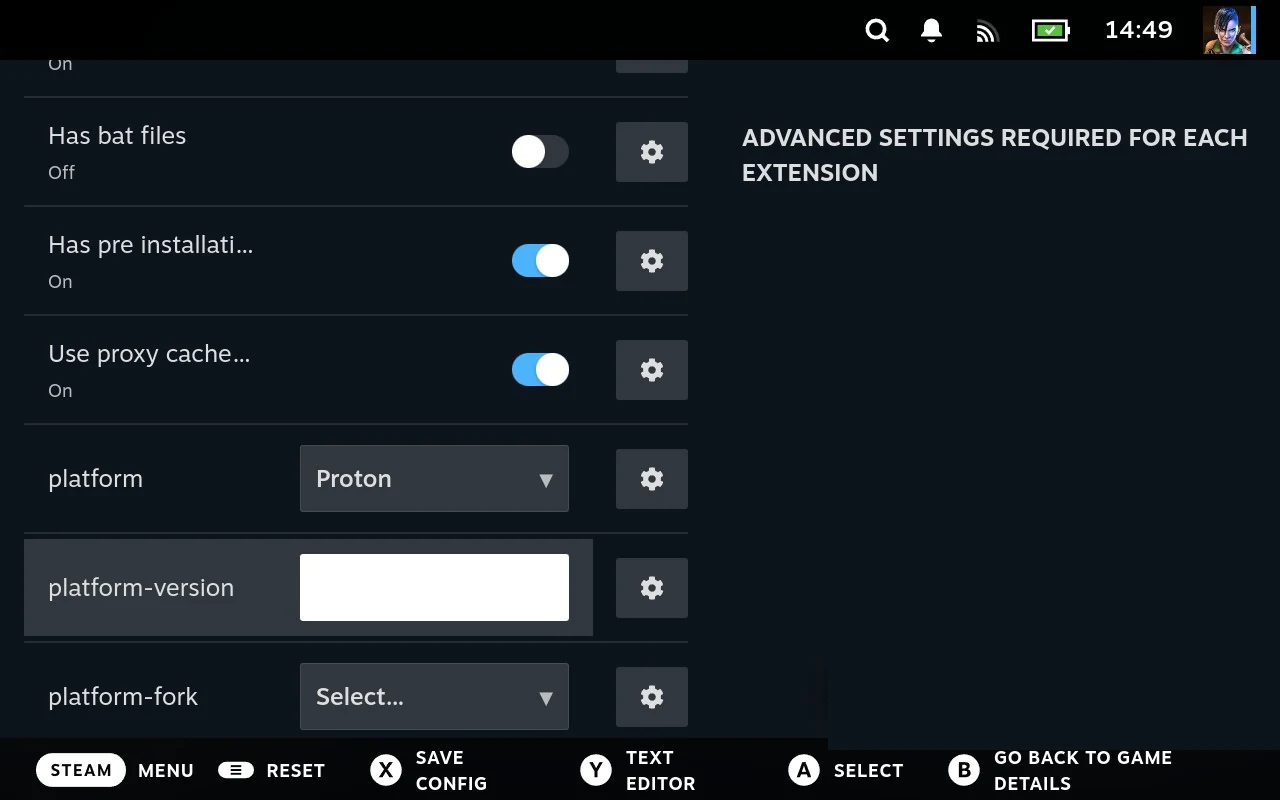
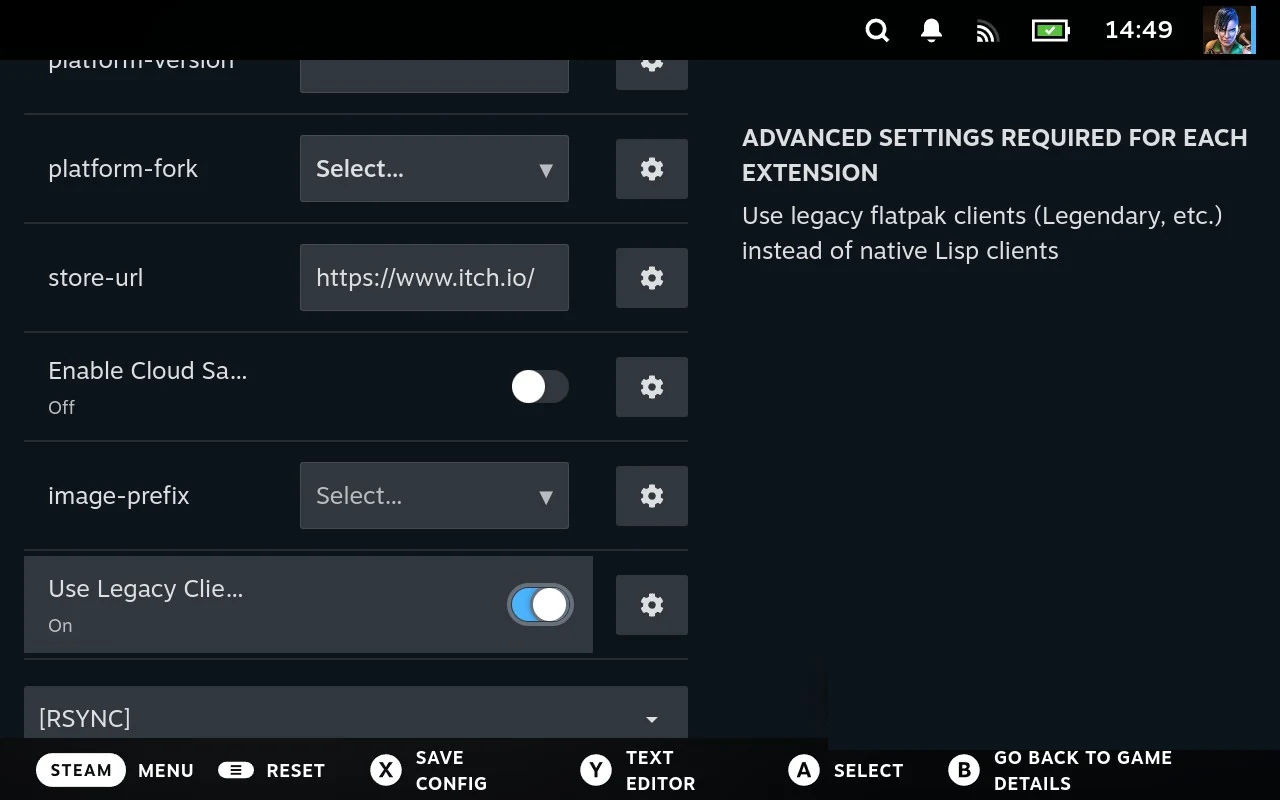
| Setting | Level | What it does |
|---|---|---|
| Show installation options | Expert | Whether you’re asked about those settings each time you install. Off on Epic and GOG, so installs start straight away. Only has an effect if the setting above is on |
| Use Legacy Clients | Expert | Uses the older flatpak clients instead of the ones Junk Store Pro supplies. See Legacy clients |
| Data source | All | Which catalogue artwork and game details come from |
| Needs Login | All | Whether this store has an account, which is what puts Login on the menu |
| Has bat files | All | Whether games can carry .bat files, for DOS and older Windows games |
| Has pre installation settings | All | Whether an Installation entry appears on each game’s own cog. See Per-game installation settings |
| Enable Cloud Saves | All | See Cloud saves before touching this |
| Base Url | All | The address artwork and other content is fetched from. Every image path is built onto the end of this |
| image-prefix | All | Text put in front of each image’s own path, for stores that keep artwork in a subfolder of the Base Url. Shows its raw name because it has no label of its own |
| Url encode | All | Whether names are escaped before going into a web address. Needed by stores whose games have spaces or punctuation in their filenames |
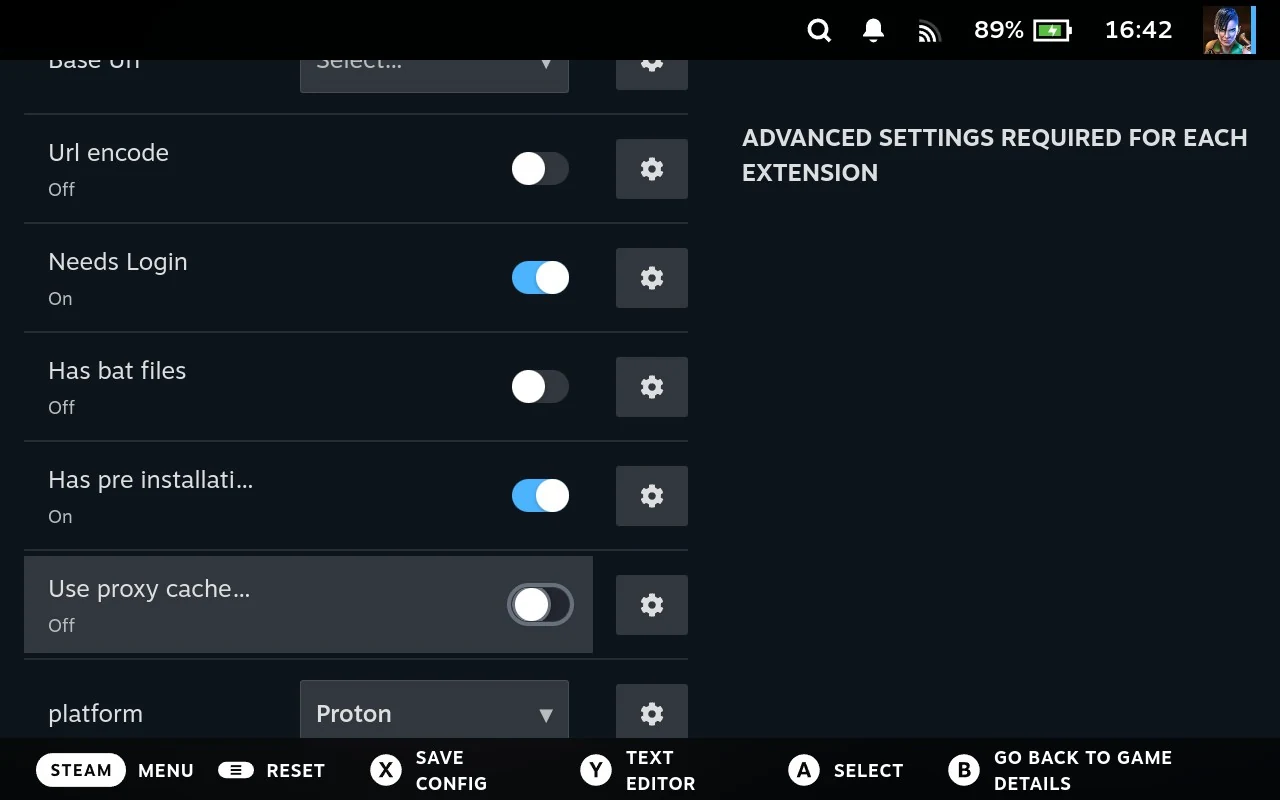
| Use proxy cache for images | All | Fetches artwork through Junk Store Pro, keeping a copy on the Deck instead of downloading it again each time. See The image cache |
| Store URL | All | The address behind the button on the store’s tab. See Visiting the store’s website |
Platform
How games from this store are launched. These are set by the extension and are usually right.
These four are grouped here for sense, not because the screen groups them. On the store’s cog they sit inside [Advanced] along with everything else there, so that’s where to look for them.
| Setting | Level | What it does |
|---|---|---|
| platform | Advanced | What runs the games: Proton, Linux, DOSBox, RetroArch, ScummVM and so on |
| platform-version | Advanced | Which version of that, where there’s a choice |
| platform-fork | Advanced | Which variant, such as DOSBox-X rather than plain DOSBox |
| Umu Store Name | All | Identifies the store to the launcher for compatibility purposes |
RSYNC
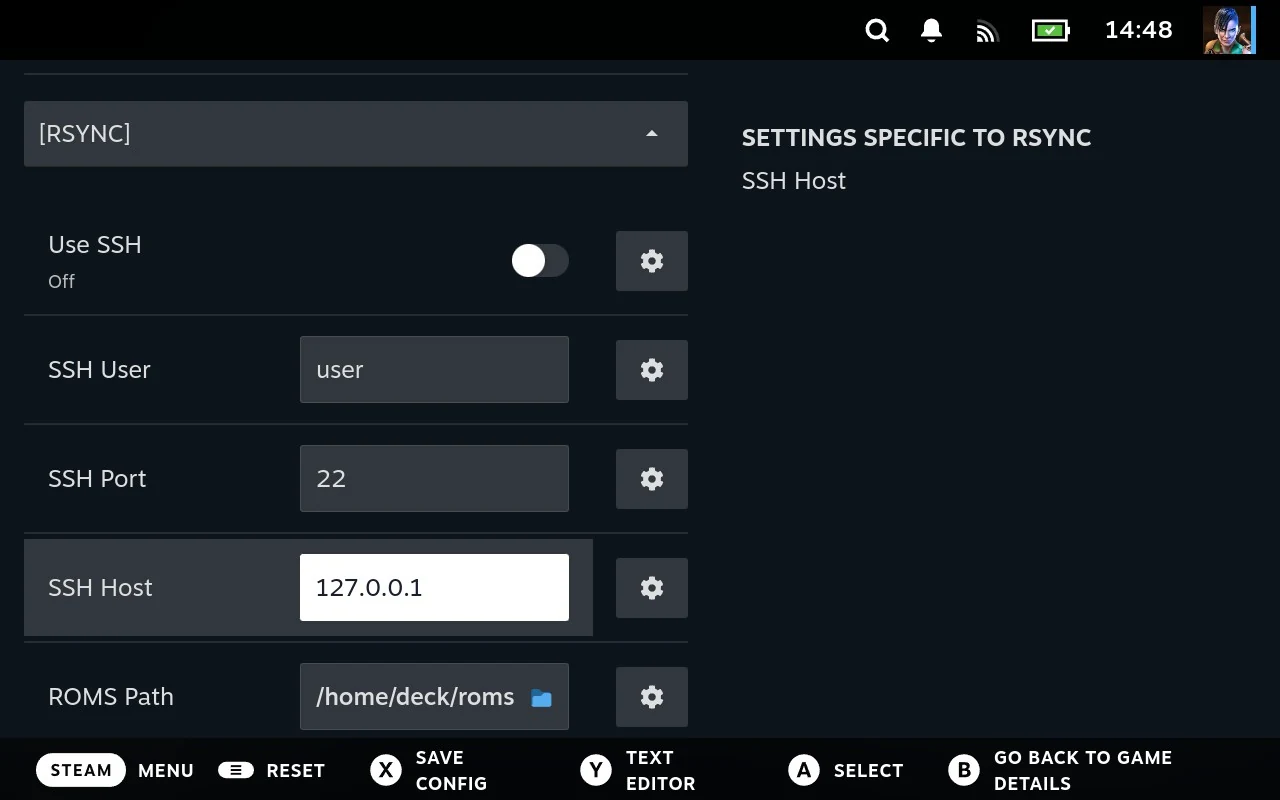
Only used when Download method is rsync.
| Setting | Level | What it does |
|---|---|---|
| Use SSH | Basic | Whether to go over SSH rather than a plain rsync connection |
| SSH User, SSH Host, SSH Port | Basic | Where to connect. Port defaults to 22 |
| ROMS Path | Basic | Where the games live on that machine |
The SSH key requirements apply here as everywhere else.
WGET
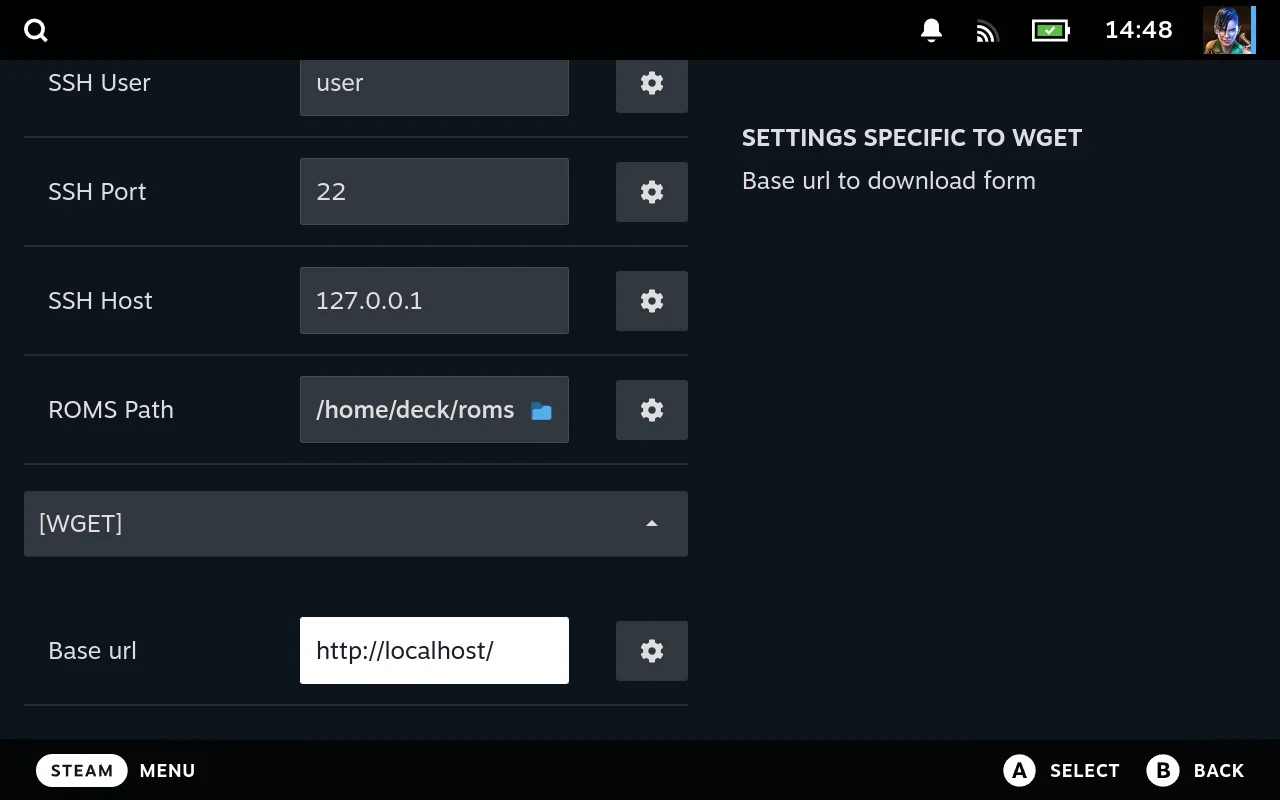
| Setting | Level | What it does |
|---|---|---|
| Base url | Basic | The web address to download from, for stores served by a plain web server |
ROMs
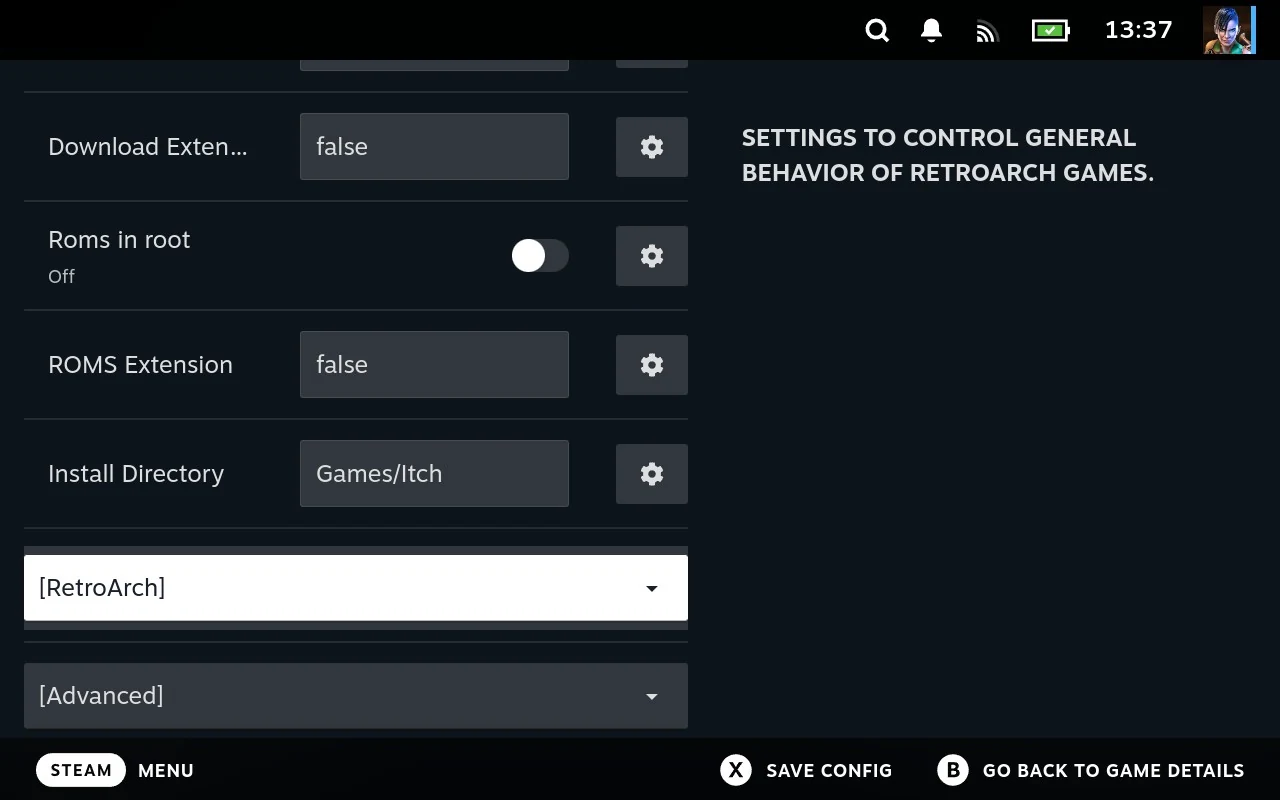
Used by stores that work from a folder of game files. Ignored by the rest.
| Setting | Level | What it does |
|---|---|---|
| ROMS Extension | All | Which file extension counts as a game, such as iso or zip |
| Download Extension | All | The extension of the file to fetch, where it differs from the above |
| Roms in root | Basic | Whether the files sit loose in the folder, rather than each in a subfolder of its own |
RetroArch
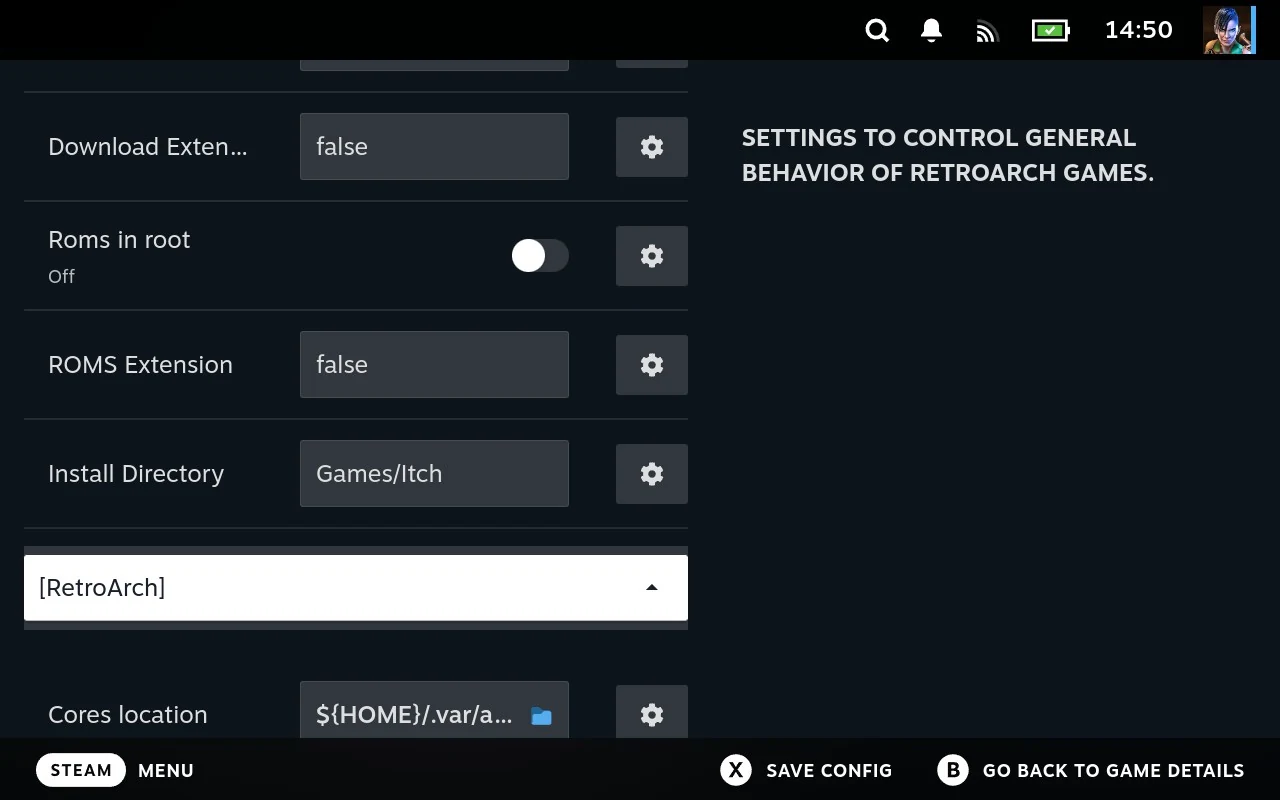
Used when the store launches games through RetroArch. Ignored otherwise.
| Setting | Level | What it does |
|---|---|---|
| RetroArch System | Basic | Which console or computer is being emulated |
| RetroArch Core | Basic | Which core runs it |
| Cores location | All | Where the cores are kept, if not the usual place |
| Base URL | All | Where thumbnails come from |
Environment
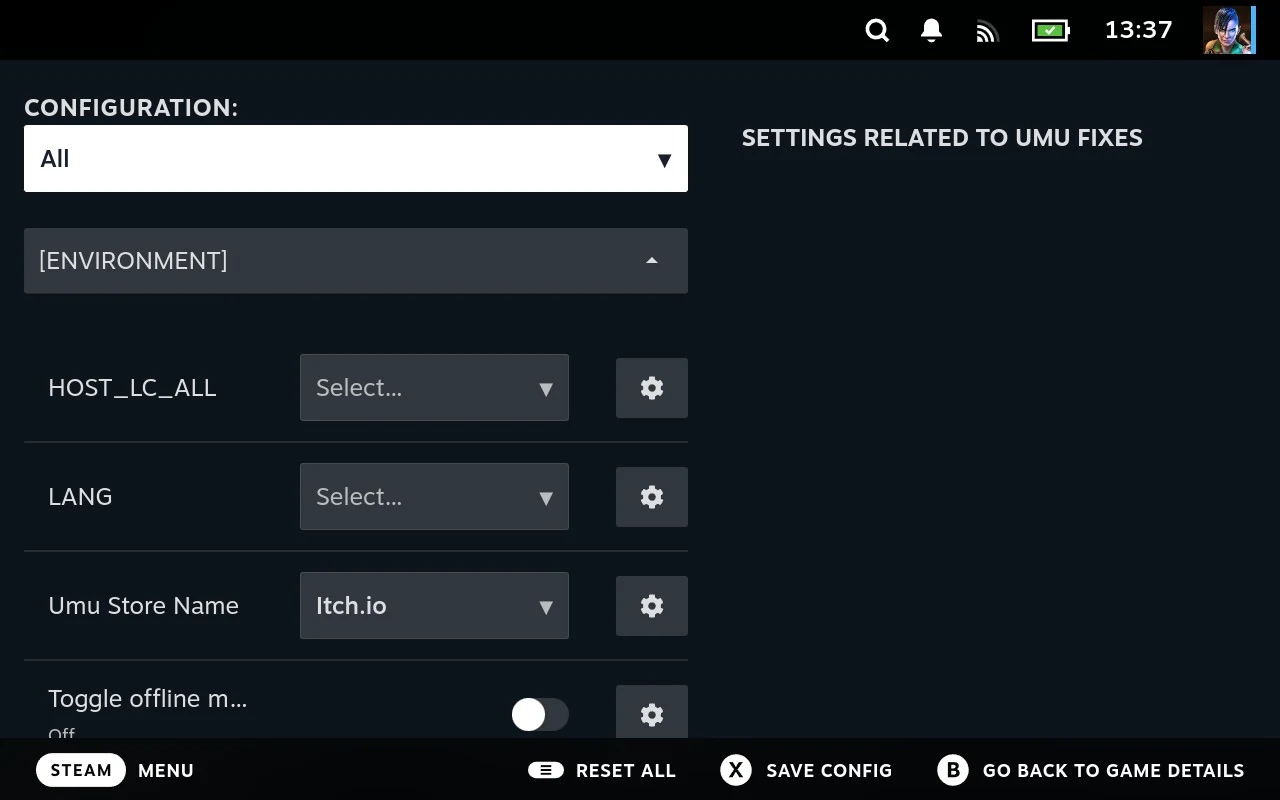
| Setting | Level | What it does |
|---|---|---|
| LANG | All | Changes what the system reports its language as, for every game in this store. Only affects games that follow the system. Not how you pick a language normally: see Setting a language |
| HOST_LC_ALL | All | The same idea, applied more forcefully: it overrides the individual locale settings rather than providing a default |
Extensions can add their own environment variables here too.
Setting a language
This isn’t how you normally choose a language. For Epic and GOG that’s an install choice, made in Installation on the game’s own cog, and it’s what to use.
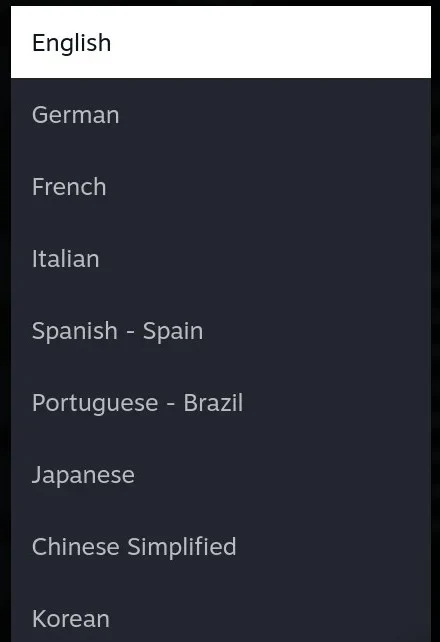
LANG and HOST_LC_ALL in the Environment section do something narrower: they change what the system reports its language as. That only matters for games with no language setting of their own, which take whatever the system says. It’s the last resort for a game stuck in the wrong language, not the first thing to try.
Changing it can break games that were working. A game handed a locale it didn’t expect can show the wrong characters, lose its fonts, lay its menus out badly, or fail to start at all. That’s not rare enough to ignore.
Set here, it applies to every game in the store, so one game’s fix becomes every game’s risk. Prefer setting it on the one game that needs it, the same two settings are on each game’s cog, in the platform’s configs, where a value affects that game alone and is easy to undo.
So the order to work in:
- Check the game’s Installation settings first. If the store offers the language you want, take it there and stop.
- If the game has no language option, try LANG on that one game, from its own cog.
- Leave the store’s setting alone unless every game in it needs the same language, which is unusual outside a library that’s entirely in one language.
- If a game breaks after you change this, empty the field first. That’s the most likely cause, and empty means “don’t interfere”, not “English”.
Empty is the right value for almost everybody. Games that follow the system get the Deck’s own language, which is normally what you want.
Offline mode
Toggle offline mode is a request, not an instruction. Turning it on sets a flag that gets handed to the store’s client when it runs, and what happens next is up to that client.
Clients that understand it work offline. They stop reaching out to the network and use what they already have.
Clients that don’t understand it carry on as normal. Nothing breaks, nothing changes. The flag is simply ignored.
So if you turn it on and the store still tries to reach the network, that’s not a fault with the setting, that client doesn’t support it yet.
This is separate from the offline mode in Settings, which is Junk Store Pro’s own and applies to everything. This one is per store.
Cloud saves
Enable Cloud Saves carries a warning in the interface, and it’s not decoration:
Warning: Enabling this feature will result in lost save games at some point. No exceptions. You’ve been warned. No support will be provided if things go wrong.
Take that at face value. Leave it off. Cloud saves aren’t finished, and turning this on risks your progress with no support if it goes wrong. Saves live on your Deck instead, which works.
Legacy clients
Use Legacy Clients switches a store back to the older flatpak tools instead of the clients Junk Store Pro supplies.
The supplied clients are better in three ways covered elsewhere in these pages: refreshing a library is quicker, signing in through Google or Apple is more reliable, and multiple accounts only work on them at all.
So this isn’t an upgrade path, it’s a way back. Turn it on if a supplied client has a problem the old one doesn’t, and expect to lose those three things while it’s on. Otherwise leave it alone.
The image cache
With Use proxy cache for images on, artwork is fetched through Junk Store Pro rather than straight from the store, and a copy is kept on the Deck. The next time that image is needed the copy is used, so the grid fills in quickly and works when you’re offline.
Everything lives in one place:
~/.config/junkstore/proxy-cache/
Inside, there’s a folder per website the artwork came from, and beneath each one the same folder structure that site uses. So a picture from images.example.com/covers/123.jpg is saved as:
~/.config/junkstore/proxy-cache/images.example.com/covers/123.jpg
That’s deliberate. It means you can see at a glance which store’s artwork is taking up the room, and delete one store’s worth without touching the rest.
One folder is different. proxy-cache/local/custom/ holds artwork you supplied yourself, from your own image files, filed under each game’s short name. It was copied in from wherever you picked it, so it can’t be fetched again if you delete it. That’s the one part of the cache worth keeping, or backing up if you’ve done a lot of it.
Clearing it
There’s no button for this, and no size limit. Nothing is ever removed automatically, so the cache only grows, though artwork is small and it takes a very large library to become a problem worth attending to.
If you do want the space back, delete the folders you don’t want. Anything downloaded comes back on its own the next time that image is needed, so nothing is permanently lost and no setting has to change. Junk Store Pro notices the file has gone and fetches it again.
The File Manager is the way to do it on the device, and Disk Usage will show you what’s actually taking up the room before you delete anything. You can also reach it over SSH if that’s easier.
Leave local/custom alone unless you’re certain, for the reason above. Deleting anything else costs you a download, not an image.
Per-game installation settings
Two settings on this screen work together to control something that shows up elsewhere: on individual games rather than here.
Has pre installation settings decides whether each game in this store gets an Installation entry on its own cog, alongside the other editors there. Turn it on and the entry appears; turn it off and it doesn’t.
On Epic and GOG this is where DLC and languages live, and it’s the reason to care about any of this. The panel is built per game by asking the store what that particular game offers, so you get up to four sections:
| Section | What’s in it |
|---|---|
| DLC | Add-ons you own for this game |
| Languages | The language versions available |
| Dependencies | Supporting components the game needs, such as older runtimes. If something a game wants isn’t listed, Run Exe can install it |
| User_Configs | Extra options the extension offers, such as how many downloads to run at once |
A game only shows the sections that apply to it. A game with no DLC has no DLC section, which is why the panel looks different from one game to the next. That’s the store answering honestly, not a fault.
DLC comes ticked, on both stores, so by default you install everything you own. Untick anything you don’t want and it stays off your disk.
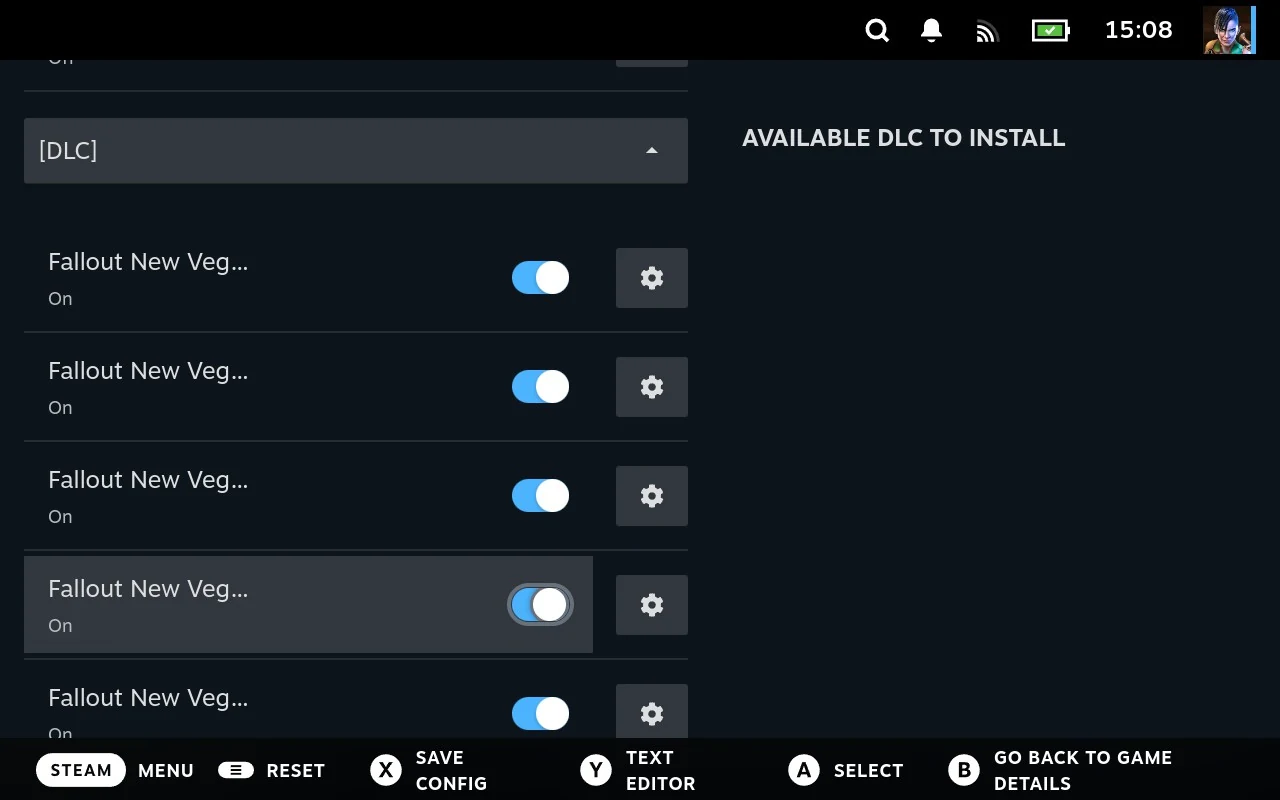
Languages work differently on each store, which is worth knowing before you go looking for a control that isn’t there:
- GOG gives you a dropdown, and you pick one language. English is the default.
- Epic gives you tickboxes, none of them ticked, and you can choose several. Epic calls these install tags, and they cover more than language on some games.
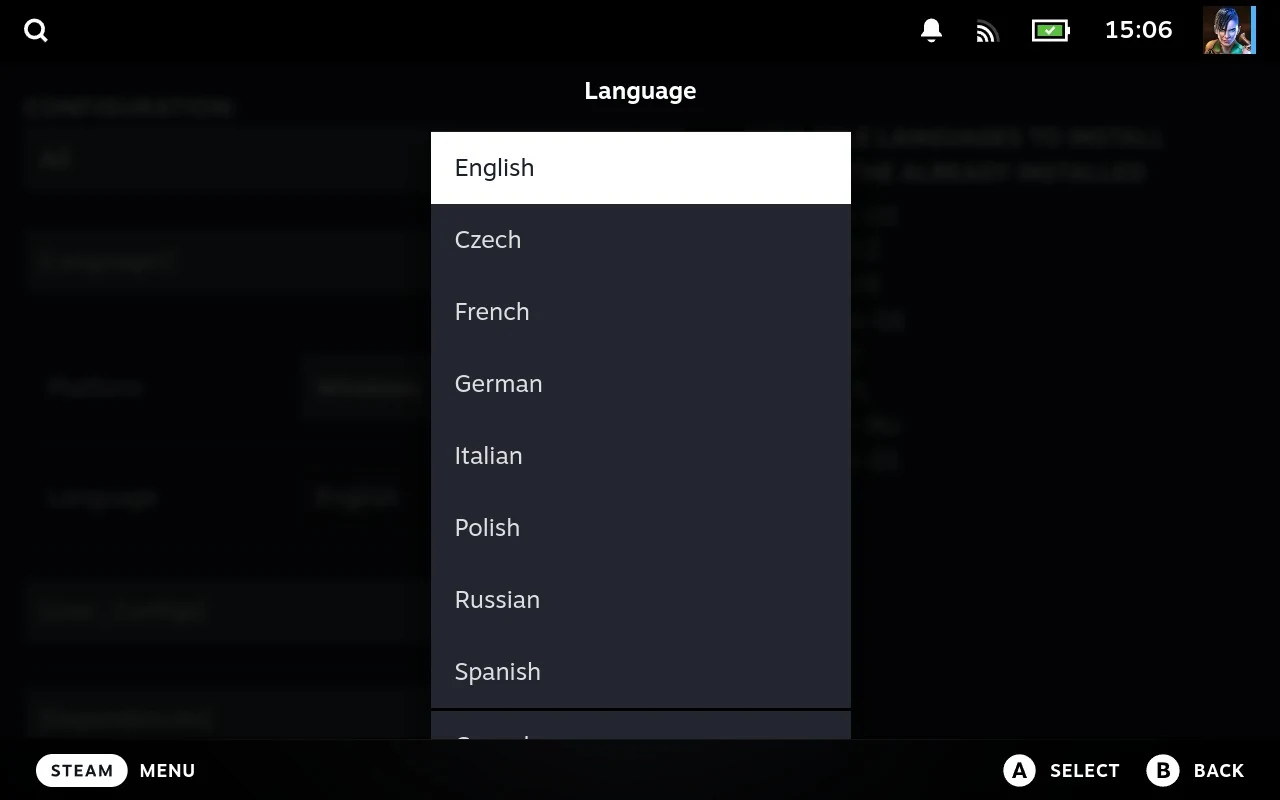
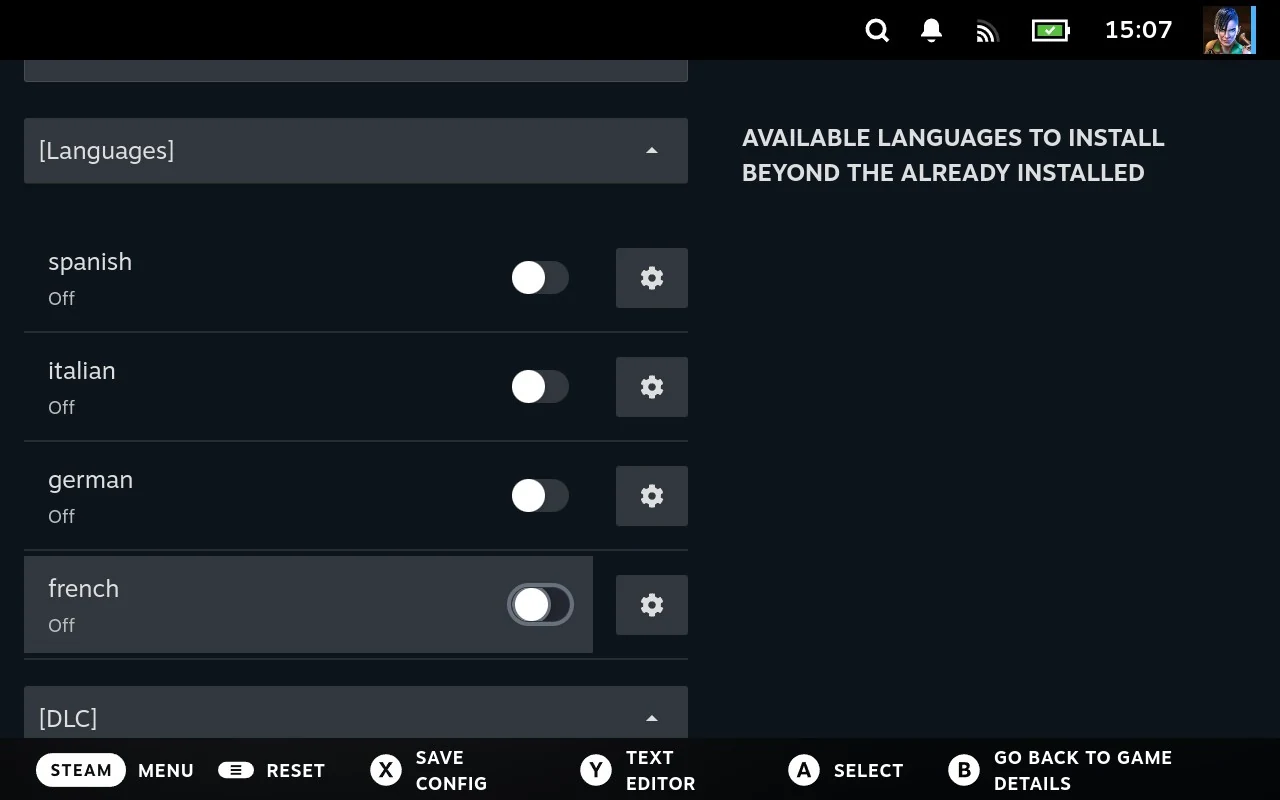
This is the right place to choose a language, and the one to use. The LANG setting in the Environment section is a different and riskier thing, for the handful of games that have no language option at all. See Setting a language.
Nothing asks you about any of this by default, so it’s worth opening before you install anything large. English and every DLC you own is what you’ll get otherwise, and that can be a good deal more than you wanted. Changing it here beforehand costs nothing; changing it afterwards means a verify or repair.
Changing DLC or languages afterwards
You can change these on an installed game, but the panel on its own doesn’t move any files. Ticking a DLC records that you want it; it doesn’t fetch it.
To make the files match what you’ve asked for, run Verify game or Repair game from the game’s own menu. That compares what’s on disk against what should be there and fetches whatever’s missing. Both only appear once a game is installed.
So the order is: open Installation on the game’s cog, change what you want, save, then verify or repair. Skip that second step and nothing appears to happen, which is the usual reason someone reports that adding DLC did nothing.
Expect it to take a while on a large game, since it has to check the files already on disk before it can work out what’s missing.
Show installation options then decides whether you’re asked each time you install.
It’s off on Epic and GOG, so installing starts the download immediately using whatever the Installation panel currently says. Turn it on and pressing Install brings the panel up first, letting you change things before anything is fetched.
With it on, X starts the install. The panel is an ordinary settings screen, so X saves it, and saving is what sets the download going. Backing out without saving cancels the install altogether.
The order matters: the second setting does nothing unless the first is on. A store with no installation settings has nothing to show, so it installs straight away either way. If you’ve turned Show installation options on and nothing is being offered, that’s the reason.
Most stores don’t use any of this and both can be left alone.
Editing a setting
Most settings are a text box, a toggle, a dropdown or a path picker, and behave as you’d expect.
Press Y on any field to type its value directly. That’s how you set something a dropdown doesn’t offer, and it’s the escape hatch when the control in front of you doesn’t fit what you need.
It opens a Text Editor window rather than editing in place, with room for several lines. That matters for the few settings that take more than one: see Additional Variables, and it’s easier to read for long values either way.
Press X to save. The hint at the bottom of the screen says Save config, and it saves everything you’ve changed on the screen at once, not just the field you’re on.
You won’t lose work by forgetting. Back out with changes still unsaved and an Unsaved Changes window asks whether you want to keep them, offering Save or Discard. It only appears if you’ve actually changed something, so leaving a screen you only looked at takes you straight out.
Discard is a real discard. It’s the way to abandon a change you’ve thought better of, rather than having to remember what each field was before you touched it.
Start undoes things
Start means reset, and what it resets depends on where you are.
On a field, Start puts that one setting back to its default. No confirmation, because it’s one value and easy to set again. This is the quick fix when you’ve changed something, it hasn’t helped, and you can’t remember what it was.
On the visibility dropdown at the top, Start resets every setting on the screen. It asks you to confirm first, and the warning is worth reading rather than clicking through: it puts the whole configuration back to defaults, not just the section you were looking at.
That second one is a genuine escape hatch. If you’ve been changing things and a store has stopped working, resetting everything gets you back to a known state in one go. It also discards any deliberate changes you made, so it’s worth a moment’s thought about whether anything on the screen was set on purpose.
Neither touches your installed games or your library. The worst case is a store configured back to how it shipped.
Getting back to a working state
If you’ve changed something and a store has stopped behaving, work up in this order.
Reset the one field, with Start on it, if you know which setting you touched.
Reset the whole screen, with Start on the visibility dropdown, if you don’t.
Regenerate the extension from the Generator, if resetting doesn’t help. That rebuilds the store’s settings from its definition, and it’s the right move if you suspect the problem is more than a single value being wrong.
None of these touch your installed games or your library.
When regenerating doesn’t fix it either
Occasionally a store stays broken through all of that, and there’s a reason for it worth knowing.
Your settings live in a file on the Deck, one per store:
~/.local/share/junkstore/conf_schemas/<store>tabconfig.json
Regenerating merges into that file rather than replacing it. The Generator works out the correct defaults, then lays your existing file over the top so your choices survive. That’s the behaviour you want almost always, and it’s why regenerating is safe. But it also means a bad value in that file survives regeneration, because the file wins. The settings are stubborn by design.
So if a store is still misbehaving after resetting everything and regenerating, the last resort is to delete that file and regenerate again. With nothing to merge, the store is rebuilt from its definition alone.
This throws away every setting you’ve chosen for that store, including its install location, so it’s genuinely last on the list. Note anything you set on purpose before you do it.
The file is plain text, so you can look at it before deleting anything, and copying it somewhere first gives you something to refer back to. Delete it in the File Manager, or over SSH if you prefer, then regenerate the extension.
Nothing here touches your installed games or your library either. The worst outcome is a store configured as though it were newly installed.