A game's own settings
On this page
Every game has a cog on its page, next to the launch button. That opens a short menu of editors, each covering a different part of how that one game is set up.
These apply to this game only. The store’s own cog sets defaults for everything in it; this changes one game without touching the rest. When the two disagree, the game wins.
Most people never need to open this. It matters when a single game is behaving differently from the others, and you want to fix that one without disturbing anything else.
What’s on the menu
The menu is headed Configuration. Which entries appear depends on the game, because each one is only offered when it applies.
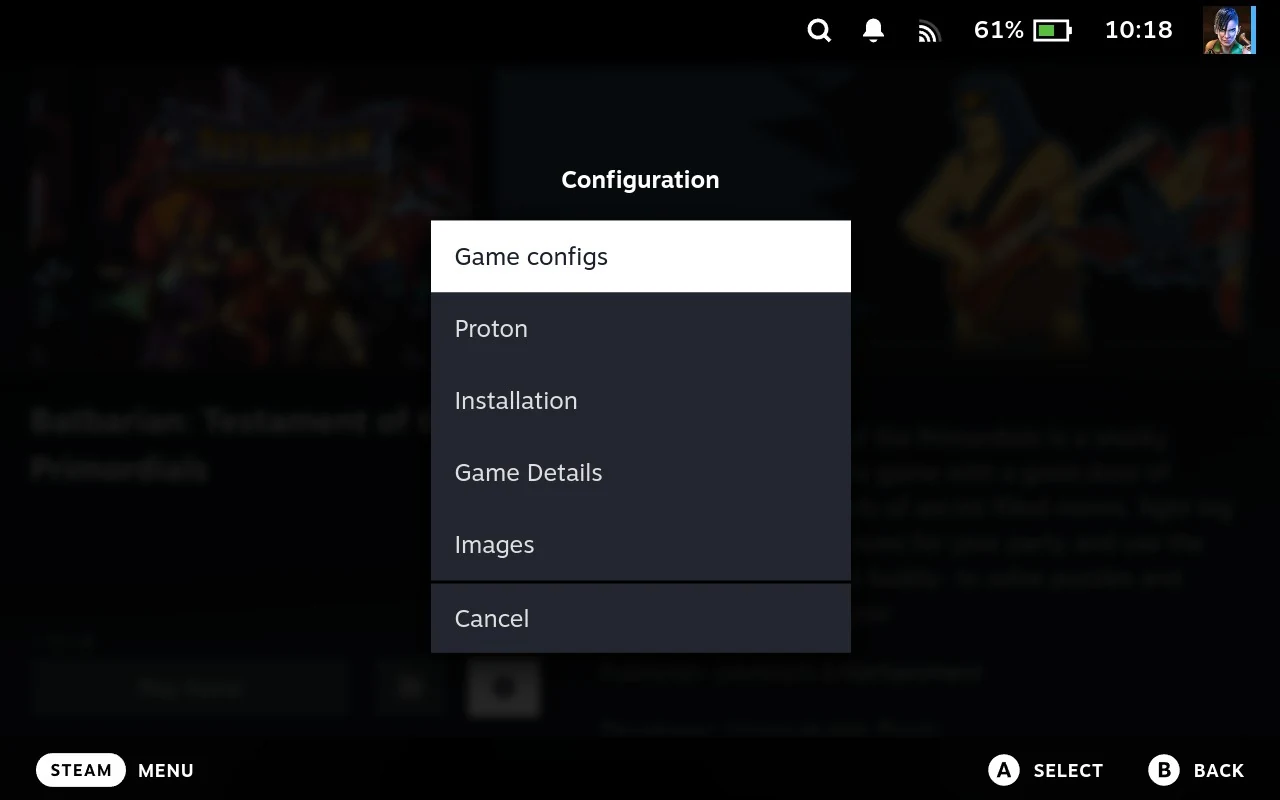
In the order they appear on screen:
| Entry | Covers |
|---|---|
| Game configs | How this game is run and what it’s handed: its environment variables, and whatever else the store’s own settings expose per game |
| Proton | The Windows compatibility settings: runtimes, extra variables and arguments, and frame generation |
| Installation | DLC, languages, and other pre-install choices. See Per-game installation settings |
| Game Details | The game’s name, artwork paths, launch settings and other recorded facts |
| Images | The artwork Junk Store Pro holds for the game |
Games on other platforms get their own entries in place of Proton:
| Entry | Covers |
|---|---|
| dosbox 1-0, dosboxx 1-0, … | The emulator’s own configuration file, such as dosbox.conf |
| Bat Files | The .bat files a DOS game uses, where it has any |
A missing entry isn’t a fault. Images only appears for games in a store, Bat Files only for games that have them, and the platform editors only where a platform is set and a matching configuration exists.
Each entry edits a different part of what Junk Store Pro has recorded about the game, and between them they cover all of it. Game Details is the game’s own record; Images is its artwork; the platform editors hold the settings for whatever runs it; Bat Files holds its batch files. Nothing is shared between them, so a change in one doesn’t disturb another.
That’s why there are several editors rather than one long screen, and it’s worth knowing when you’re looking for a setting: work out which of those four it belongs to, and that’s the entry to open.
All of them save the same way: X saves, and backing out asks whether you want to keep your changes. Start resets a field, or the whole screen from the dropdown at the top. That’s the same everywhere in Junk Store Pro, and it’s covered in Editing a setting.
Game Details
This edits Junk Store Pro’s database entry for the game, directly. Every field on the screen is a column in the record, and saving writes your values straight into it. There’s no layer in between checking that what you typed makes sense.
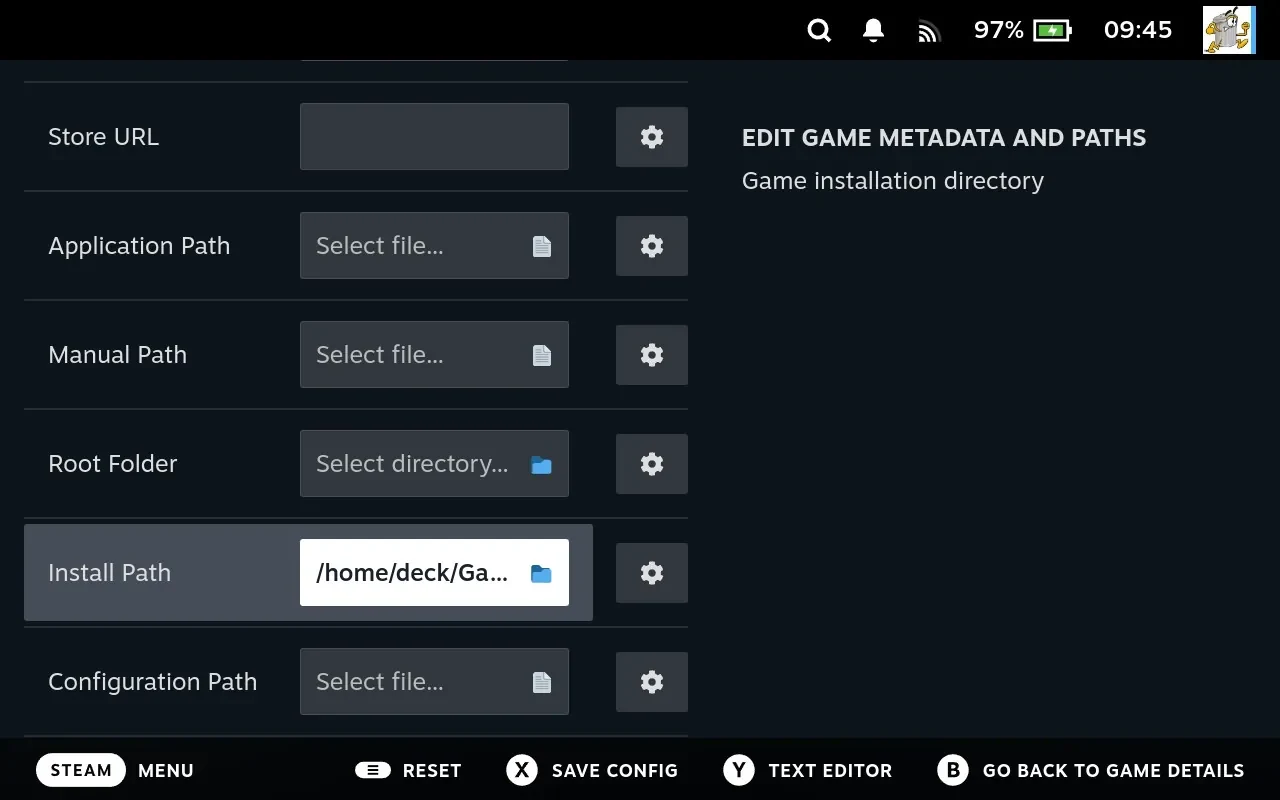
That’s worth knowing before you change anything, because it explains how this screen behaves:
- Nothing is validated. A misspelled path saves exactly as readily as a correct one. Nothing warns you and nothing refuses.
- There’s no undo. Once saved, the previous value is gone. Start resets a field to its default, which isn’t the same as what was there a minute ago.
- There’s no automatic repair. A refresh doesn’t quietly correct a record you’ve edited, so a mistake stays until you fix it. Getting the store’s version back is how you undo one.
So it’s the most useful editor here and the easiest to damage. Which parts are safe is worth knowing.
The parts you’d want to change
These are descriptive. Changing them affects what you see, and nothing else.
| Field | Does |
|---|---|
| Game Title | The name shown on the grid and the game’s page |
| Sorting Title | The name used for sorting, so The Witcher can file under W |
| Notes | The description on the game’s page |
| Publisher, Developer, Genre, Release Date | Shown with the game’s details |
| Store URL | The game’s page on the store’s website |
Sorting Title is the one people actually want. A library full of games beginning with “The” sorts badly, and this fixes it for one game without renaming it.
These came from the store originally, so if you change one and later want the store’s version back, there’s a way to get it, see below.
The parts that point at files
These name real things on disk. Getting one wrong can stop a game working, though nothing is deleted.
| Field | Does |
|---|---|
| Install Path | Where the game’s files are. Used throughout, and the one that matters most |
| Working Directory | The folder the game starts in |
| Application Path | The program to run |
| Arguments | Anything passed to it on the command line |
| Configuration Path | The game’s own configuration file, where it has one |
| Root Folder | The folder the game treats as its base |
| Manual Path | The game’s manual, if it came with one |
Not all of these are used. Junk Store Pro’s game record began life matching another launcher’s, because the early version imported data from one, and the design grew away from that starting point since. Several fields are still there from then, filled in or not, without anything reading them, Manual Path and Root Folder in particular. Others matter only to certain kinds of store.
That’s worth knowing before you spend time on this screen: filling a field in doesn’t guarantee anything acts on it. If you’re trying to change how a game launches, the reliable route is below rather than typing here.
Application Path and Working Directory are the same two things Run Exe sets for you, from a list, with the right values filled in and applied where they’re actually read. Use that instead where you can; this screen is for the case where you need to type something the list can’t offer.
These are what Reset Launch Options resets to
The two aren’t independent, and this is the useful part.
Reset Launch Options rebuilds the Steam shortcut from this record. It reads the game’s stored details, works out how the game should be launched, and writes that back to Steam: the program, the working folder, the launch options and the shortcut’s name.
It rewrites the artwork as well, from the Images list, so it’s not only the launch settings that get rebuilt. That’s covered below.
So “reset” means back to what’s recorded here, not back to how the game shipped. Two consequences:
- Change something here and it doesn’t take effect on its own. The record is updated, but the Steam shortcut still holds the old values. Running Reset Launch Options is what pushes your change through.
- If you’ve set the executable with Run Exe and then reset, you’ll go back to whatever this record says, losing the change you made with X. That’s the expected behaviour rather than a fault, and it’s worth knowing before you reach for reset to fix an unrelated problem.
- The same goes for artwork you set on the Steam shortcut directly, with the File Manager’s Steam submenu or SteamGridDB’s Steam Shortcut Only. A reset replaces it with whatever the Images list holds.
That makes this screen the deliberate route for a permanent change, and Run Exe the quick one. Set it here if you want it to survive a reset.
Getting the store’s version back
If you’ve edited a record and want what the store originally said, or the store has since corrected something that’s wrong on your Deck, there’s a way to get it, and it’s worth knowing because there’s no undo on this screen.
For a game that isn’t installed, delete it and refresh. Delete Unlinked Games in the store’s actions removes games with no Steam shortcut from Junk Store Pro’s records, and Refresh Games List then fetches them again from scratch. What comes back is the store’s current information, not your edited copy.
That makes it useful for more than undoing a mistake. If a game’s details were wrong and the store has fixed them since, this is how you pick up the correction: your Deck is working from what was fetched at the time, and nothing re-fetches it on its own.
It only works for games that aren’t installed, since installed games have a Steam shortcut and are deliberately left alone. For those, correct the field by hand.
It costs nothing but time. Only Junk Store Pro’s records are removed, no files are touched, and the refresh rebuilds them. A large library takes a while to fetch again, so it’s better suited to fixing something specific than as a routine tidy-up.
The parts to leave alone
These are Junk Store Pro’s own bookkeeping. They’re editable because the screen shows everything, not because they’re meant to be edited.
| Field | Why to leave it |
|---|---|
| Steam Client ID | How Junk Store Pro knows this game is installed. Clearing it makes an installed game look uninstalled |
| Database ID, Source | How the game is matched back to the store it came from |
| UMU ID | Used to apply the right compatibility fixes when launching |
| Size | Recorded at install time, not measured live |
Nothing checks what you type. Whatever you put in a field is what gets saved, so a typo in a path is stored as happily as a correct one. If a game stops working right after you edited this screen, that’s almost certainly the cause, and it’s worth undoing what you changed before looking anywhere else.
Images
Images lists the artwork Junk Store Pro holds for this game, each with a thumbnail and what kind it is. This is Junk Store Pro’s own artwork, separate from what Steam shows in your library.
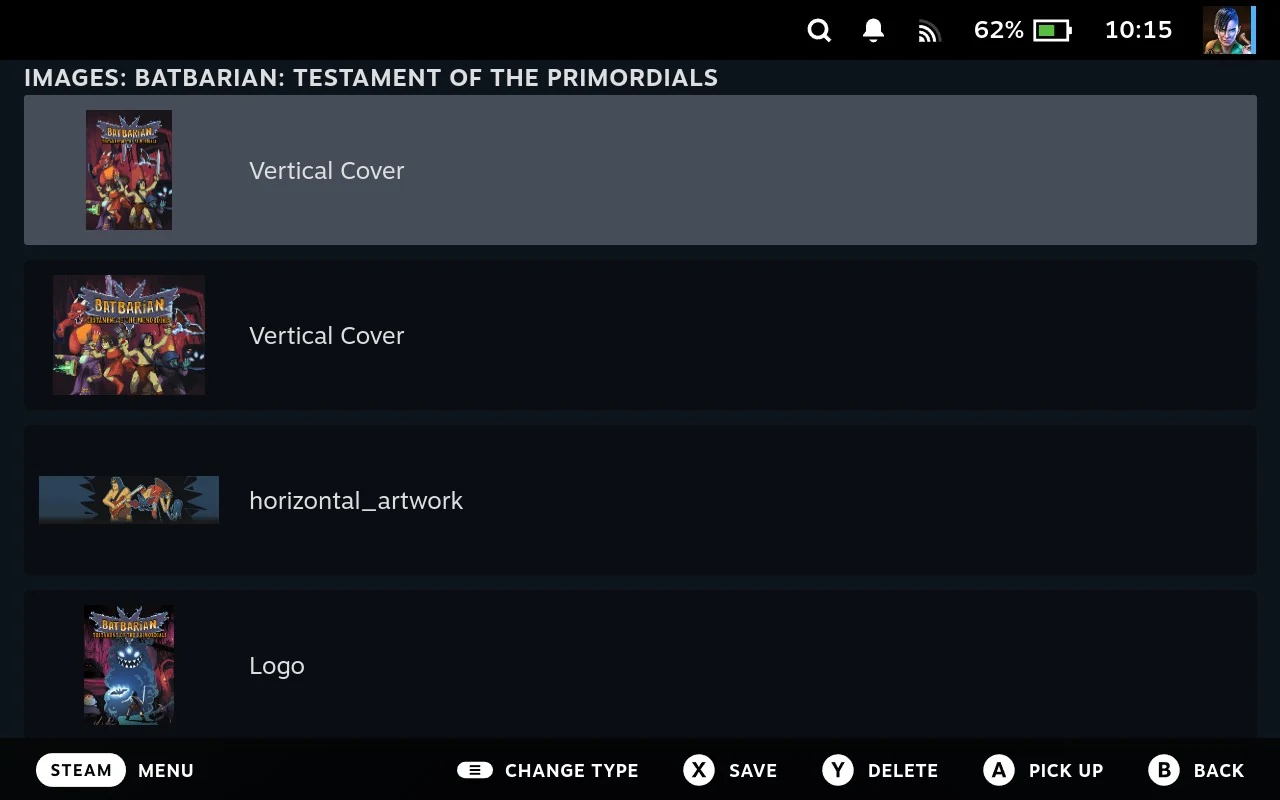
Like Game Details, this edits the records directly, one row per picture. The same things follow: nothing is checked, there’s no undo, and a picture that came from the store can come back the next time the game’s details are fetched.
Six kinds can be chosen: Vertical Cover, Horizontal Cover, Hero, Logo, Icon and Background. Those are what the change-type menu offers.
You may see others listed. Stores label their artwork with their own names, and some of those don’t match the six, a picture may show as screenshots or horizontal_artwork rather than a tidy label. Nothing is wrong with those images; they just came in under a name the menu doesn’t have. You can still reorder or delete them, and changing the type puts them onto one of the six.
Reordering
The image at the top of the list is the one shown on the grid. That’s the whole reason to reorder: move the picture you want as the game’s cover to the top, and that’s what you’ll see on the tab.
It doesn’t matter what kind it is. The grid takes whatever is first, so a Logo or a screenshot sitting at the top is what gets used, which is the usual explanation for a game showing something odd on the grid while perfectly good cover art sits further down the list. Move the right one up.
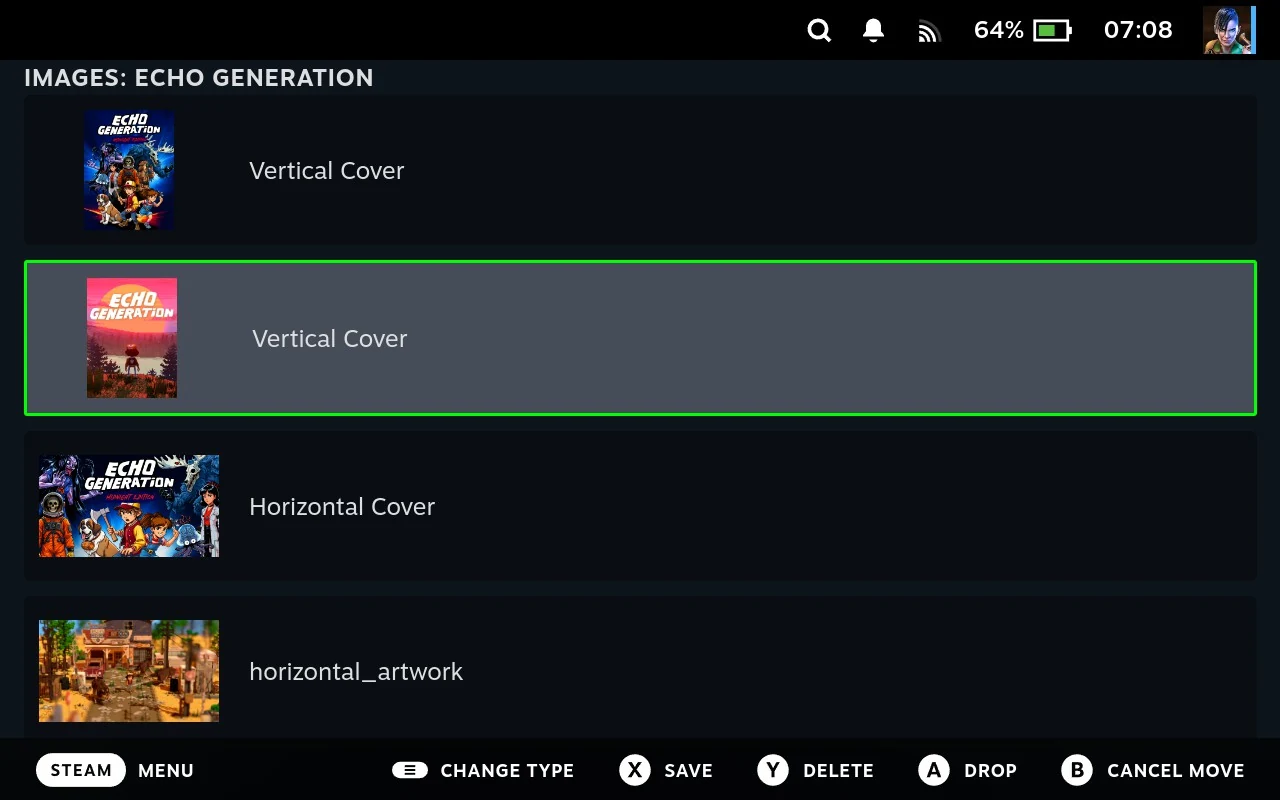
Reordering works by picking an image up and putting it down:
| Button | Does |
|---|---|
| A | Pick up the image, then Drop it once it’s where you want |
| D-pad up/down | Moves it, while it’s picked up |
| B | Cancel move, putting it back |
The image you’re holding is highlighted, so you can see what you’re moving. Nothing changes until you drop it, and B abandons the move rather than the screen.
Changing a kind and deleting
The menu button changes an image’s kind, which is how you fix a picture filed as a Hero that ought to be a Logo. SELECT does the same thing.
The options button deletes an image, after asking. That removes it from Junk Store Pro’s records.
X saves. Reordering, changing kinds and deleting are all held until then.
Where the pictures come from
Most are fetched from the store when your library is refreshed. Search SteamGridDB adds more, and the File Manager’s Steam submenu can set one from a file of your own.
Changes here don’t reach Steam on their own. Junk Store Pro’s artwork and Steam’s are kept separately, so a picture set here shows on the game’s page in Junk Store Pro while the Steam shortcut carries on with what it had.
Reset Launch Options pushes them across. As well as rebuilding the launch settings, it copies this list’s artwork into the Steam shortcut. So if you’ve reordered images or changed their kinds and want your Steam library to match, that’s how to apply it, and it’s why a reset done for some unrelated reason can change how your library looks.
Search SteamGridDB’s Both option is the direct route when you’re picking a new picture anyway, since it writes to both places at once.
Platform settings
The remaining entries configure whatever actually runs the game. There are two, and they do different jobs.
These are stored per game as well, in their own part of Junk Store Pro’s records rather than as loose files. That’s what lets one game run under a different Proton, or with a DOSBox setup of its own, without affecting anything else in the store. The store’s cog sets the starting point; these override it for one game.
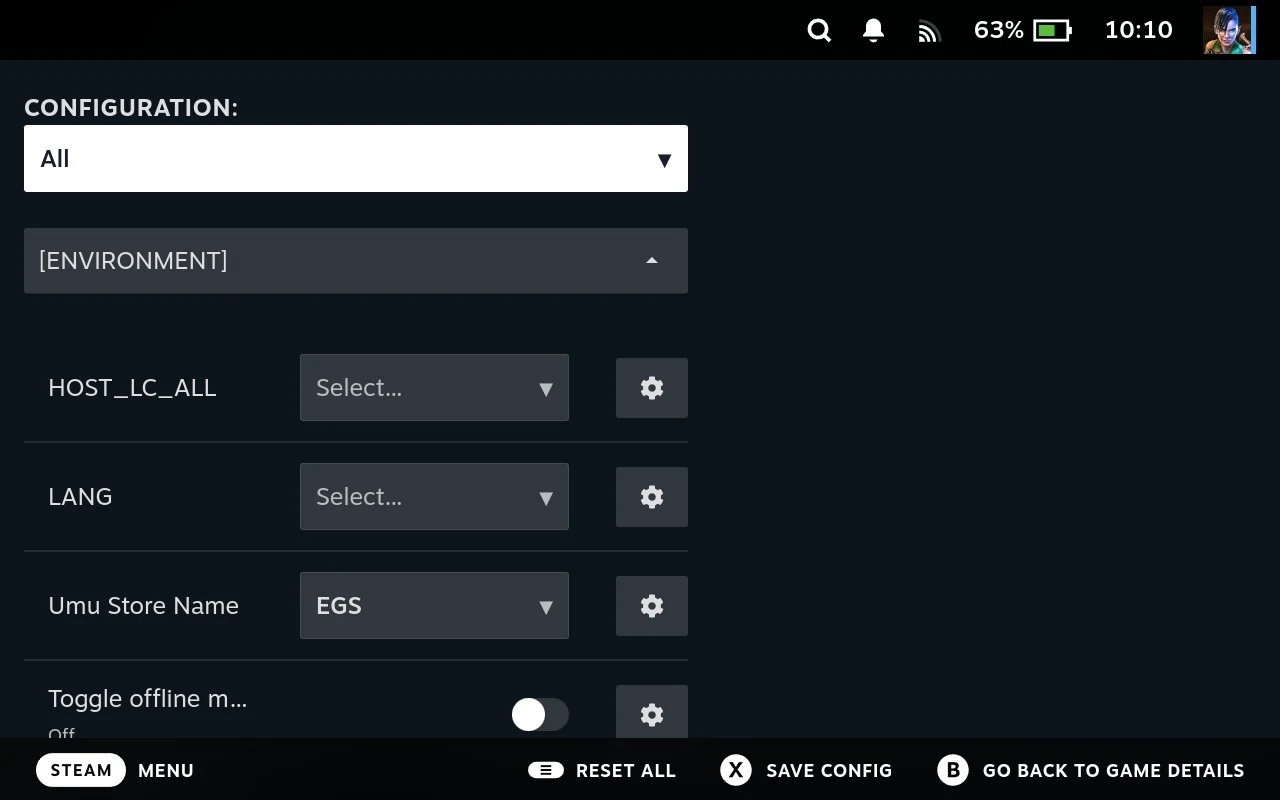
The platform’s configs
Game configs holds the platform settings for this one game: which launcher runs it, which version, and which variant. On a store whose games run under an emulator, the entry is named after it instead, such as dosbox 1-0.
| Setting | Does |
|---|---|
| platform | What runs the game: Proton, Linux, DOSBox, RetroArch, ScummVM and so on |
| platform-version | Which version of that platform Junk Store Pro’s settings are for, where there’s a choice. Not the Proton version a game runs under |
| platform-fork | Which variant, such as DOSBox-X or DOSBox Staging rather than plain DOSBox |
| Enable Cloud Saves | Leave it off. See Cloud saves |
These are set for you when the game is installed and are usually right. The reason to come here is a game that needs something different from the rest of its store, a different DOSBox variant for a game one of them handles badly, for instance.
This isn’t where you change a game’s Proton version. That’s a Steam setting rather than a Junk Store Pro one: press Y on the game’s page to open its Steam page, and set the compatibility tool through Steam’s own properties. The Junk Store website covers that. What this screen records is which platform Junk Store Pro launches the game through, which is a different thing.
Changing the platform can change what else is on the cog. The second editor below only appears where Junk Store Pro has a configuration file for the platform you picked, which at the moment means Proton and the DOSBox family. Choose something else and that entry isn’t there at all, not a fault, just nothing to configure.
LANG and HOST_LC_ALL
Games launched through Proton also have LANG and HOST_LC_ALL here. They’re a last resort, not the normal way to choose a language.
For most games, the language is an install choice. Epic and GOG let you pick which language version to fetch, in Installation on the game’s cog. That’s the right place, and it’s what to try first.
These two are for the games that ignore that and follow the system’s language instead. Some older games have no language setting of their own and simply run in whatever the system says, so the only way to change them is to change what the system reports. That’s what these do.
They can break games that were working. A game handed a locale it didn’t expect can show the wrong characters, lose its fonts, lay its menus out badly, or fail to start at all. It’s not a safe setting to try speculatively.
So: only reach for these if a game is stuck in the wrong language and has no setting for it, having already checked its Installation options. If a game misbehaves afterwards, empty the field first, empty means “don’t interfere”, not English.
Setting a language covers the store-wide versions of these, and why setting them per game like this is the safer of the two.
Proton settings
Games running under Proton get a large settings screen of their own, covering runtimes, frame limiting, upscaling and frame generation. It has its own page.
Related
- The store-wide versions of these settings: A store’s settings
- Setting the executable from a list: Run Exe
- Artwork from the community library: Search SteamGridDB
- Setting artwork from your own files: The File Manager and Steam