The File Manager and Steam
On this page
The File Manager can edit your Steam library directly: set a game’s artwork, change which file it launches, and clean up what uninstalled games leave behind. These are the jobs it does that nothing else on the Deck does.
Most of this needs the File Manager opened from a game, so it knows which one you mean. See Two ways to open it.
Add to Steam
Add to Steam makes a Steam shortcut out of whatever file you have focused, so it turns up in your library.
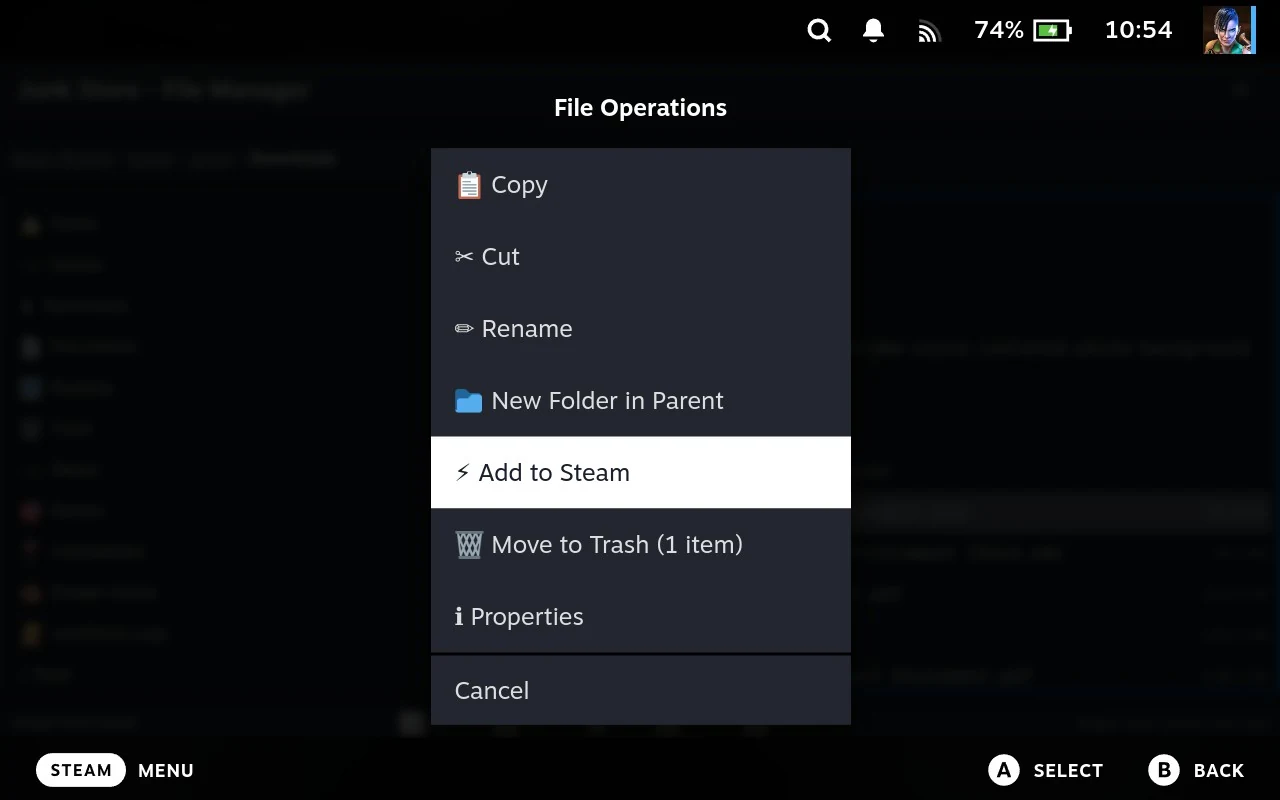
If it’s an .exe, Junk Store Pro sets the launcher to Proton and records the executable’s name, its folder and the install path, so it’s ready to run straight away. Anything else gets added without that step, and you set the launcher yourself if it needs one.
This is how you get an emulator, a tool, or a game you installed by hand into your Steam library.
Making the entry is the first step of something larger. Once it exists, the rest of Junk Store Pro’s tools work on it, artwork, what it launches, what it runs under. See Setting a game up by hand.
The Steam submenu
This is the least appreciated part of the File Manager, and probably the most useful.
It edits your actual Steam shortcut, live. Not a Junk Store Pro setting that later gets applied: the entry in your Steam library changes as soon as you choose. Artwork appears in your library immediately, and a changed executable is what launches next time. You are editing Steam from inside Junk Store Pro, using the file in front of you as the value.
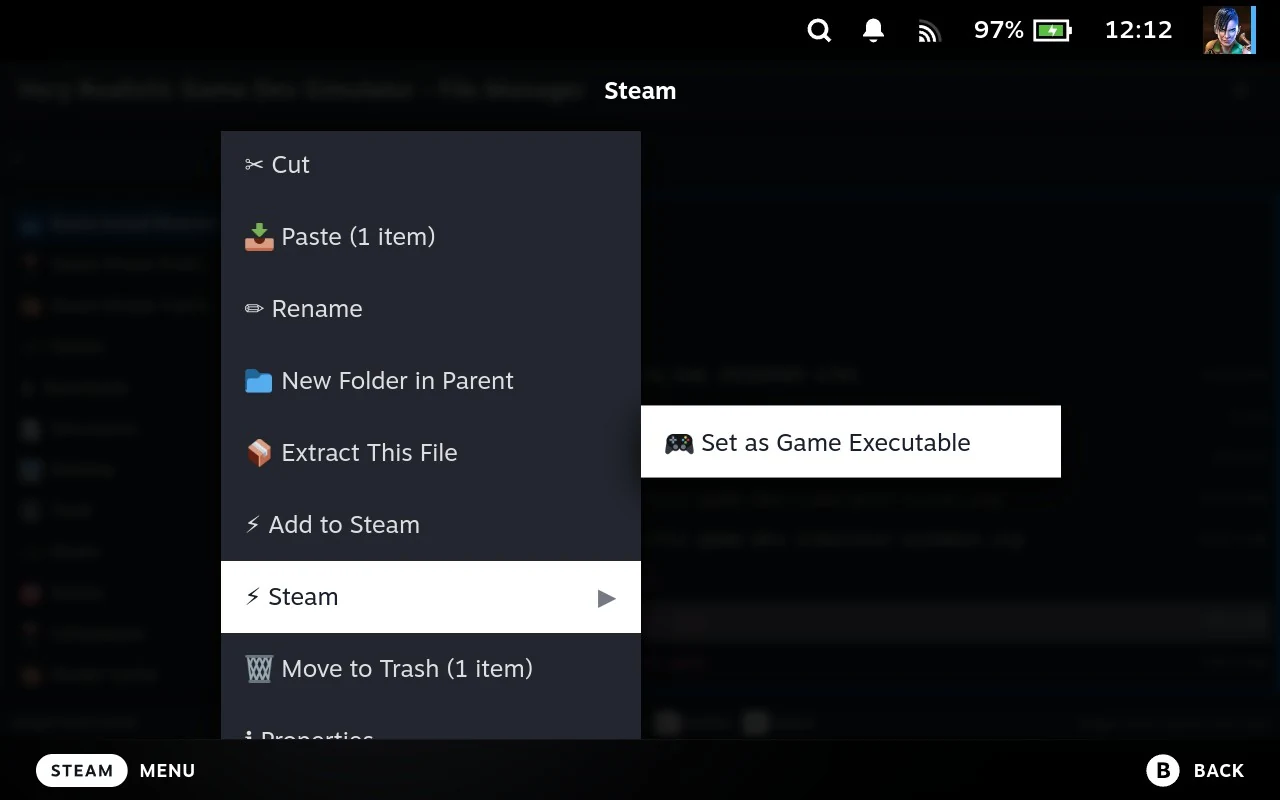
That matters because Steam’s own version of this doesn’t work properly in Game Mode. The options are there in a shortcut’s properties, but the file picker behind them misbehaves under gamescope, so in practice you end up in Desktop Mode to change an executable or set artwork. Here you’re already standing in the game’s folder looking at the file, and you never leave Game Mode.
| Item | Sets | Appears on |
|---|---|---|
| 🎮 Set as Game Executable | Which file the shortcut launches | Any file |
| 📁 Set as Working Directory | The directory the game starts in | Any directory |
| 🖼️ Hero Image | The wide banner on the game’s page | Image files |
| 🏷️ Logo | The game’s logo overlay | Image files |
| ⬜ Grid Icon | The small square icon | Image files |
| 📱 Vertical Cover | The tall capsule in the library grid | Image files |
| 🌄 Library Background | The page background | Image files |
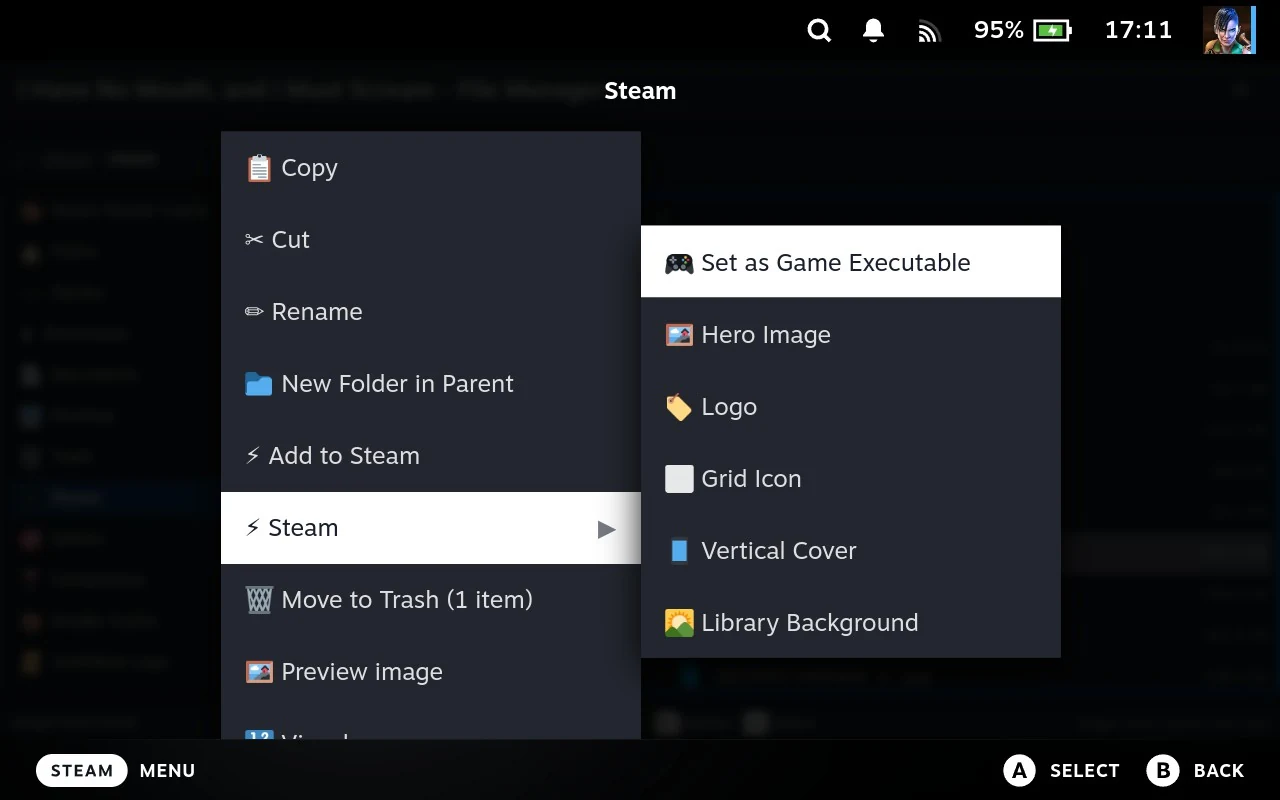
Three conditions decide whether the submenu appears at all, and between them they explain nearly every case of “I can’t see it”:
- You opened the File Manager from a game. The submenu needs to know which shortcut it is editing, so it is absent when the File Manager is opened from the main menu.
- Exactly one item is focused. It doesn’t appear for a multiple selection.
- The item suits the operation. Artwork entries appear only on
.png,.jpg,.jpeg,.webpand.gif; Set as Executable only on files; Set as Working Directory only on directories.
What this is good for:
Artwork that Steam got wrong or never had. Drop images anywhere on the Deck, browse to them, and assign each to its slot. This is the practical route for games whose automatic artwork is missing or ugly, and it beats Steam’s own artwork flow for anything not bought from Steam.
Use this when you have a picture of your own you want to use. Search SteamGridDB on the game’s page is the easier route it will search for the game and present you with the images it found.
A game launching the wrong thing. Installers often leave several executables, and the automatically chosen one isn’t always right. Find the correct one and set it, without going near Steam’s own file picker. Run Exe on the game’s page does the same job from a shortlist, which is quicker when the file you want is on it.
A game that won’t start from its own directory. Some games expect to run from a particular folder. Set the working directory to that folder.
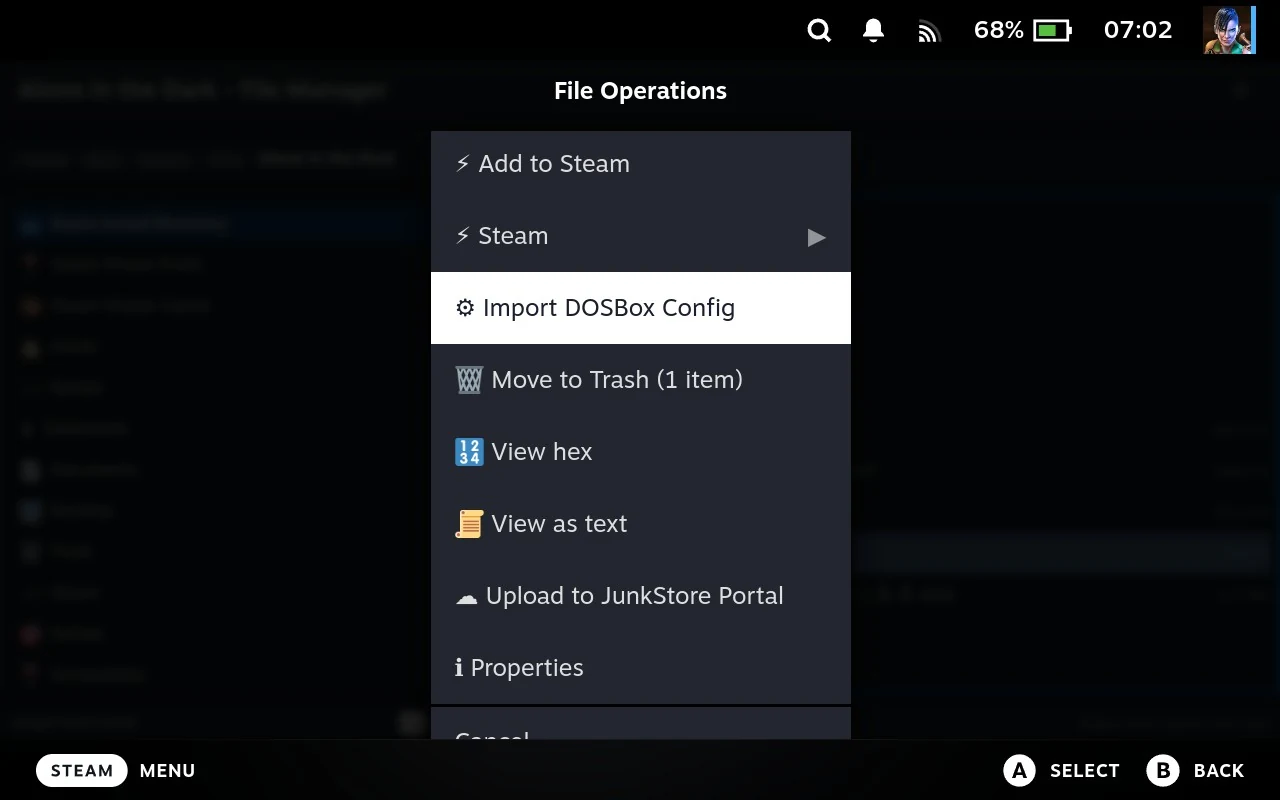
Importing a DOSBox conf or a .bat
Only when the File Manager was opened from a game. These write into that game’s configuration, so they need to know which game, and unlike the Steam submenu, what they need is the extension’s game context rather than a Steam shortcut. Opened standalone, neither appears.
This is the natural way to deal with DOS and old Windows games, which typically arrive as a folder containing the game, a dosbox.conf, and one or more .bat files. Browse into the folder and import them where they stand.
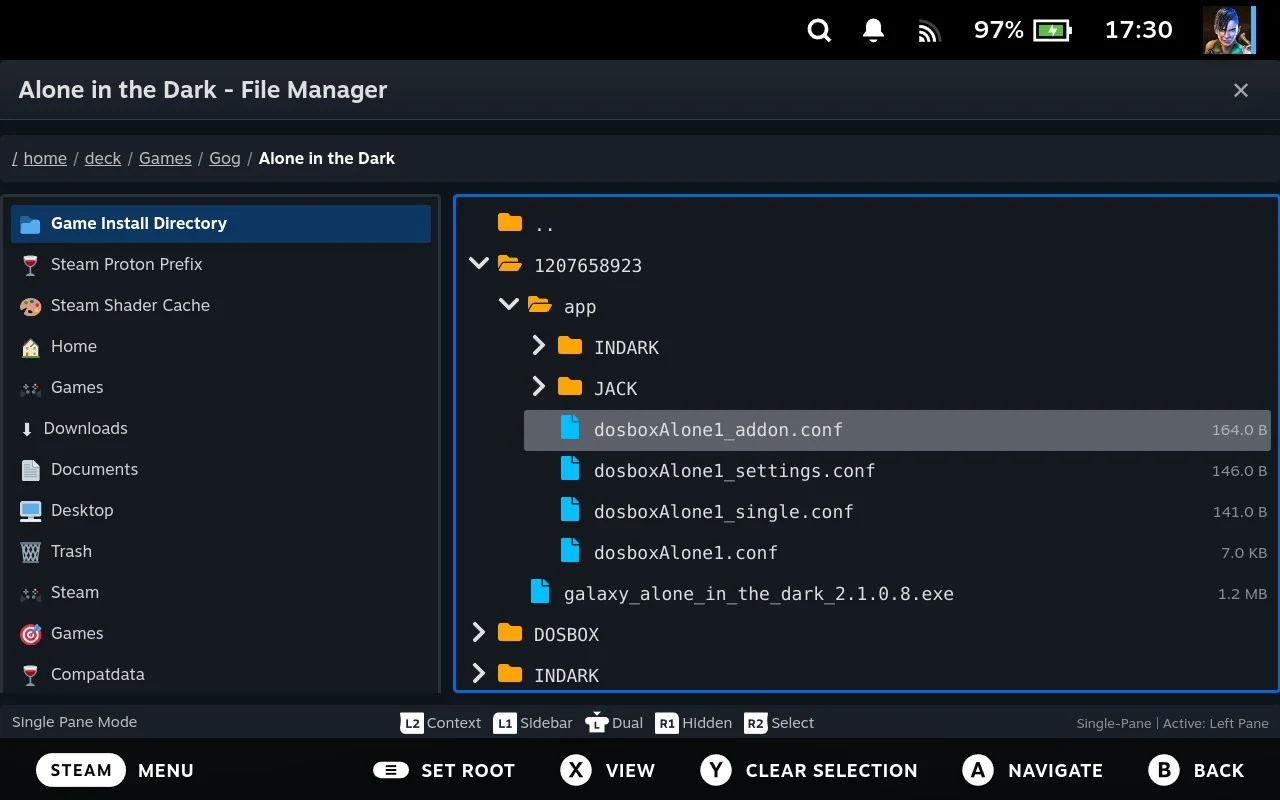
A .conf file opens a small dialog before importing, because you need to say how it combines with what the game already has:
| Strategy | Effect |
|---|---|
| Merge with existing | Keeps current settings, adds what the file specifies |
| Replace existing | The file wins |
| Autoexec only | Takes just the startup commands, ignores the rest |
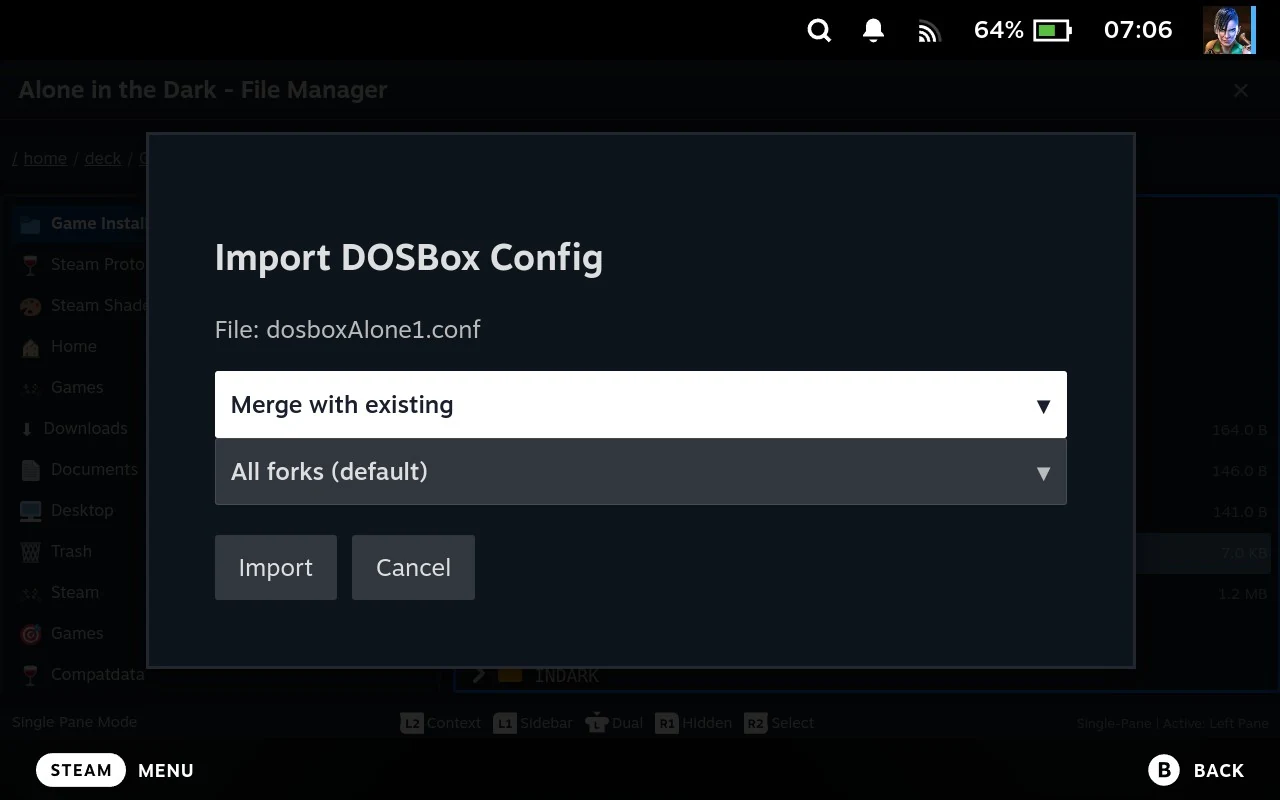
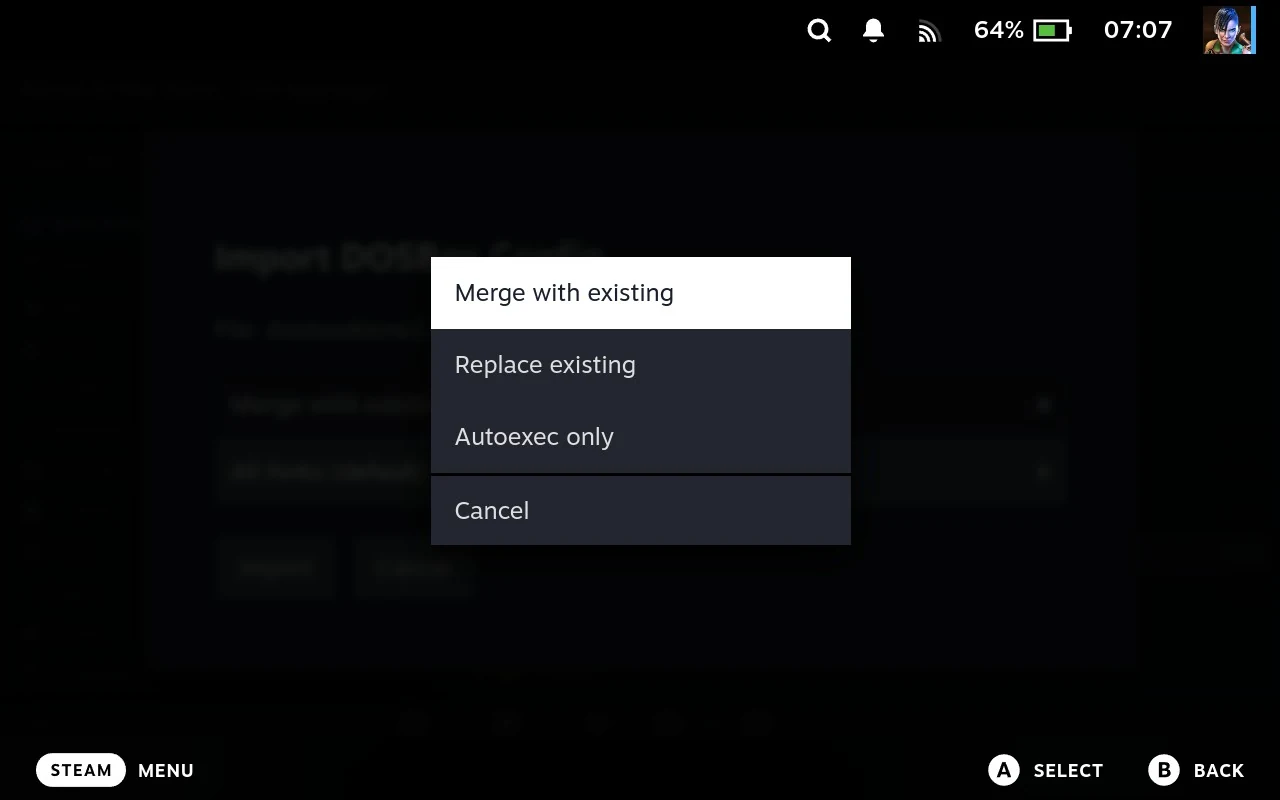
You can also aim it at a particular DOSBox fork, when the conf was written for DOSBox-X or DOSBox Staging rather than plain DOSBox. Left alone it applies to all forks.
Merge is the safe default. Replace discards configuration you may have set up through the interface.
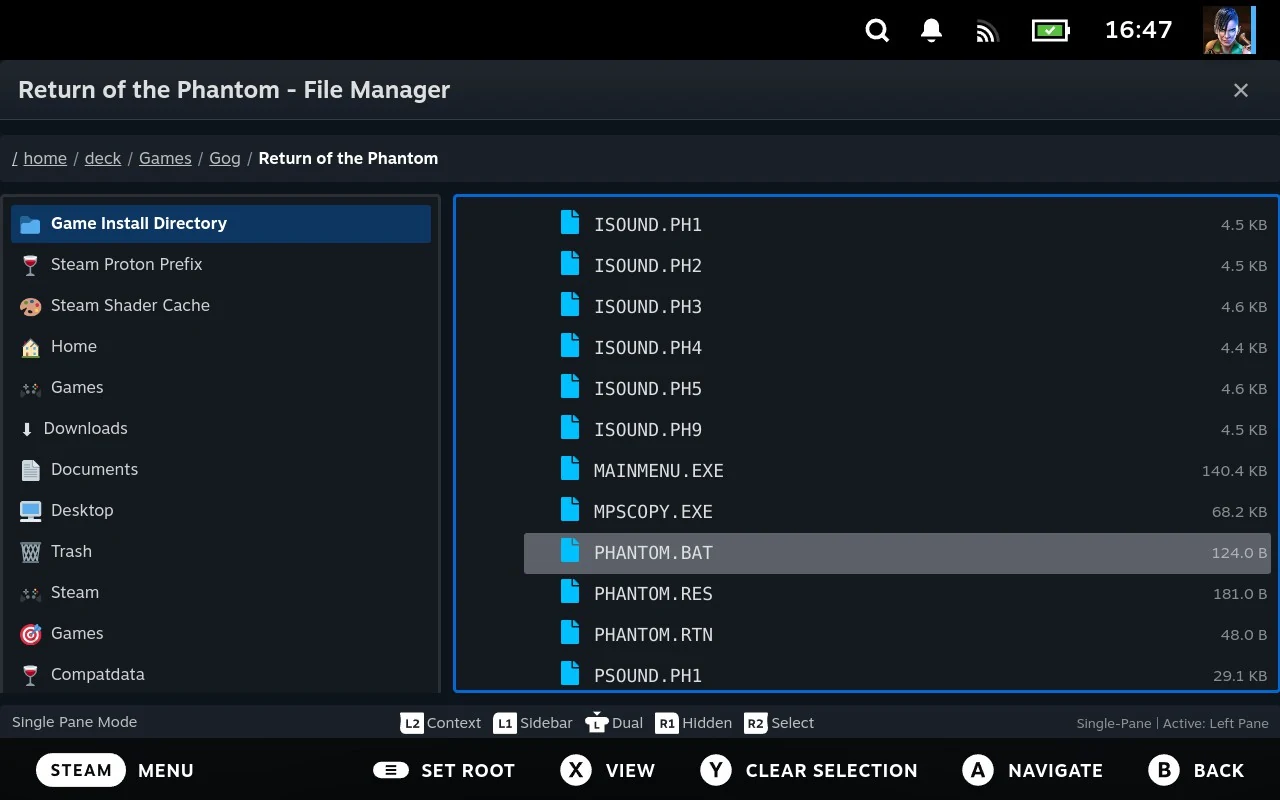
A .bat file imports immediately, with no dialog. The game context is already known and there is nothing to decide. The batch file is stored against the game rather than read from disk each time, which is why importing is a step at all, see the has-bat-files setting in the extension documentation. Importing bat files is still limited and dependent on how the extension was configured before generation.
.conf, .config, and any file named dosbox.conf are all offered the conf import.
Prefixes, shader caches, and the numbers problem
Steam stores a game’s Windows environment and its compiled shaders in directories named after the game’s numeric ID, not its name:
~/.steam/steam/steamapps/compatdata/1091500/       <- a Proton prefix
~/.steam/steam/steamapps/shadercache/1091500/      <- its shader cache
Which is fine for Steam and useless for you. A Deck accumulates hundreds of these, and finding the one belonging to a particular game means knowing its ID.
The File Manager shows the game’s name against each numbered directory. Browse compatdata and you see the games rather than the numbers. That is the whole feature, and it turns an unusable directory into a readable one.
The number stays visible in grey next to the name, so you can still match it up against anything else that refers to the game by ID.
Reading the colours
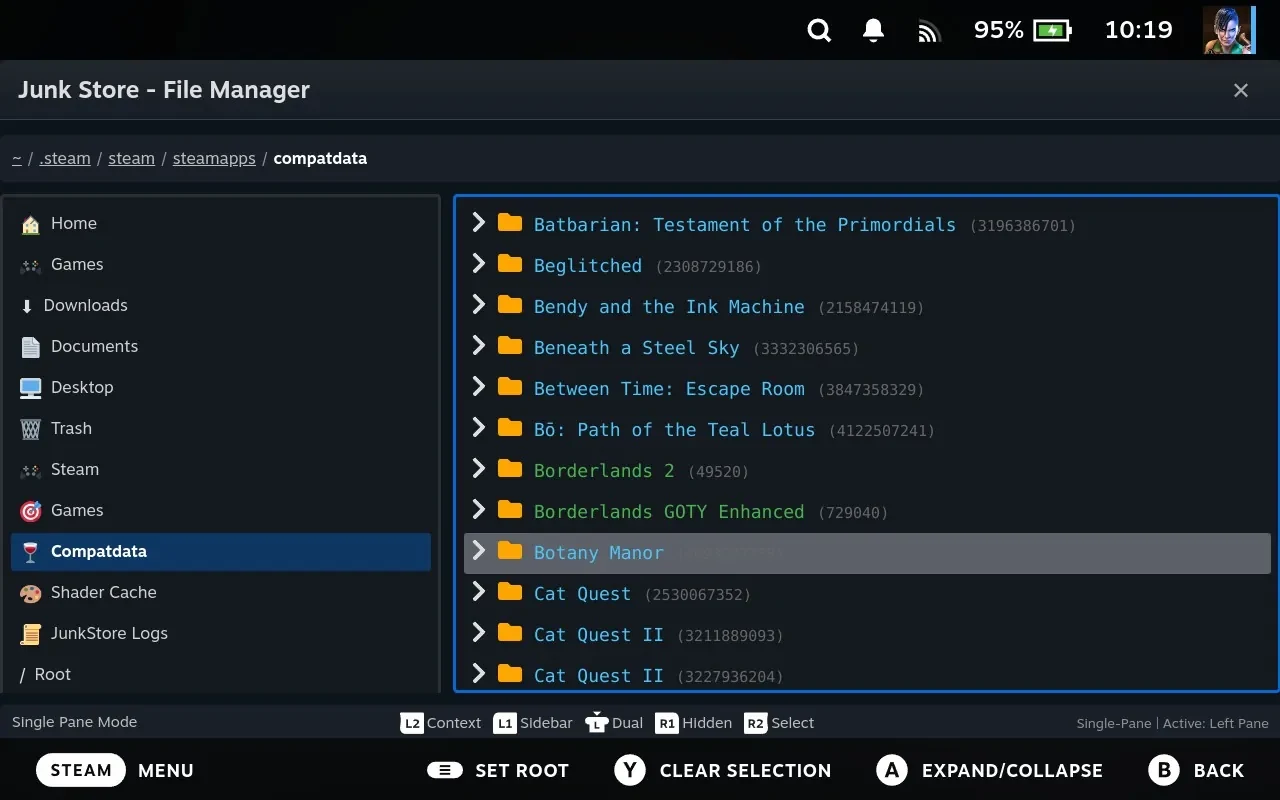
Names are coloured by what kind of thing they belong to, which tells you at a glance what you’re looking at:
| Colour | Means |
|---|---|
| Green | A game from your Steam library |
| Blue | A non-Steam game: something added as a shortcut, including anything Junk Store Pro installed |
| Yellow | A runtime rather than a game: Proton itself, and similar |
| Orange No Game badge, row dimmed | Nothing on this device claims it |
Yellow is the one not to delete. Runtimes are shared, so a yellow entry is in use by everything that runs through it, not by one game.
Two routes in, depending on what you want:
| Sidebar entry | Shows |
|---|---|
| Steam Proton Prefix | Straight to the prefix of the game you opened the File Manager from |
| Steam Shader Cache | Straight to that game’s shader cache |
| Compatdata | Every prefix on the device, named |
| Shader Cache | Every shader cache, named |
The first two appear only when the File Manager was opened from a game, and they save you identifying the number at all.
Orphans
A numbered directory with no matching installed game is an orphan: the game was uninstalled but its prefix or shaders were left behind.
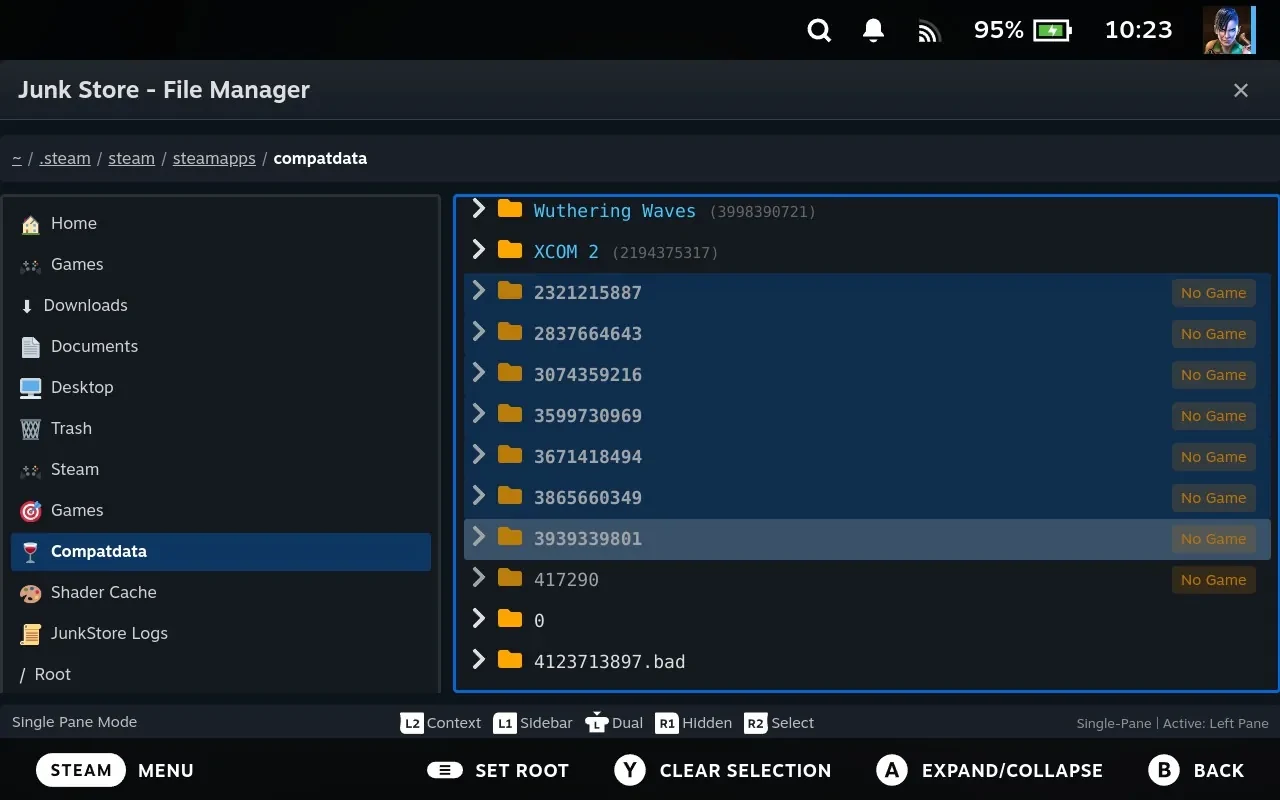
They’re easy to spot: an orphan has no name to show, so it stays a bare number, carries an orange No Game badge, and the whole row is dimmed. Scroll compatdata and they stand out from the named entries around them.
Their menu offers Move to Trash, you can browse the contents first if you want to know what you’re reclaiming first. Combined with Disk Usage this is a good answer to a Deck that has quietly filled up.
Check for saves before you delete a prefix
A Windows game usually keeps its saves inside its Proton prefix. That’s the fake Windows installation the game runs in, so anything it wrote to My Documents, AppData or its own folder is in there. An orphaned prefix is a game you uninstalled, and its saves are still sitting in it.
So an orphan isn’t automatically waste. Before deleting one, have a look inside for anything you want to keep. Saves are usually somewhere under:
<the numbered folder>/pfx/drive_c/users/steamuser/
with Documents, Saved Games and AppData below that being the usual suspects. Copy anything worth keeping somewhere else first.
This cuts both ways, and it’s the more useful direction: if you’ve lost saves for a game you reinstalled, this is where to look. Reinstalling often produces a new prefix, and the old one stays behind as an orphan with your saves in it. Find the orphan, dig into drive_c, and copy the saves back across.
Shader caches never hold saves, so orphaned shaders are safe to remove without checking.
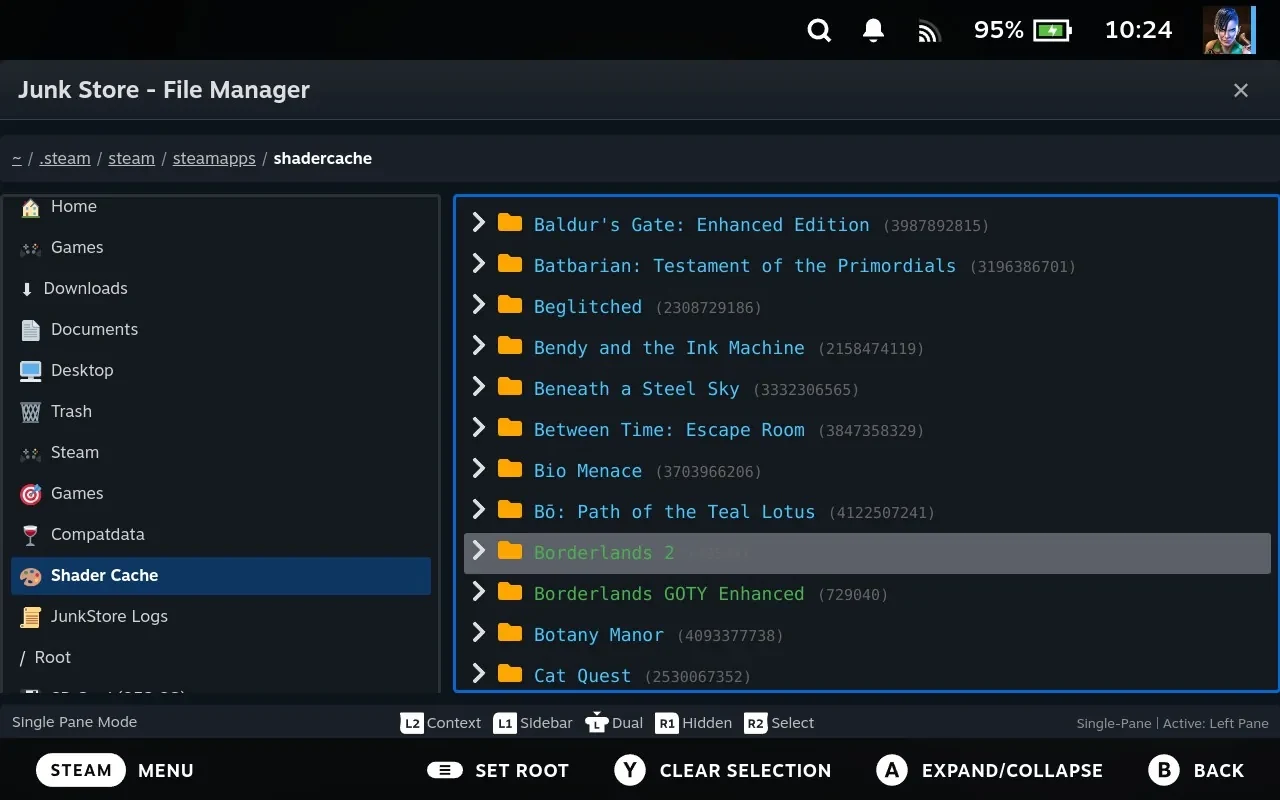
Once you’ve picked the orphans, the menu offers to move them to the trash and tells you how many it’s about to take.
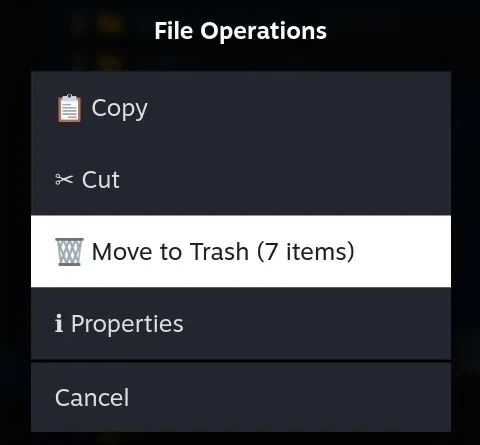
If a prefix is orphaned, the Steam entry that owned it is gone. That’s what the badge is telling you, and it’s why the saves inside are worth a look before it goes.
Over the network
Name resolution works on remote machines too. Browse another Deck’s compatdata and you get its game names, not its numbers, even though those games are installed over there and not here.
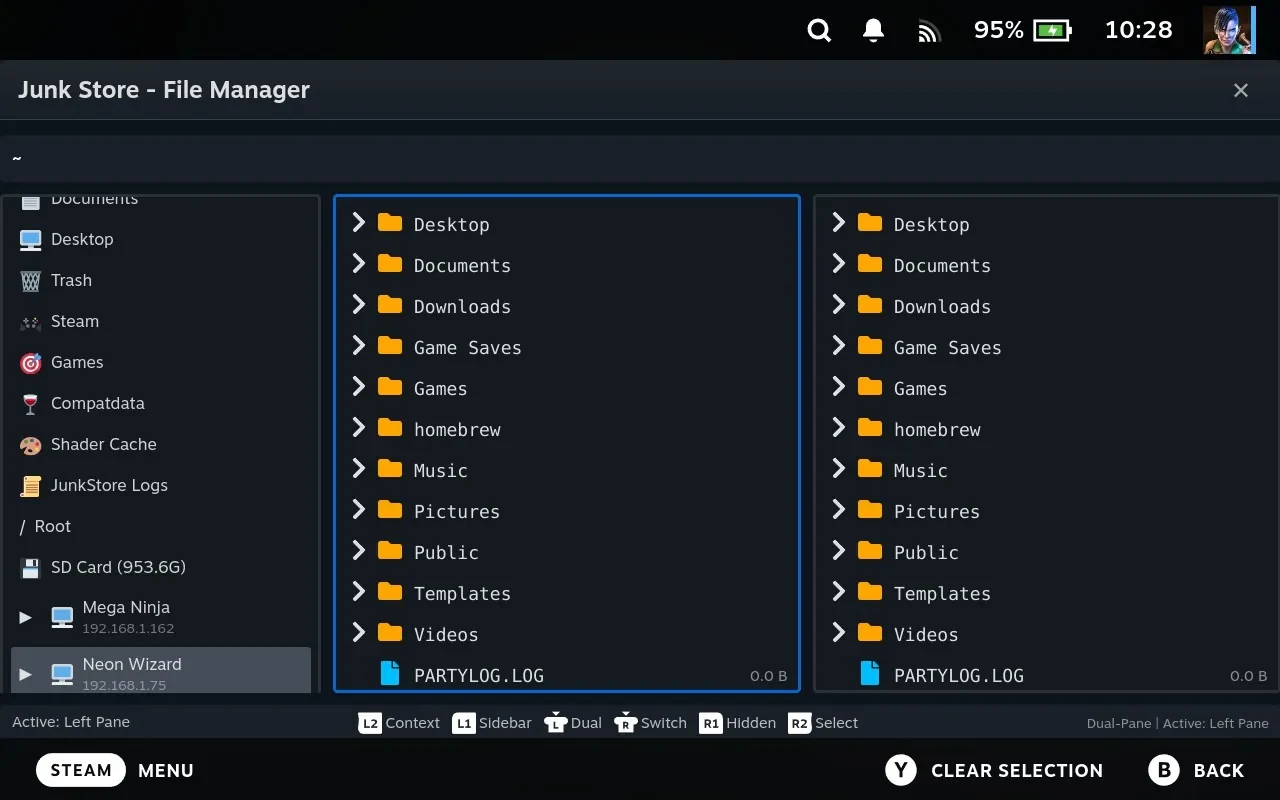
Junk Store Pro asks the other machine what it has installed, over the same SSH connection used for browsing. The remote machine’s sidebar carries the same Compatdata and Shader Cache entries as the local one.
This is what makes moving a game’s environment between Decks reasonable. Put the remote machine’s compatdata in one pane and yours in the other, find the game by name on both sides, and copy. Without the names you would be matching numeric directories by hand across two machines.
Names are fetched once per machine and remembered while the File Manager is open, so there is a pause the first time you browse a remote prefix directory and none afterwards. A remote machine whose Steam data can’t be read shows numbers, which is the same view you would have had anyway.
Related
- Driving the File Manager: The File Manager
- Viewers, disk usage and the sidebar: File Manager tools
- Every shortcut: File Manager reference