How to Install Junk Store Pro with the Installer
One file installs Junk Store Pro, signs you in and generates your store tabs
The installer does the whole job, not just putting the program on your Deck. It signs you in, fetches the right build, installs it, and generates your store tabs for you. Take this route unless you have a reason not to.
The install is the one part of Junk Store Pro you do in Desktop Mode. Everything after it happens on the controller, in Game Mode.
You'll need your portal account. That's where the build comes from, and it's what Junk Store Pro checks your licence against.
Would rather do it yourself? Installing manually covers the other route.
- Go to Desktop Mode
Press the Steam button, then Power, then Switch to Desktop.
- Log in to the portal and press Download Installer
Go to the portal and sign in. If you have forgotten your password, the login page has a reset option. Make sure you check your spam folder if it doesn't show in your inbox.
On Junk Store Pro Files, the green Download Installer button under Quick Install is the one you want. Ignore the list of builds underneath it. Those are for installing manually, and the installer fetches the right build for you anyway.
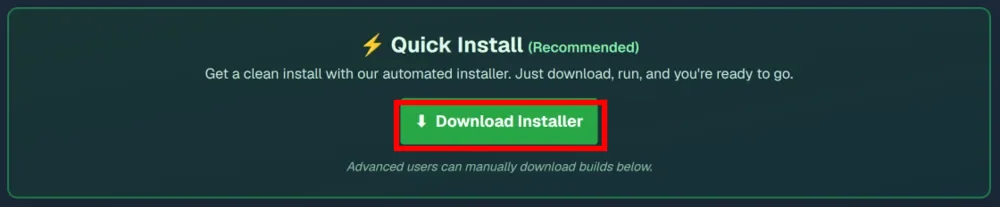
It's a tiny file, a couple of hundred bytes, so the download is instant.
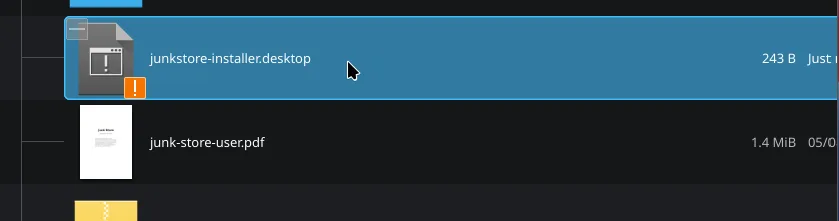
- Drag it onto your Desktop
Open Dolphin, go to Downloads, and drag the file onto your Desktop. It shows up as Install JunkStore with an orange warning badge on the icon, which is normal for a file that hasn't been run yet.
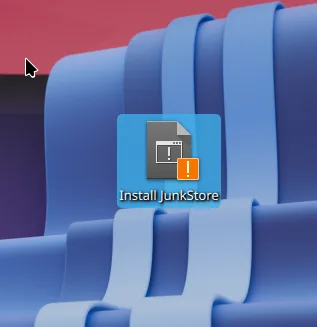
- Double-click it and choose Continue
KDE asks whether you trust the program before it runs. Press Continue.
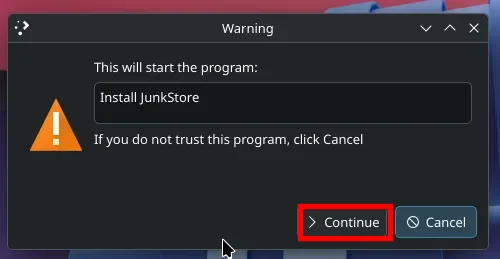
If double-clicking does nothing, or opens the file in a text editor, right-click it and choose Properties, then Permissions, and tick the box to allow executing the file as a program.
- Sign in with your portal account
The installer opens with a login window of its own. Use the same email and password as the portal.
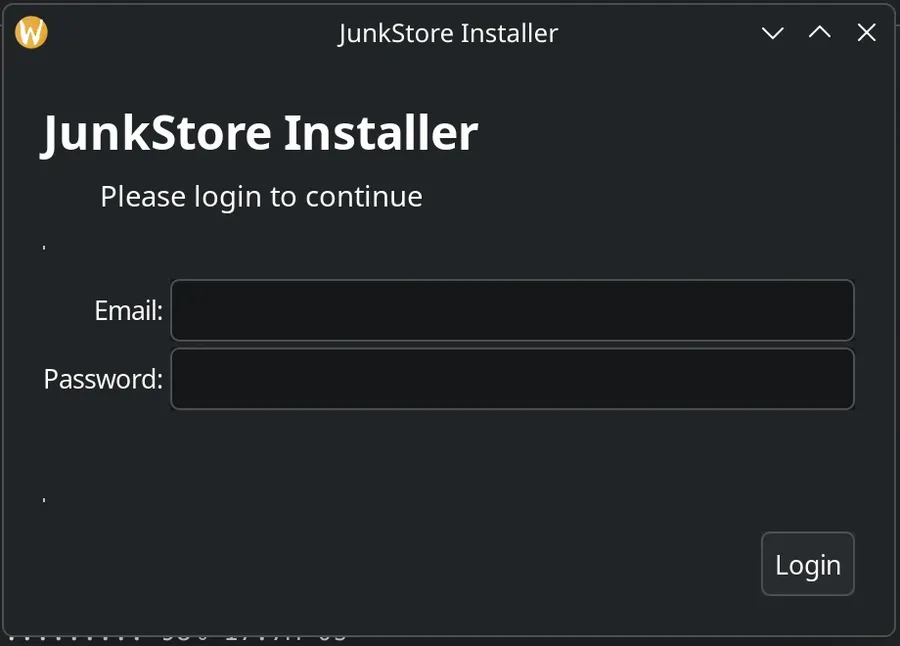
This sign-in carries through, so you won't be asked to sign in to Junk Store Pro again when you get back to Game Mode.
- Step 1 of 3: pick your options
Both channels default to stable, which is generally the one almost everyone will want on first install.
Control What it does Build Channel Which releases of Junk Store Pro itself this Deck takes Extension Channel The same, for the stores and tools that run on it Nothing here is permanent. The channels are the same settings you'll find later in Junk Store Pro under Settings, so you can change your mind.
The two tickboxes
These are worth understanding rather than clicking past, because the first one decides which clients fetch and install your games.
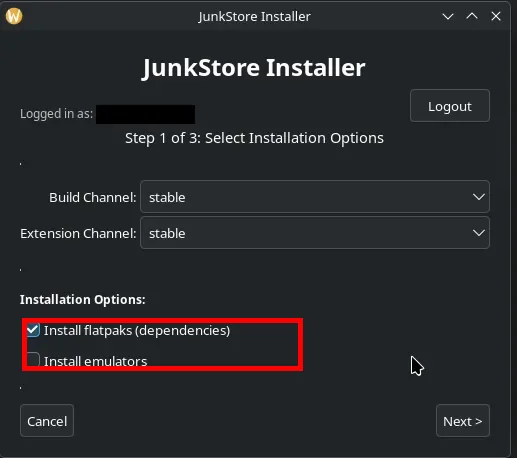
Install flatpaks (dependencies) installs the legacy flatpak clients: Legendary for Epic, gogdl for GOG and nile for Amazon. It arrives ticked, so leaving the dialogue alone gives you these.
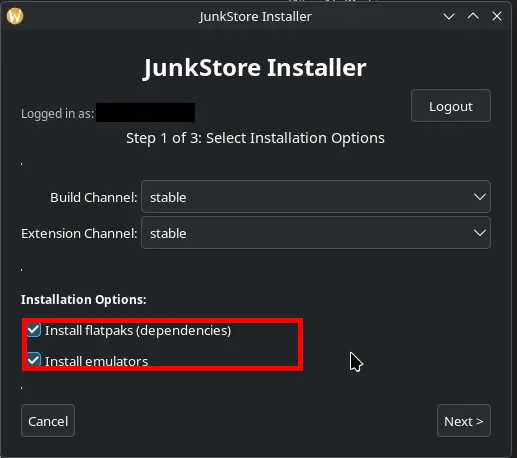
Install emulators adds the emulator flatpaks, for running retro and emulated games through Junk Store Pro. It arrives unticked. Tick it only if you're planning to use them, since it's a fair bit of extra software to put on your Deck otherwise.
The new clients
We've built our own clients for Epic, GOG and Amazon, the same way we did for itch. They're faster than the legacy clients, and they're the only way to use more than one account with the same store.
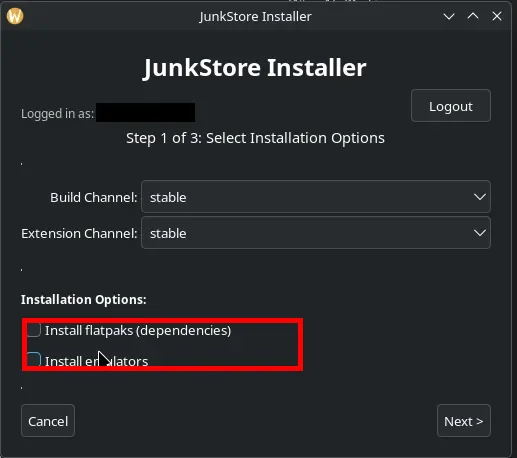
To use them, untick Install flatpaks. They aren't the default yet, so this route costs you one small step in Game Mode, which has to be done before you sign in to any store. It's covered in step 10 below, and it's a single switch per store.
There's one trade-off. The experimental cloud saves don't work with the new clients. If you're relying on those, stay on the legacy clients and leave the tickbox as it is.
So the choice is between leaving the default alone and having it work straight away, or unticking and doing one extra thing for faster, multi-account clients.
You're not stuck with whichever you pick. If you take the default now and fancy the new clients later, that's fine, and there's nothing to reinstall. Switching to the new clients covers it in a few steps.
Default: flatpaks ticked. The legacy clients. Nothing extra to do later.
Nothing ticked: the new clients. Faster, and multiple accounts per store. Needs the switch in step 10 before you sign in.
Both ticked: legacy clients plus emulators. The default, with the emulator flatpaks added.
Press Next.
- Step 2 of 3: let it run
This is the part that does the work. It fetches the build, downloads it, then runs the install, and shows you what it's doing as it goes. There's nothing to press.
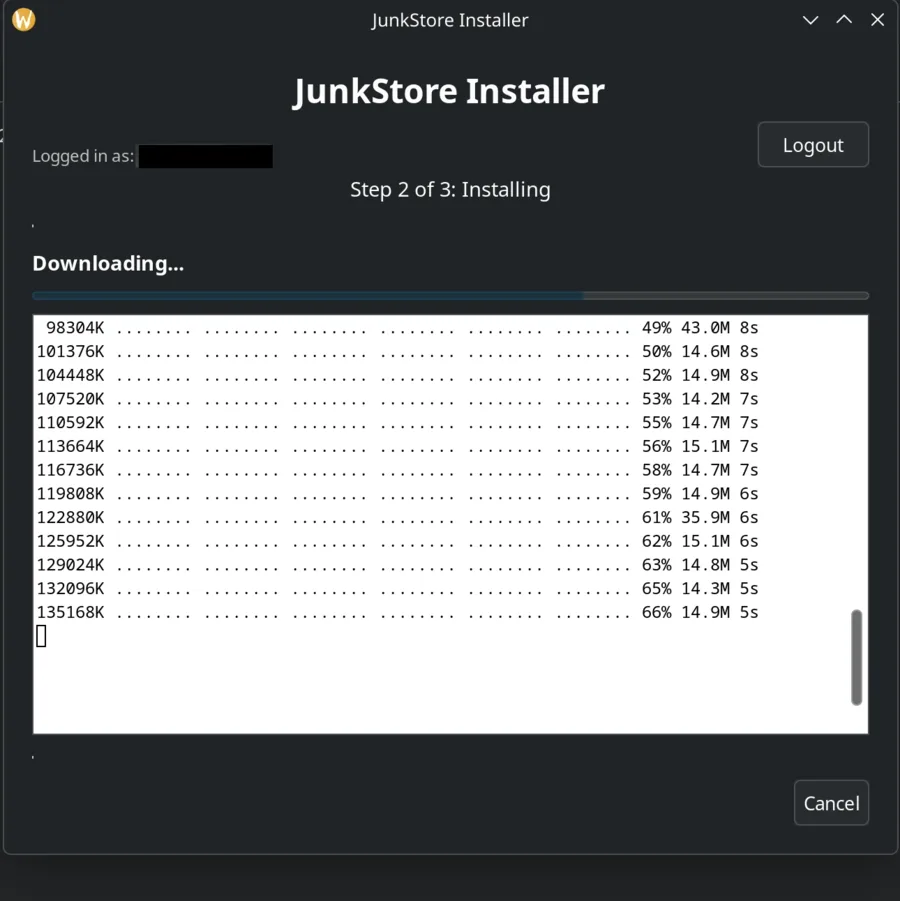
When it's done it moves itself on to step 3.
- Step 3 of 3: choose your stores
Tick the stores you want and press Generate. The installer creates the tabs for you, which is the step you'd otherwise be doing by hand later.
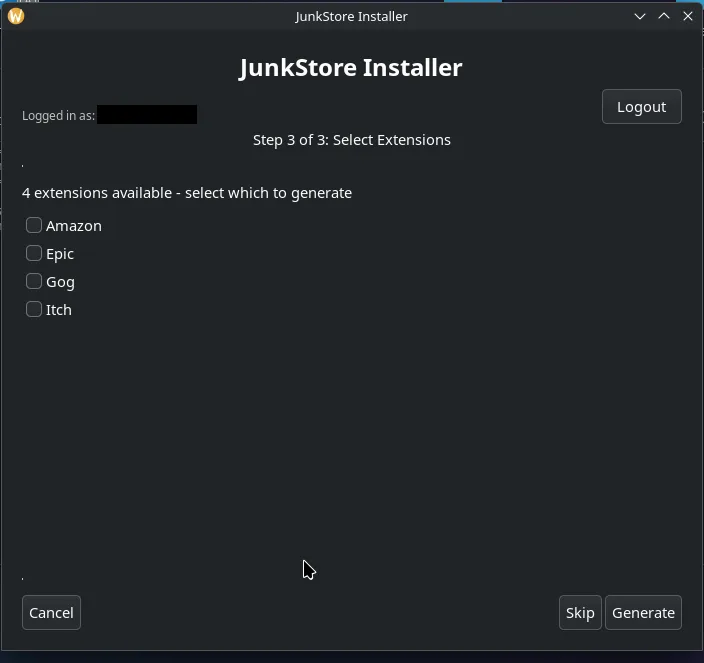
You can press Skip and set them up yourself later if you'd rather. That means going through the Generator by hand: downloading the presets, then generating each store you want.
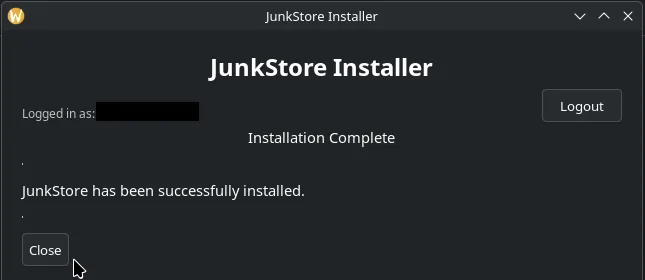
"Installation Complete" comes up once the stores have been generated, so it's the last thing you see rather than something that appears part way through. Once it's on screen you're finished in Desktop Mode, and you're safe to press Close.
- Back to Game Mode
Return to Game Mode and tap SELECT to open Junk Store Pro. That's the button above the D-pad, the one Steam labels View. On a PC, Ctrl+3 does the same thing.
Your tabs are already there, one for each store you generated.

- Using the new clients? Turn "Use Legacy Clients" off first Only if you unticked Install flatpaks in step 1. If you left the tickbox as it came, skip straight to signing in. Do this before you sign in to any store, not after.
The new clients are installed, but the stores don't use them until you say so. Use Legacy Clients is that switch, and there's one per store, so repeat this on each tab you generated.
It lives on the store's own settings, which you get to from the cog at the top of the tab. It's in the row of buttons to the right of the search box, between the sliders and the shop icon.

Sliders and cog mean the same thing throughout Junk Store Pro: sliders are actions that happen, the cog is settings that stay. You want the cog.
Open it and scroll to the bottom of Advanced.
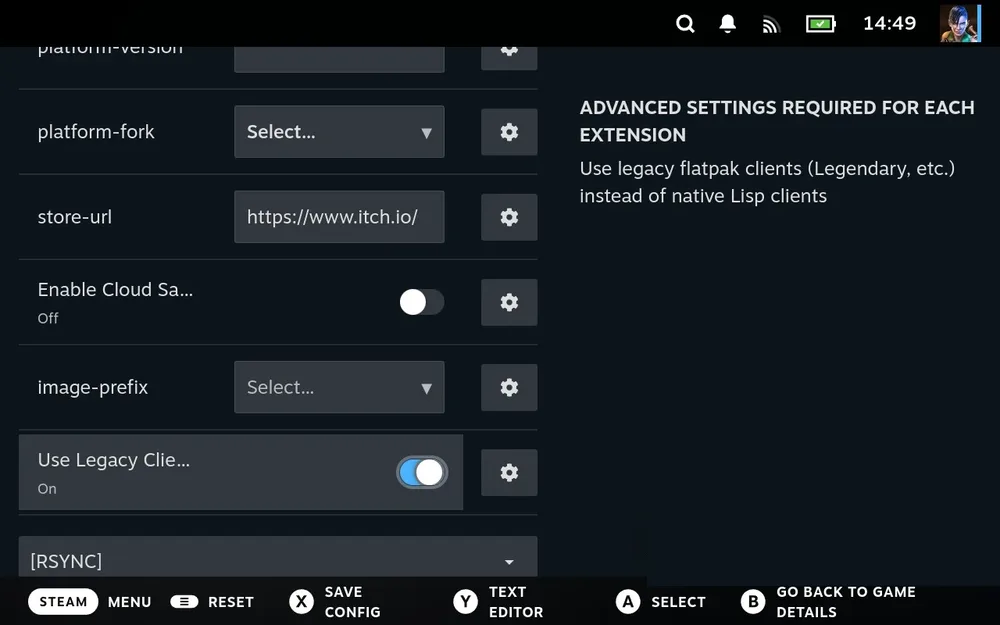
On, it looks like this. This is the one you don't want:

Tap it so it reads Off:

That's it. Because you're doing this on a fresh install, before signing in, there's nothing cached to clear and no library to rebuild. Do it on each store, then carry on to signing in.
- Sign in to each store
Open each tab and sign in to the store itself. The library fills in from there.

Give it a few minutes. The first sync builds a database for each store, so a large library takes a while to appear. Nothing is wrong if a tab sits empty at first.
What you should end up with
- Junk Store Pro opens on SELECT
- A tab for each store you ticked
- Each tab signed in, with its library showing
If one of those is missing, the usual cause is an install that was cut short at step 7.
If you went for the new clients and a store won't fetch anything, check Use Legacy Clients is actually off on that tab. It's per store, so it's easy to set on one and forget the rest.
Coming from the Decky plugin?
The import is automatic. It happens the first time you launch Junk Store Pro, and your games sync across as you open each tab. Saves and settings come with them. Expect it to take a while, since it rebuilds the database for each store.
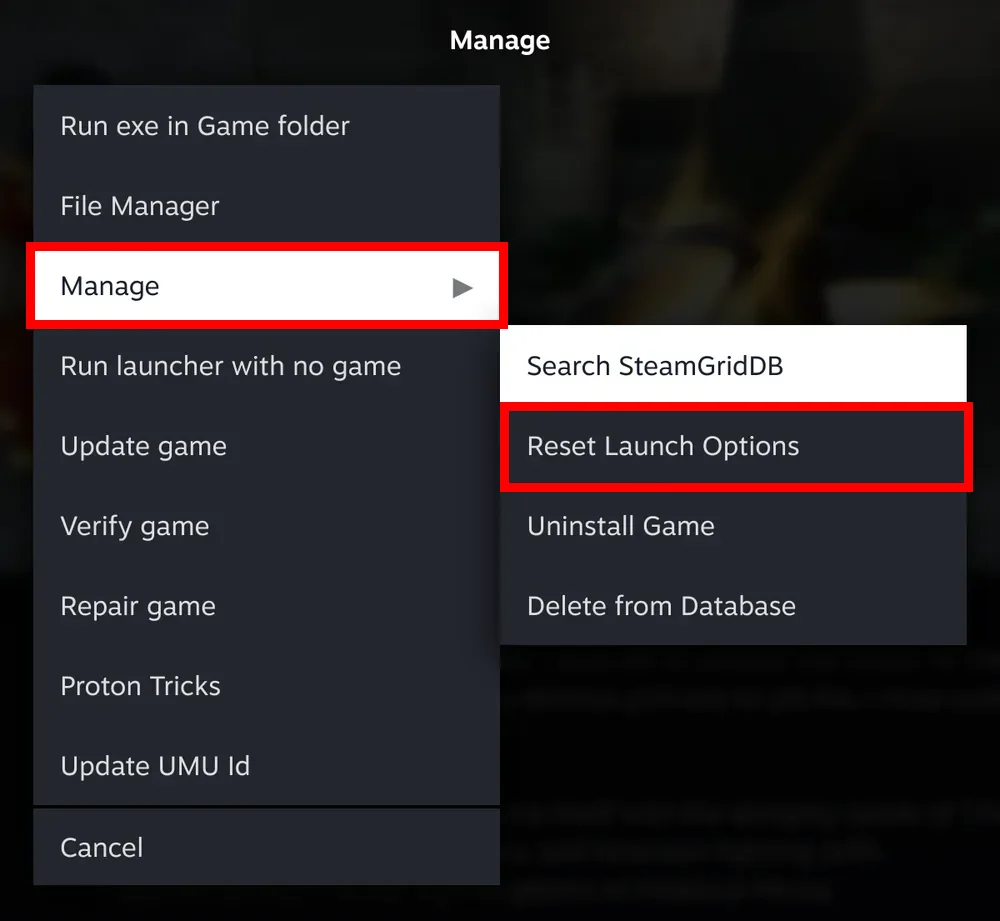
One step is manual: reset launch options once for each game. It completes the migration, and until you do it a game that was already installed won't play.
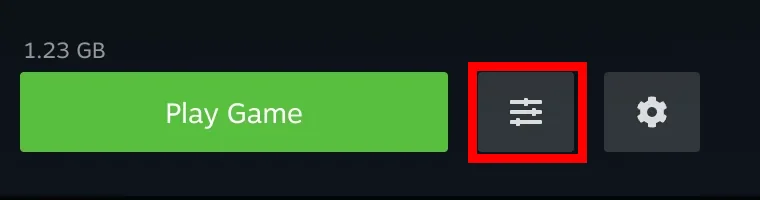
On the game's page, press the sliders button beside Play Game.
Then choose Manage, and Reset Launch Options from the submenu that opens beside it.
Removing it again
Two steps, in this order.
First, Settings, then Uninstall Dependencies. That removes the supporting software Junk Store Pro put in place, which the uninstall script doesn't touch. Do it first, because the button lives inside Junk Store Pro and you can't reach it once that's gone.
Then run the uninstall script from Konsole in Desktop Mode:
~/.local/share/junkstore/uninstall.shYour own data stays behind, deliberately, at ~/.config/junkstore/. Settings, databases and any overrides you wrote are all in there, so a reinstall picks up where you left off. If you want it gone, delete the folder yourself.
Non-Steam shortcuts stay in Steam. Uninstall the games first, or you'll be tidying up entries by hand afterwards.
More in the manual
The Junk Store Pro user manual covers the why behind these screens, if you want the detail rather than the steps.
- Signing in to Junk Store Pro - The account that proves your copy is licensed, and what it is not
- The buttons - Taking an update once you are installed
Stuck or need help?
Most issues are quick to sort out. Here's where to start.
- Executable won't run - If nothing happens when you double-click the installer
- Junk Store isn't working after installation - If it installed but won't run properly
- I don't have any extensions - If you skipped step 8, or no tabs appeared
- Troubleshooting - All Pro version issues
Want the full detail? The user manual covers every screen and setting in Junk Store Pro, and is worth a look if you'd rather read up than hunt through fixes.
Still stuck? Open a support ticket right in the Support Portal
For game-specific issues, feedback, or just a chat, you'll find us on:
On Discord, head to the #js-pro-support channel.