How to Install Junk Store Pro Manually
The manual route: download the build from the portal and set up your store tabs yourself
Most people should use the installer instead. It does all of this for you, including generating your store tabs. This page is the manual route, for when you'd rather do it yourself or the installer has given you trouble.
Prefer video? Watch on YouTube
- Go to Desktop Mode
Press the Steam button → Power → Switch to Desktop.
- Log into the portal and download the latest build
Go to the portal and sign in. If the password won't come to you, the login page has a reset option.
Take the first file in the list, marked Recommended and LATEST.
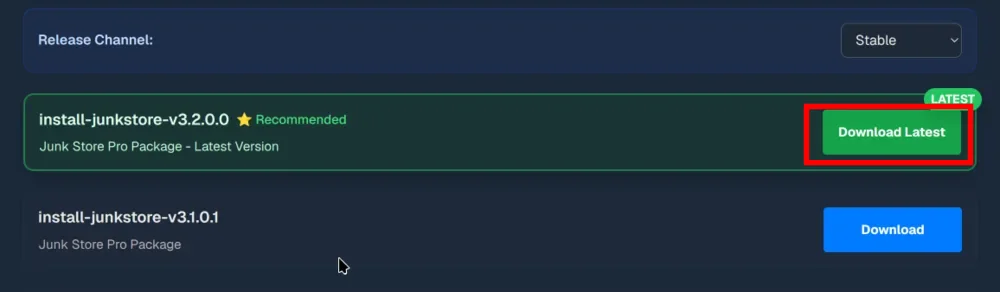
This is where you pick your channel. There's no channel setting later in this method, so the file you choose here decides which release you get. Use the Release Channel dropdown to switch between them, then take the first file in the list.
- Make it executable
It arrives without permission to run, so give it that first. Open Dolphin and go to Downloads.

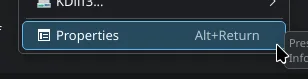
Right-click it and choose Properties.
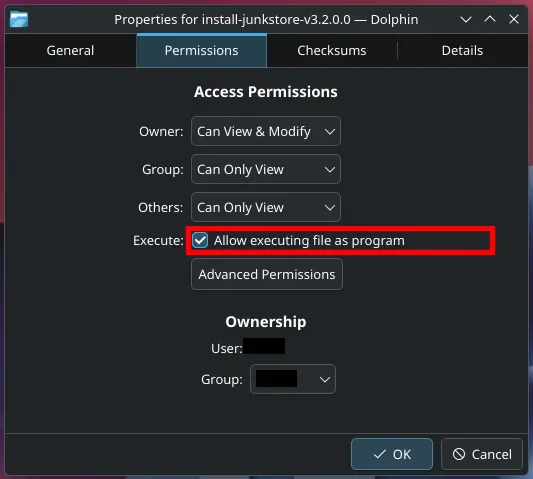
Open the Permissions tab, tick Allow executing file as program, then press OK.
- Run it
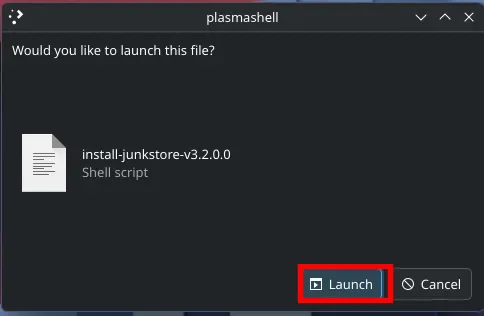
Double-click the file. KDE asks what to do with it: choose Launch, not one of the editor options.
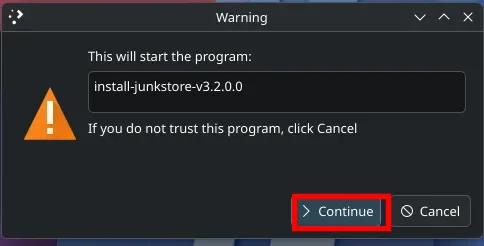
Then confirm you trust it with Continue.
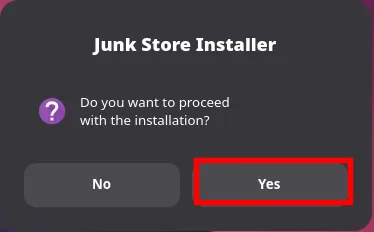
The installer asks once more before it starts. Press Yes.
If double-clicking does nothing, or opens the file in a text editor, the permission in the previous step didn't take. A custom icon theme can also break the dialogue the installer uses, in which case switching to the default theme for the install is the usual fix.
- Wait for it to finish
A Configuring Junk Store window opens and logs what it's doing. You'll see it fetching the flatpak clients as it goes.
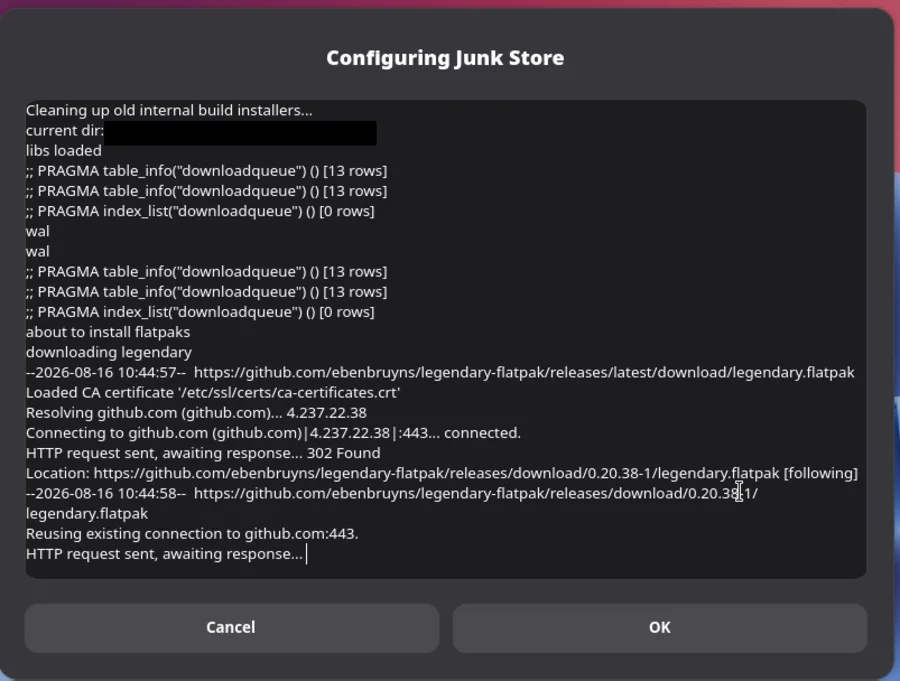
You don't get asked about flatpaks or emulators here. This method installs the lot: the legacy flatpak clients and the emulator flatpaks both go on by default, with no tickboxes to say otherwise. That's the main thing the installer does differently, where you get to choose. There's a note further down on what to do if you didn't want them.
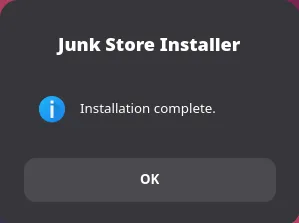
⚠️ CRITICAL: This step takes a while. You MUST wait until the window says "Installation complete" before pressing OK. Pressing OK too early cancels the installation, and it fails quietly, so what you end up with looks like a Junk Store Pro that doesn't work rather than one that never finished.This is what finished looks like. The log ends with Installation complete. You can close this window now.
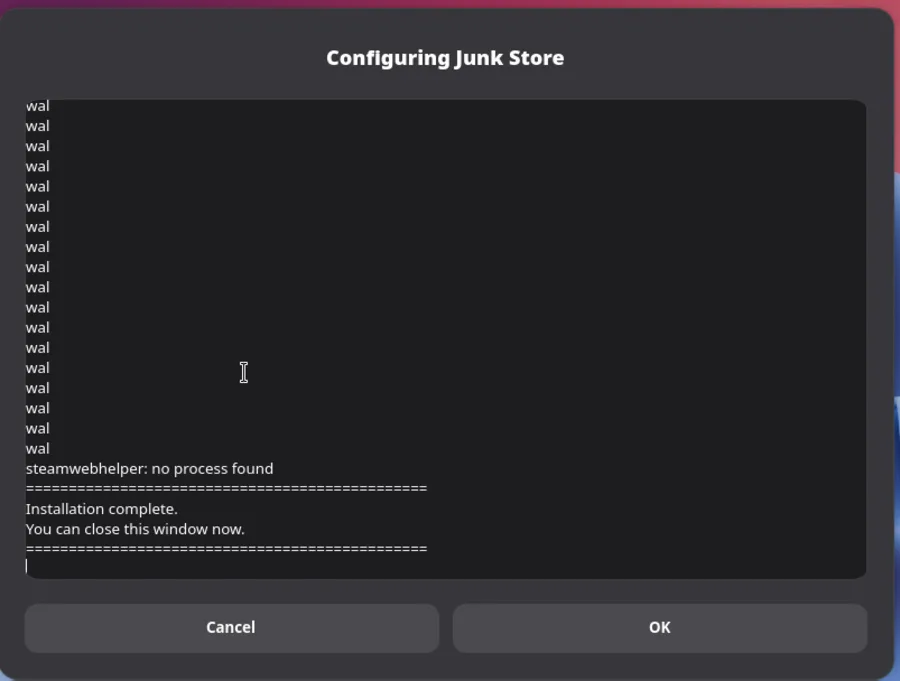
A confirmation box appears as well. Once you have both, you're safe to press OK.
- Back to Game Mode and sign in
Return to Game Mode and tap SELECT to open Junk Store Pro. That's the button above the D-pad, the one Steam labels View. On a PC, Ctrl+3 does the same thing.
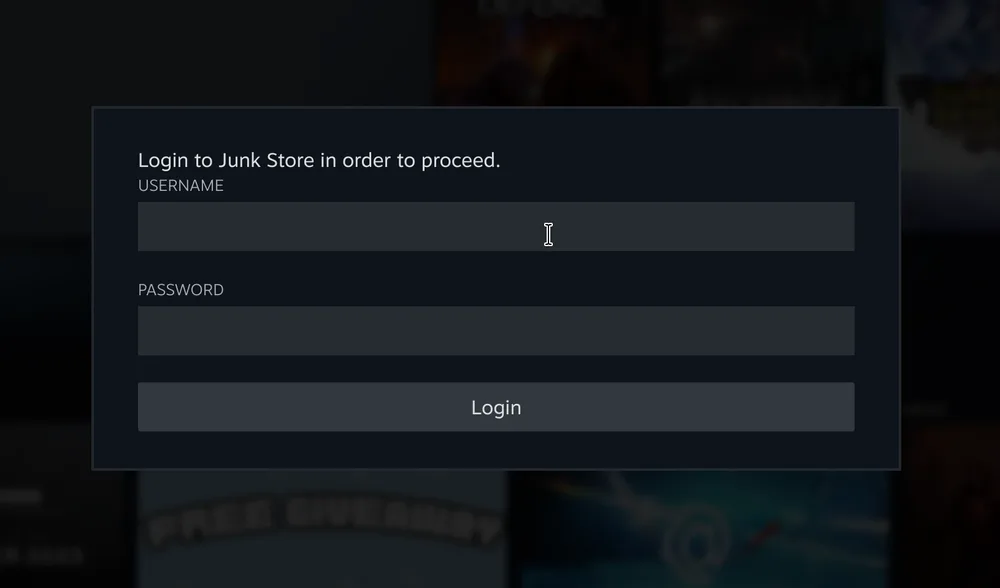
Sign in with your portal credentials, the same account as step 2. This step only exists on the manual route. The installer signs you in on your behalf.
- Generate your stores
A fresh install has no store tabs, so you choose which ones to create. This is the other step the installer does for you.
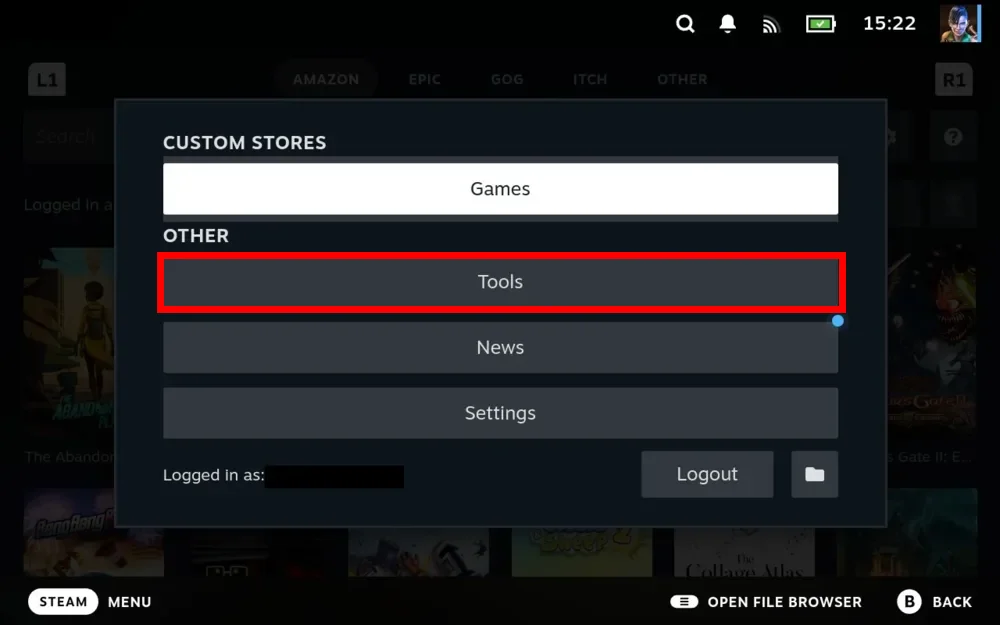
Make sure you're signed in from the previous step, or the presets won't download. Scroll down to Tools, then Generator.
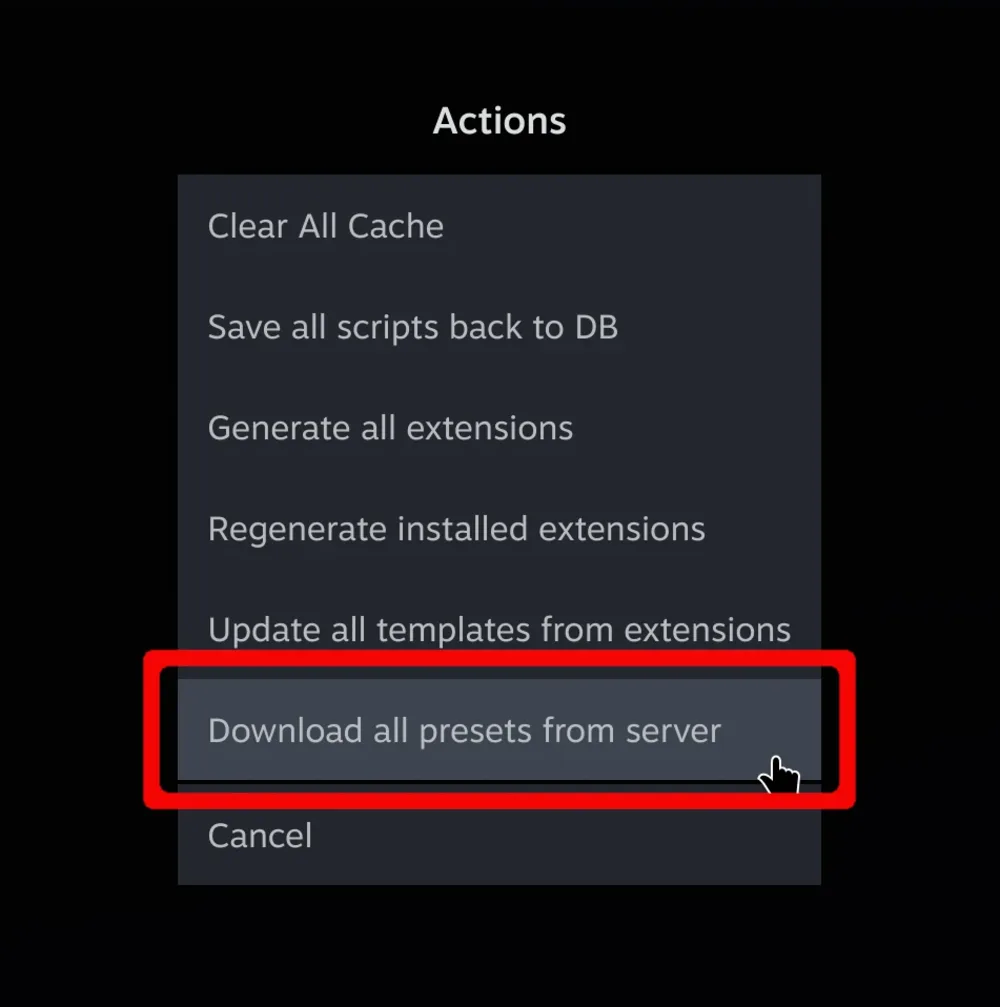
Open the sliders menu to the right of the search bar.

Choose Download all presets from server.
Then press the download button on each store you want.
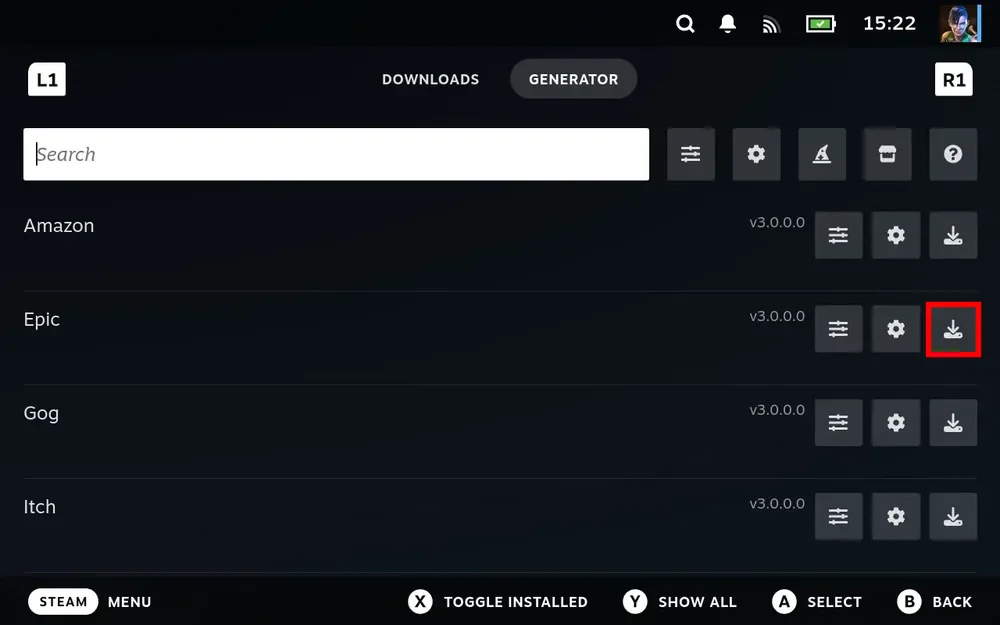
A tab appears for each one.

- Sign in to each store
Open each tab and sign in to the store itself. The library fills in from there.

Give it a few minutes. The first sync builds a database for each store, so a large library takes a while to appear. Nothing is wrong if a tab sits empty at first.
What this method decided for you
Because there were no tickboxes at install time, you now have the legacy flatpak clients and the emulator flatpaks on your Deck whether you wanted them or not. Both are sortable from Game Mode.
To use the legacy clients, turn Use Legacy Clients on in Junk Store Pro. It's per store, on the cog at the top of each tab, at the bottom of Advanced.
If you don't want the flatpaks, uninstall them. There's no harm in leaving them sitting there beyond the disk space, but there's no point keeping them if you're not going to use them.
The installer asks about both of these up front, which is why it's the easier route for most people.
Coming from the Decky plugin?
The import is automatic. It happens the first time you launch Junk Store Pro, and your games sync across as you open each tab. Saves and settings come with them. Expect it to take a while, since it rebuilds the database for each store.
One step is manual: reset launch options once for each game. It completes the migration, and until you do it a game that was already installed won't play.
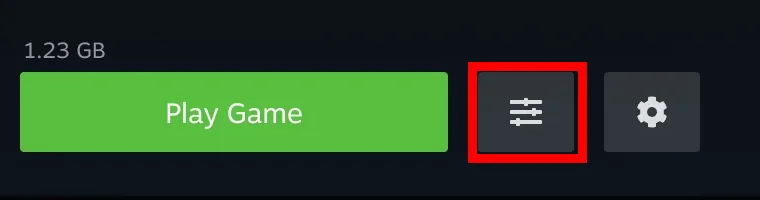
On the game's page, press the sliders button beside Play Game.
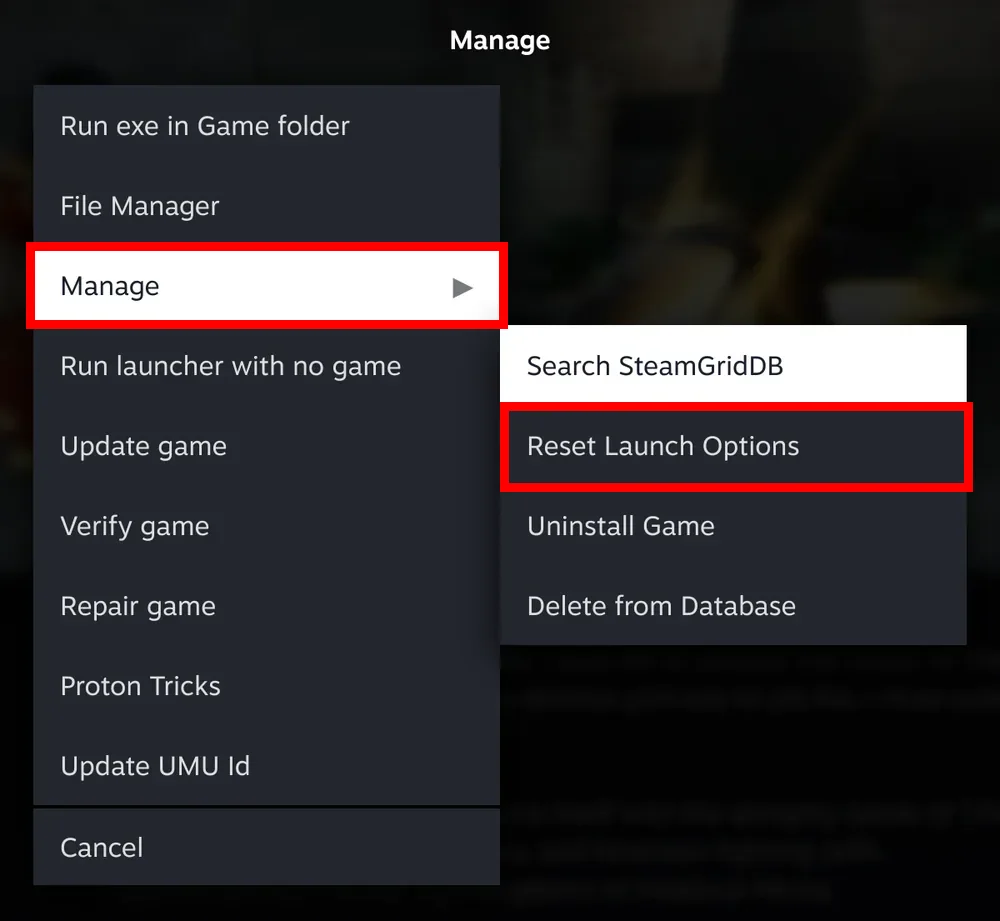
Then choose Manage, and Reset Launch Options from the submenu that opens beside it.
More in the manual
The Junk Store Pro user manual covers the why behind these screens, if you want the detail rather than the steps.
- Signing in to Junk Store Pro - The account that proves your copy is licensed, and what it is not
- The buttons - Taking an update once you are installed
Stuck or need help?
Most issues are quick to sort out. Here's where to start.
- Installation not completing - If the installer seems stuck
- Executable won't run - If Junk Store won't start
- FAQ - General usage questions
- Troubleshooting - All Pro version issues
Want the full detail? The user manual covers every screen and setting in Junk Store Pro, and is worth a look if you'd rather read up than hunt through fixes.
Still stuck? Open a support ticket right in the Support Portal
For game-specific issues, feedback, or just a chat, you'll find us on:
On Discord, head to the #js-pro-support channel.