How to Switch to the New Clients in Junk Store Pro
Move a store off the legacy flatpak clients onto ours, for faster refreshes and multiple accounts
We've built our own clients for Epic, GOG and Amazon, the same way we did for itch. If you're still on the legacy flatpak clients, this is how you move across.
Difference Between the Clients
Two things, mainly. Ours are quicker, which you'll notice most when refreshing a library. And they let you use more than one account with the same store, which the old ones could never do.
Otherwise there's not much to weigh up. Your games stay put and nothing gets reinstalled, so it's a setting rather than a migration.
Switching a store over
There's one switch per store, so repeat this on each tab you want moved.
- Turn Use Legacy Clients off
It lives on the store's own settings, which you get to from the cog at the top of the tab. It's in the row of buttons to the right of the search box, between the sliders and the shop icon.

Sliders and cog mean the same thing throughout Junk Store Pro: sliders are actions that happen, the cog is settings that stay. You want the cog.
Open it and scroll to the bottom of Advanced.
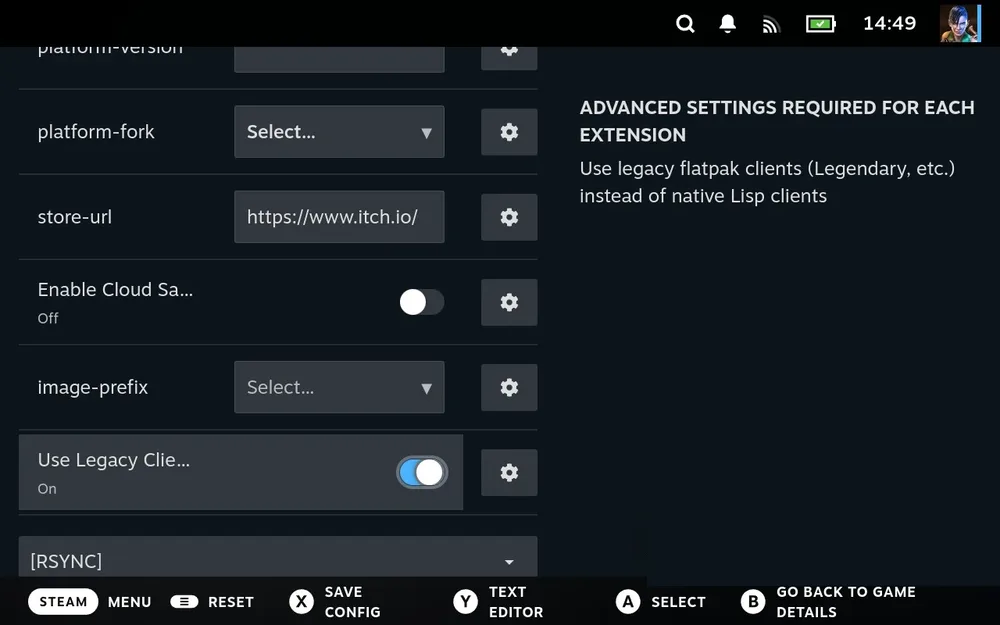
On, it looks like this. This is the one you don't want:

Tap it so it reads Off:

- Clear the store's cache
Open the sliders menu on that tab and choose Clear All Cache. That throws away what the store has remembered locally, including its note of whether you're signed in, so it works it out again from scratch.
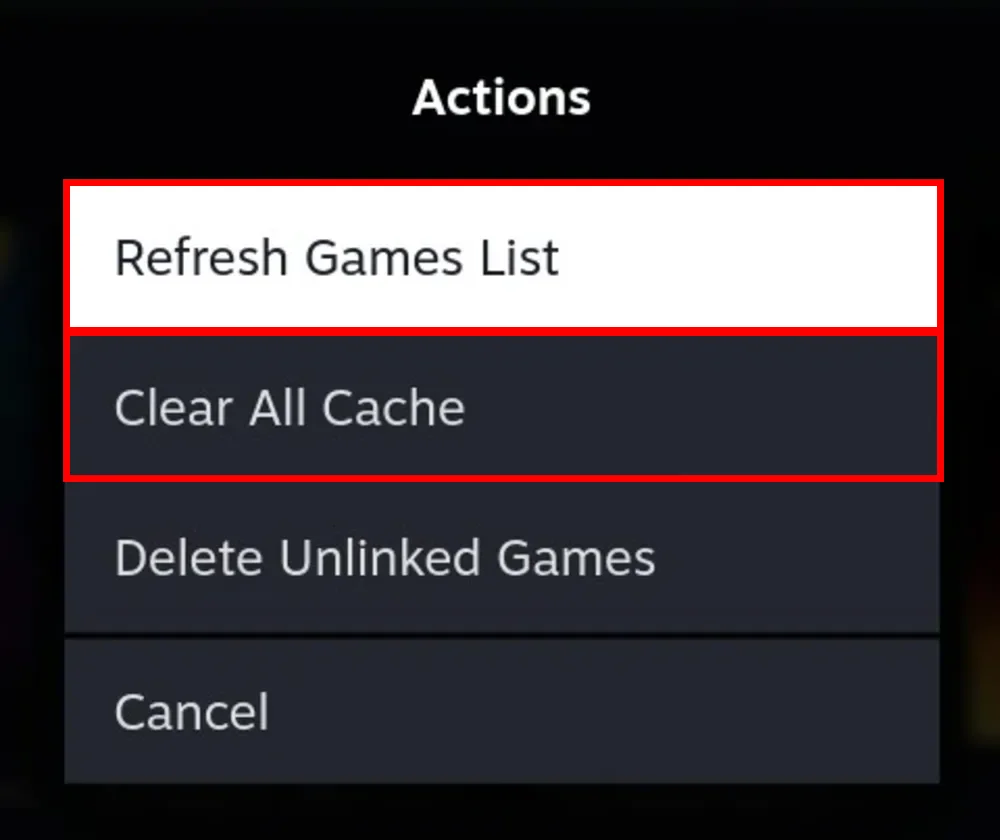
- Refresh the games list
Open the sliders menu again and choose Refresh Games List.
This takes a while on a big library, and it isn't stuck. Start it and leave it alone.
- Move to another tab and back
That's what triggers the swap. Until you do it, the store carries on as it was.
Doing it at install time instead
If you're setting up a Deck from scratch, you can start on the new clients rather than switching later. Untick Install flatpaks (dependencies) at step 1 of the installer, then turn Use Legacy Clients off on each tab before you sign in to any store.
None of the cache clearing or refreshing above applies in that case, because there's nothing cached yet and no library to rebuild. Installing with the installer covers it in place.
More in the manual
The Junk Store Pro user manual covers the why behind these screens, if you want the detail rather than the steps.
- Legacy clients - What the switch changes, and what you give up
- Refresh games list - How refreshing works on the supplied clients
Stuck or need help?
Most issues are quick to sort out. Here's where to start.
- Games not showing - If a library looks empty after switching
- Troubleshooting - All Pro version issues
Want the full detail? The user manual covers every screen and setting in Junk Store Pro, and is worth a look if you'd rather read up than hunt through fixes.
Still stuck? Open a support ticket right in the Support Portal
For game-specific issues, feedback, or just a chat, you'll find us on:
On Discord, head to the #js-pro-support channel.