How to Fix the NIL Path Error When a Game Won't Launch
When the usual fixes don’t shift the NIL path error, set the install path and executable by hand
A NIL path error means Junk Store doesn't have an install folder set for the game. Usually a reset, a repair or a reinstall sorts it. Every now and then none of them do, and you'll need to fill in the missing details by hand. Here's how.
What the Error Looks Like
You'll get this either as soon as the install finishes, or when you hit Play:
Unhandled exception in backend
Default pathname NIL is not an absolute pathname
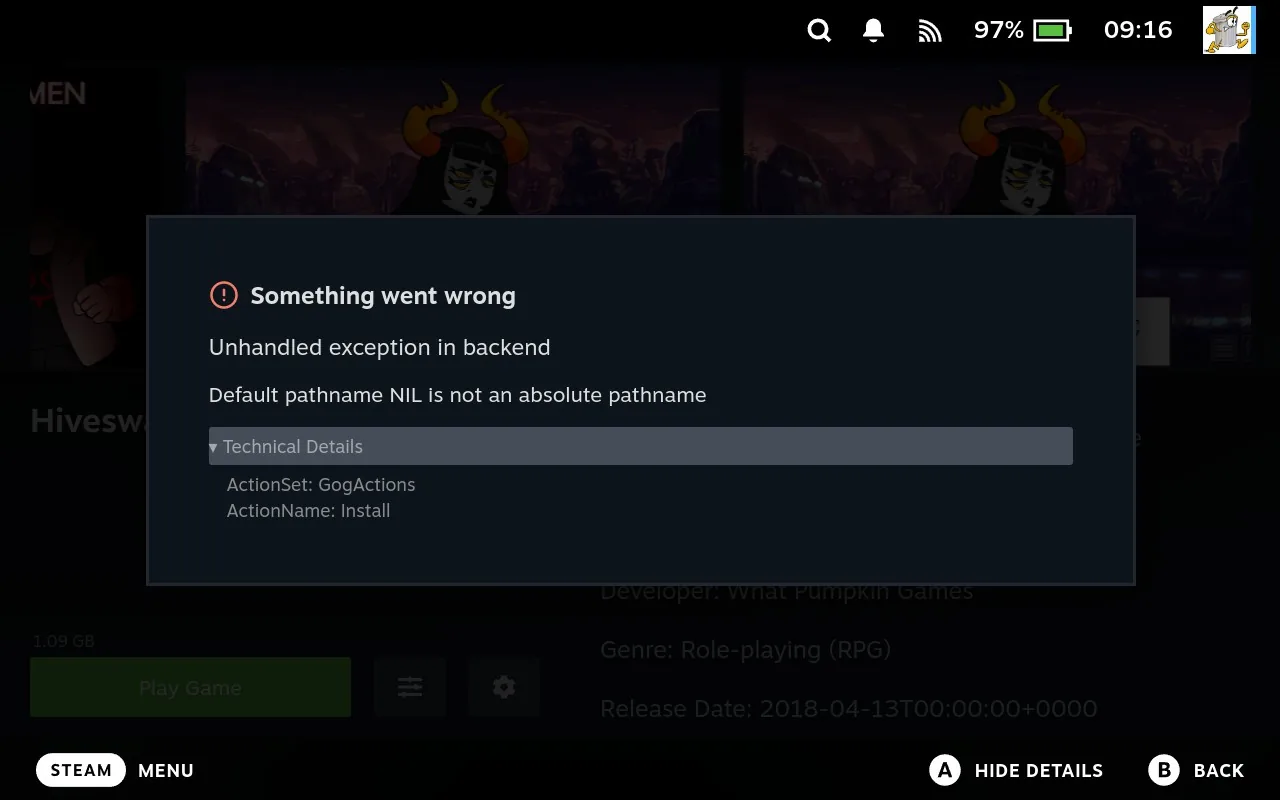
It boils down to one thing: the game's install folder isn't set. The files may well be sitting on your Deck, but Junk Store has no record of where they went or what to run, so it has nothing to launch.
Try the Easy Fixes First
This error turns up for a few different reasons, and most of the time the automated tools clear it without any fuss. Work through these before you go any further:
- Reset Launch Options, under sliders menu > Manage
- Verify game from the sliders menu
- Repair game from the sliders menu
- Reinstall the game
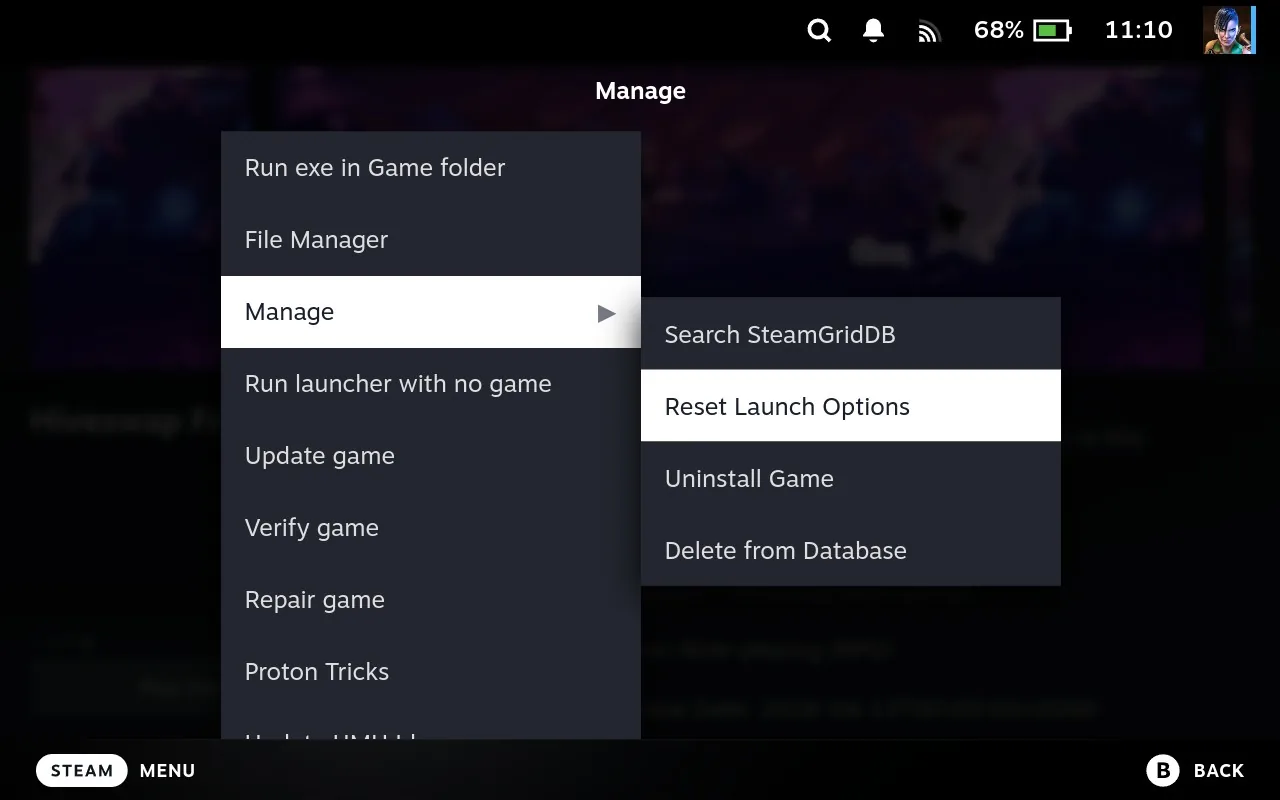
Any one of those will often set the install folder and put things right. Start with Reset Launch Options, since it's the quickest and it puts the game's configuration back to default.
If That Doesn't Work
If the error keeps coming back after all of those, none of the automation is getting there and you'll need to sort it yourself. That means telling Junk Store the two things it's missing: where the game is installed, and which executable to launch.
Step 1: Set the Install Path
- Open Game Details
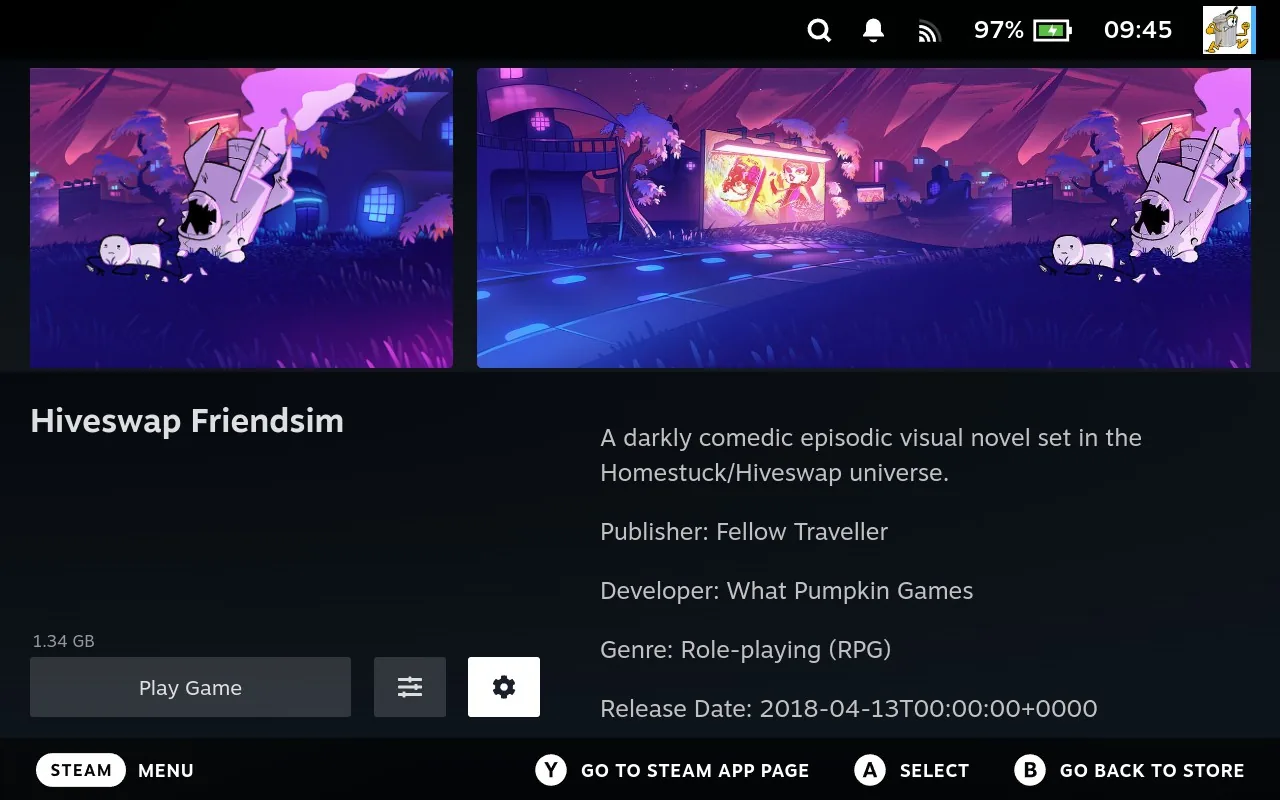
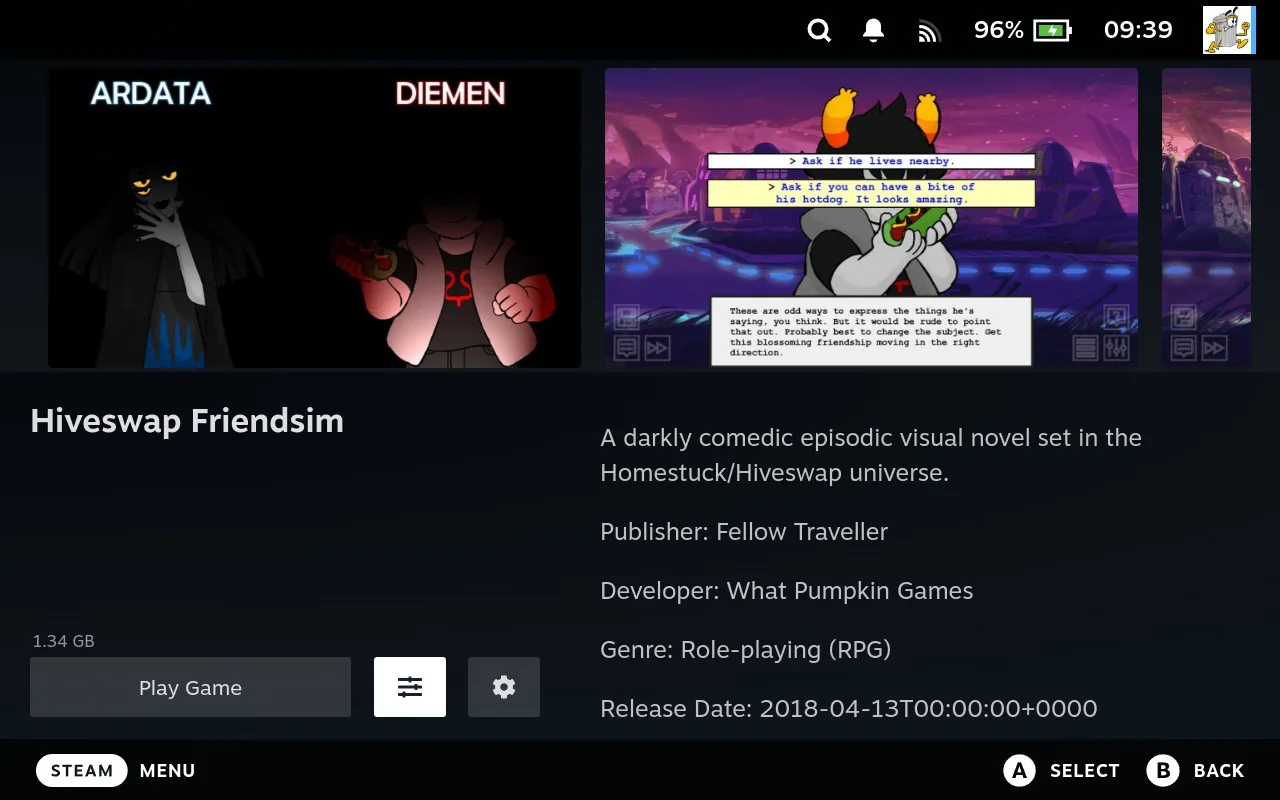
On the game's page in Junk Store, select the cog icon.
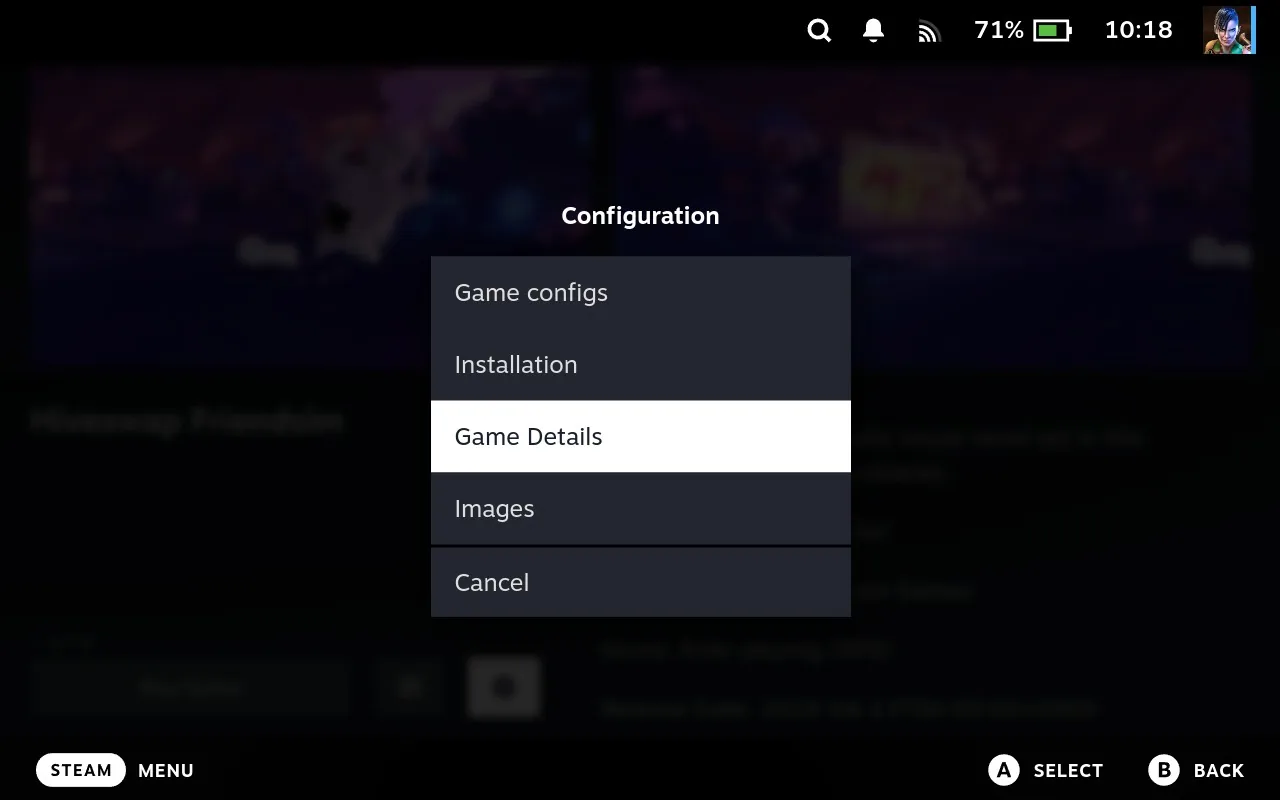
From the Configuration menu, choose Game Details.
- Select the Install Path Field
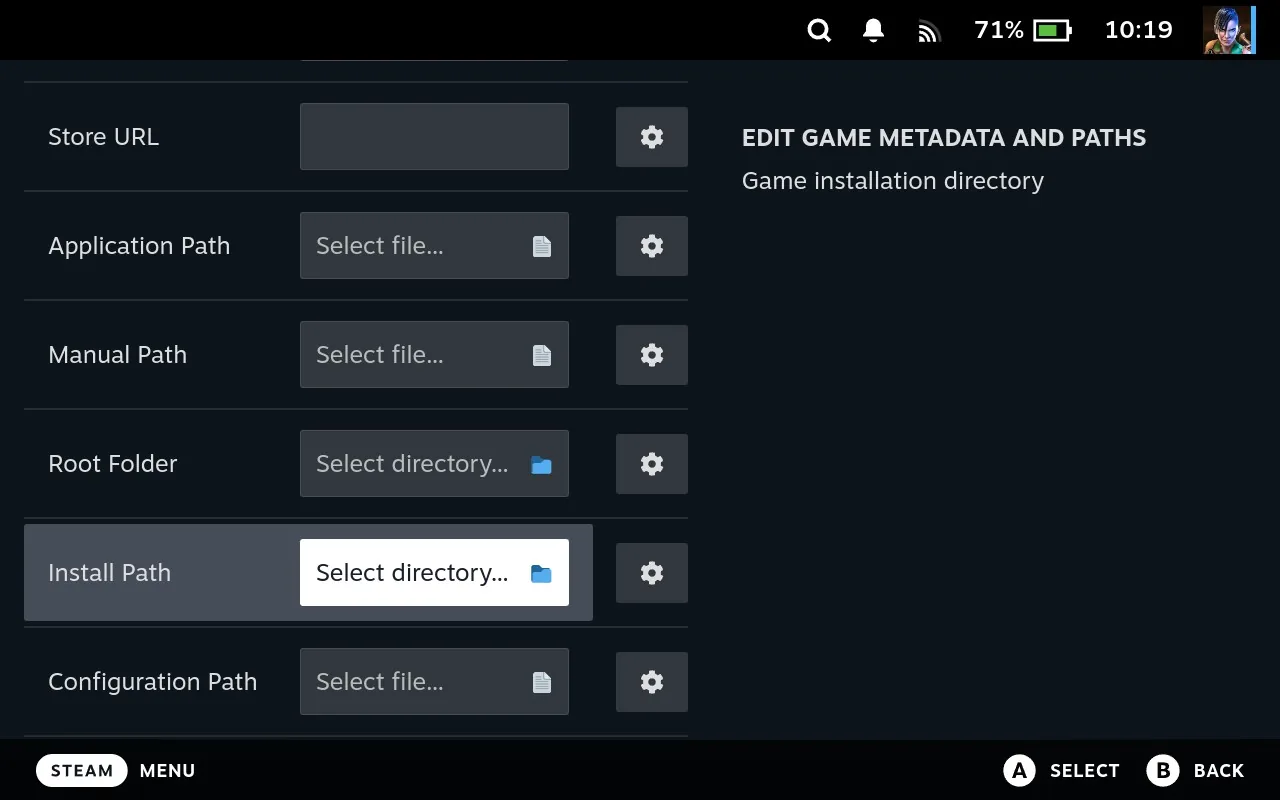
Scroll down to Install Path. If it says Select directory..., that's your problem right there: Junk Store has no idea where the game is. Select the field to open the file manager in directory picker mode.
- Find Your Game Folder
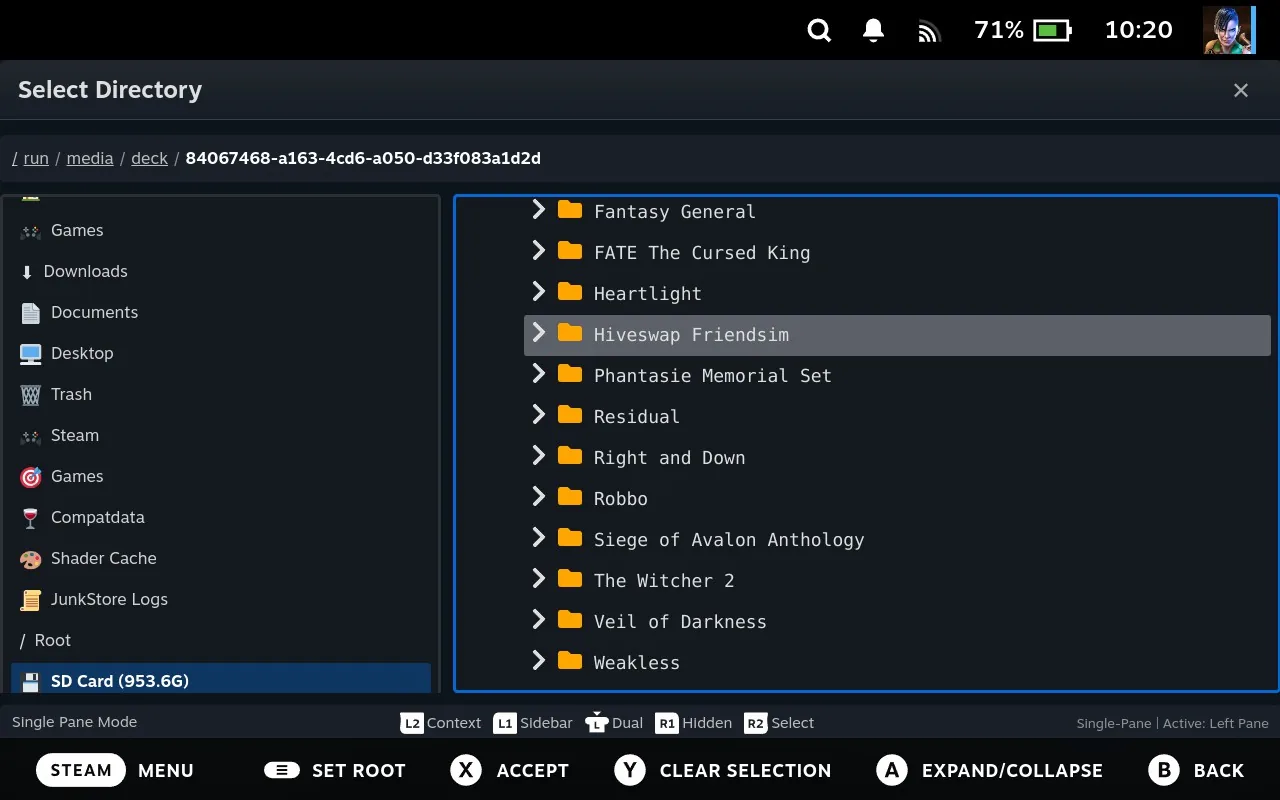
Navigate to wherever the game actually installed. Use the sidebar to jump to your Games folder or your SD card, then work your way down to the game's own folder. With the right folder highlighted, press X to Accept. That drops you back on the Game Details screen with the path filled in.
- Save It
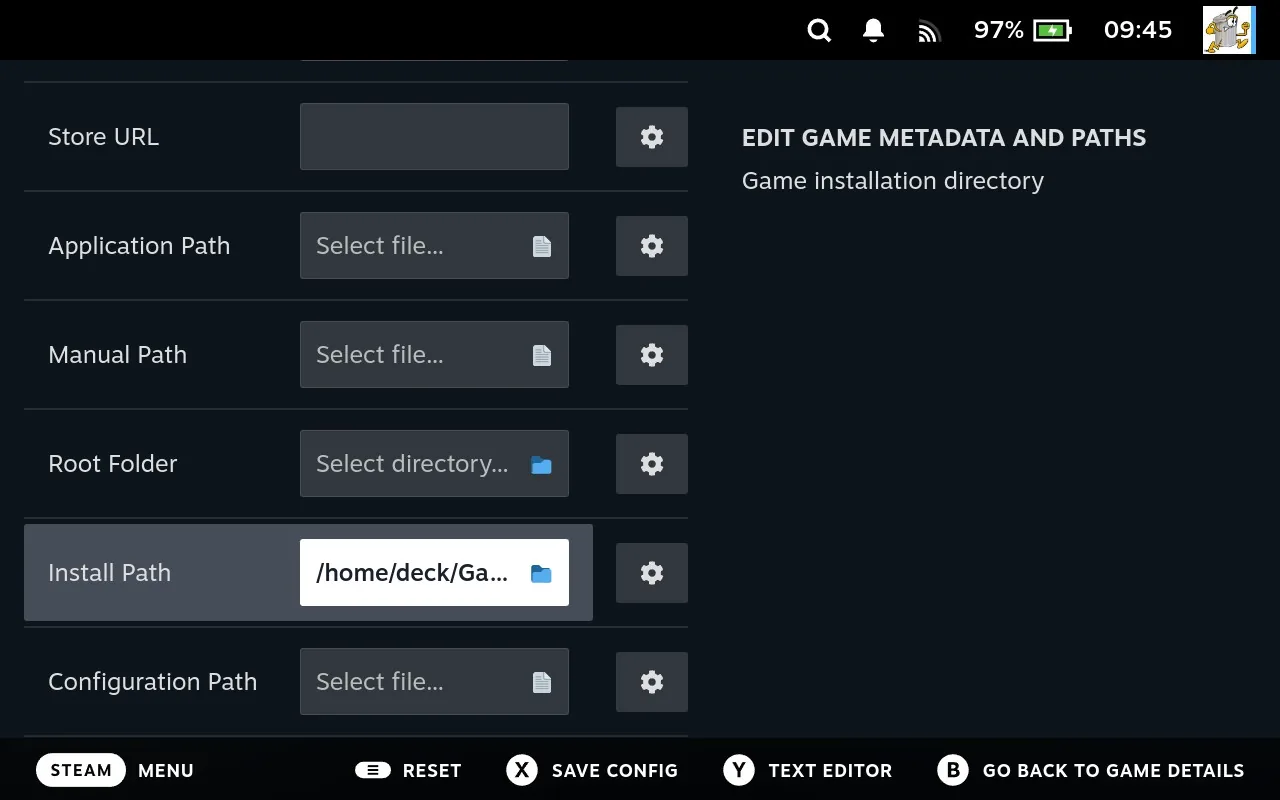
Press X again to Save Config. Don't skip this one. If you back out without saving, the path is gone and you'll be doing it all again.
Step 2: Find Out Which Executable to Run
Most games ship with a pile of executables, and only one of them is the game. Rather than guess, have a look at the file the storefront leaves behind that lists the launch task.
- Open the File Manager
Back on the game page, open the sliders menu and choose File Manager. It opens in the game's directory.
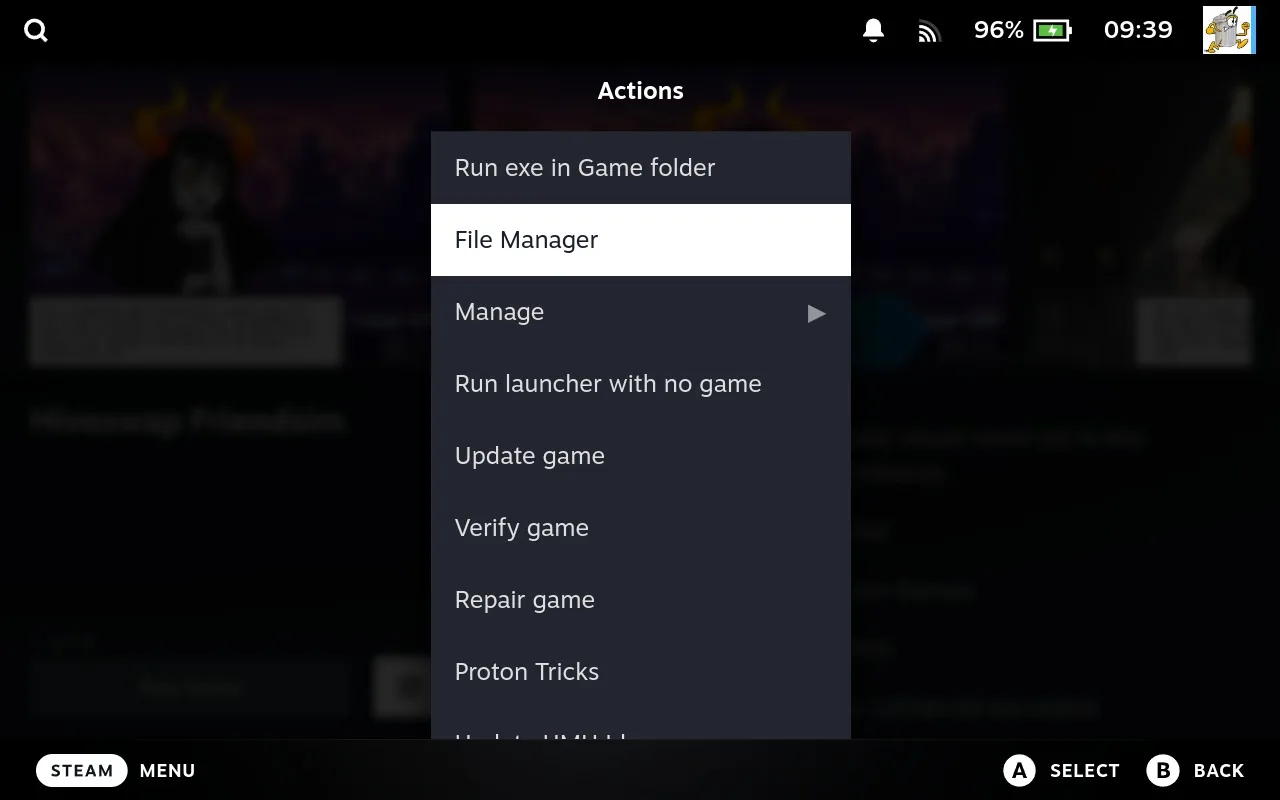
- Open the Game's Info File
For a GOG game, look for
goggame-<gameid>.infoin the top level of the game folder and press X to open it. There'll be a few files with that samegoggame-prefix. You want the.infoone.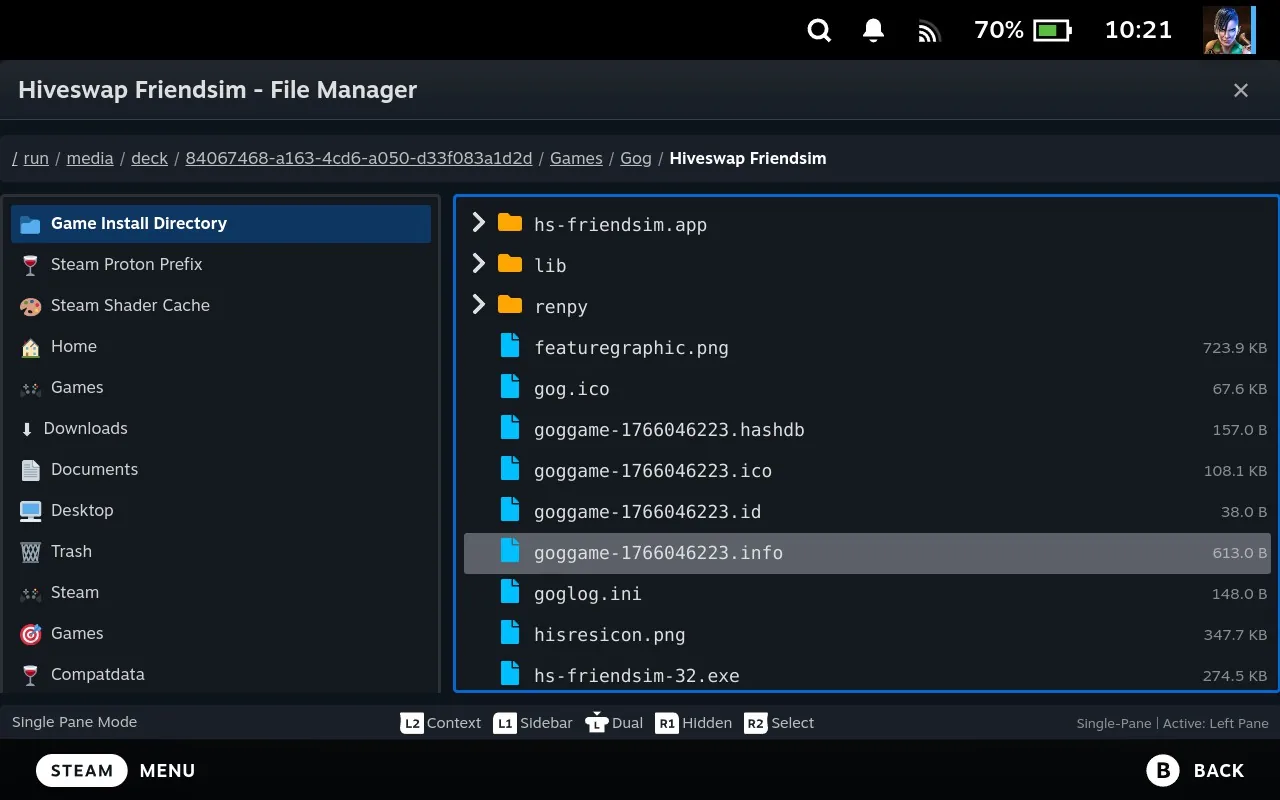
- Look for the Path
Scroll down to the playTasks section. The
"path"value is the executable Junk Store needs to run. In this example it'shs-friendsim.exe. Make a note of it.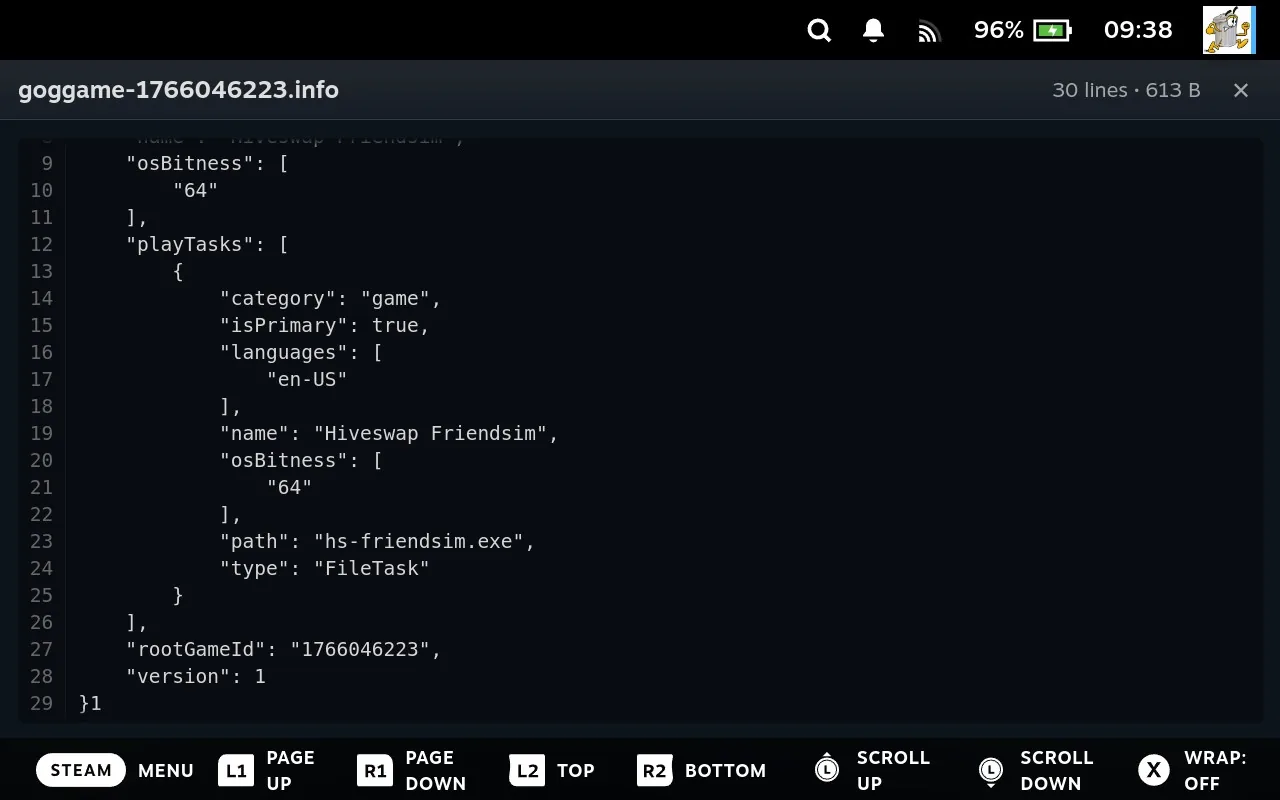
vcredist, python and anything tucked away in a lib or redist folder a miss. Step 3: Set the Game Executable
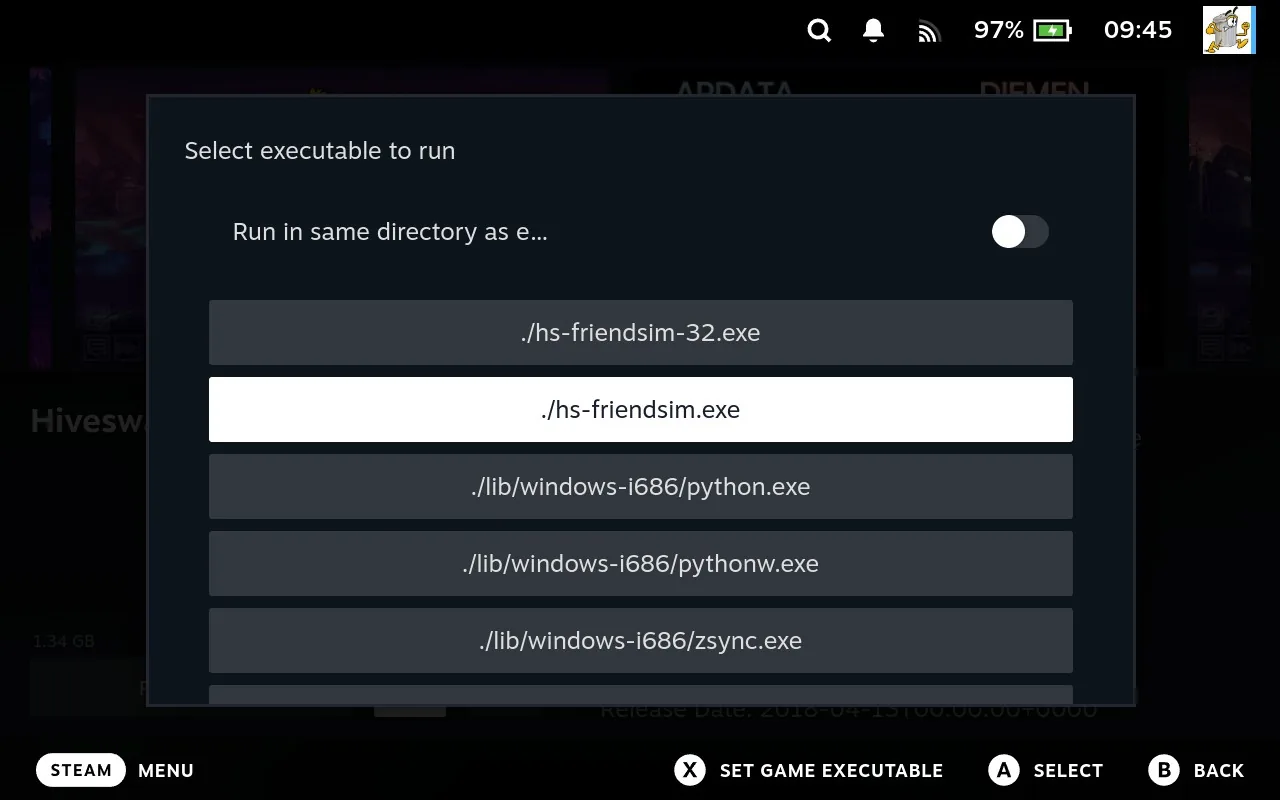
- Open Run exe in Game Folder
Open the sliders menu again and select Run exe in Game folder.
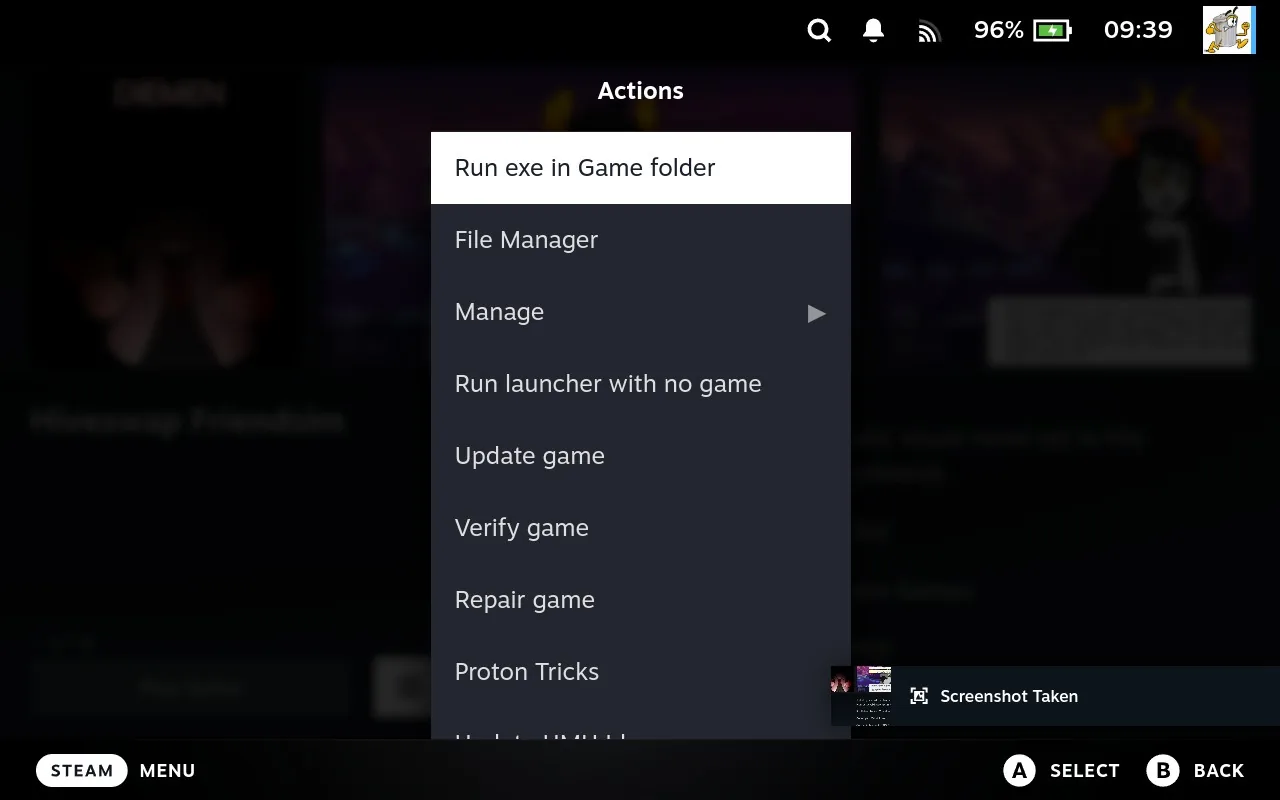
- Pick Your Executable and Save It
Find the executable you noted down in Step 2 and press X to Set Game Executable. Pressing A only runs it the once, which isn't what you want here. You want it saved so the Play button uses it every time.
Step 4: Force a Compatibility Tool
Because the install never registered properly, the game won't have a compatibility tool set either. You'll need to sort that out yourself.
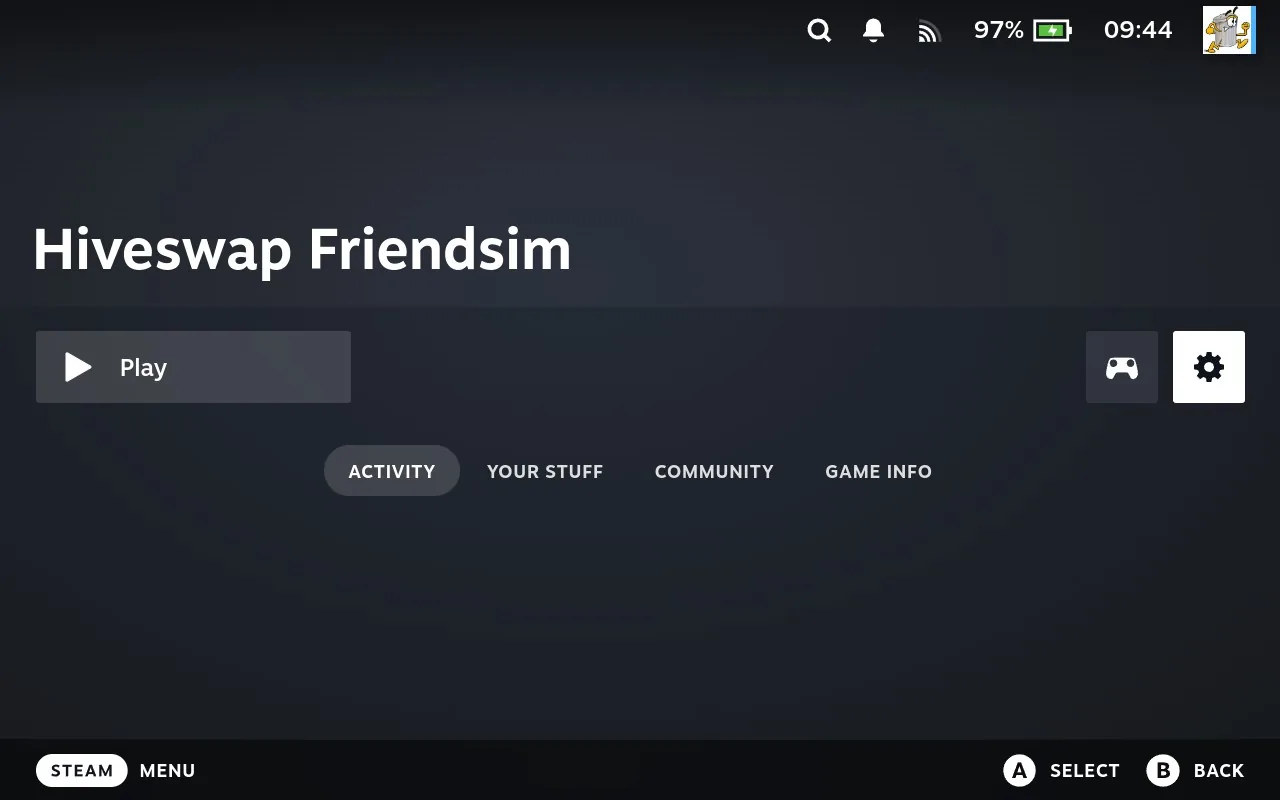
- Jump to the Steam Game Page
Press Y on the game's page in Junk Store to open its Steam page, then select the cog icon.
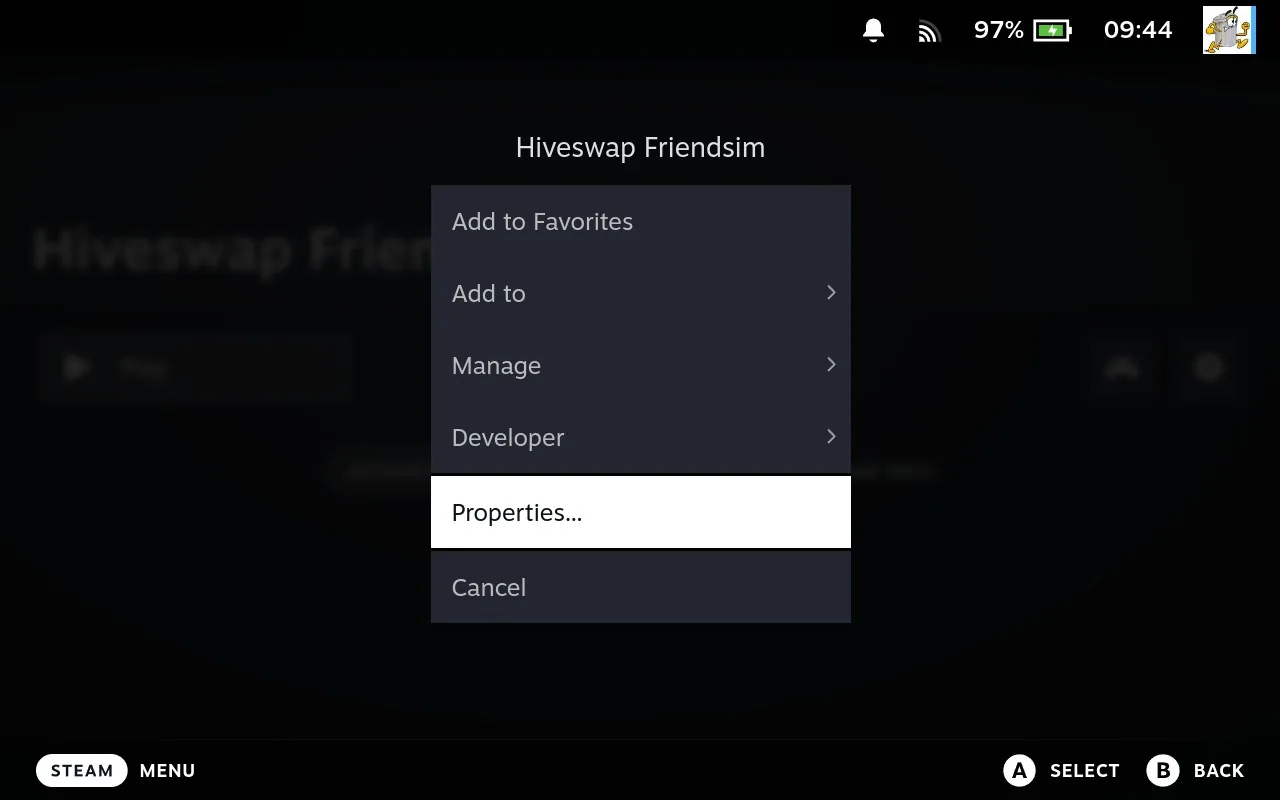
- Open Properties
Choose Properties... from the menu.
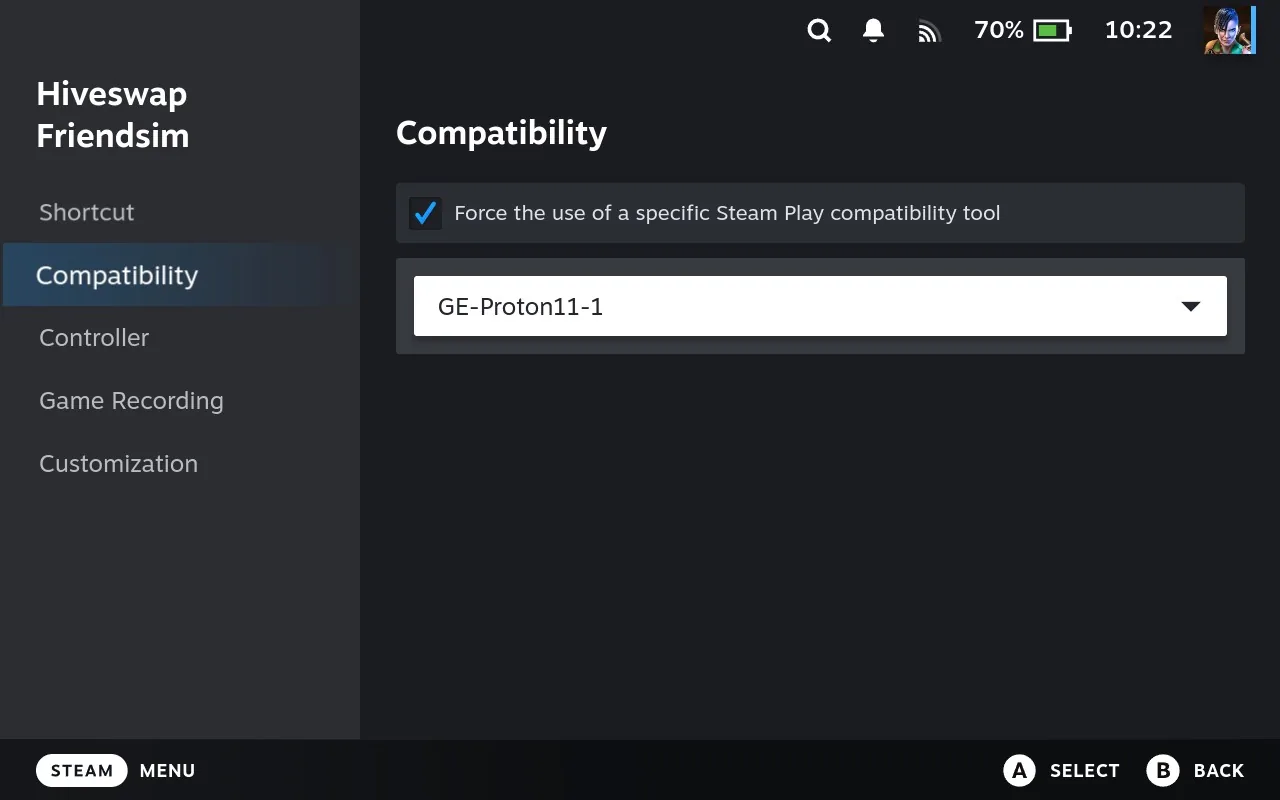
- Tick Force Compatibility
Go to Compatibility, tick Force the use of a specific Steam Play compatibility tool, and pick the version you want from the list.
Hit Play
That's the lot. Head back to the game's page in Junk Store and press Play Game. It should launch straight into the game.
More in the manual
The Junk Store Pro user manual covers the why behind these screens, if you want the detail rather than the steps.
- The parts that point at files - Install Path, Working Directory, Application Path and Arguments, and which one matters most
- Choose what runs it - Why the Proton version is Steam's setting rather than Junk Store's
Stuck or need help?
Most issues are quick to sort out. Here's where to start.
- FAQ - General questions
- Troubleshooting - Common issues
Want the full detail? The user manual covers every screen and setting in Junk Store Pro, and is worth a look if you'd rather read up than hunt through fixes.
Still stuck? Open a support ticket right in the Support Portal
For game-specific issues, feedback, or just a chat, you'll find us on:
On Discord, head to the #js-pro-support channel.